Welcome, dear digital artist!
If you want to learn how to paint a digital portrait painting, this is a great place for you to start this journey. I’ll make it as clear and comfortable for you as possible!
I will teach in this detailed tutorial, which methods and techniques I use for digital portrait painting. This one method presented is for me the very best – the one of all that gives me always the best results. For over a decade I’m doing digital portraits either for the entertainment industry as a conceptual artist or directly for portrait commissions by so many different people around the world.
Paint the Digital Portrait Painting like a Real Portrait
This technique is also the best for real, traditional portrait painting! It’s known that digital drawing is very hard and maybe harder than real drawing – so you can imagine how much you will benefit from it also as a real painter.
My name is Michael, and I’m happy to be your art teacher for the next few minutes of reading. Seems not for a long time, but art is nothing complicated and my aim is to make it very clear and easy – while at the same it’s packed with details and many useful tips and tricks.
How To Paint a Digital Portrait Painting
I know that digital portrait painting is offering a lot of shortcuts (like tracing, which is absolutely fine), but I want to focus and teach you how to actually really draw and paint a portrait. This one is for those who love to go deeper. There is a special fascination in painting a whole portrait painting without any help, but just with the eyes.
So, it’s not about using shortcuts, but it’s about that “extra” that makes you really proud of yourself as an artist.
Well, let’s start! …

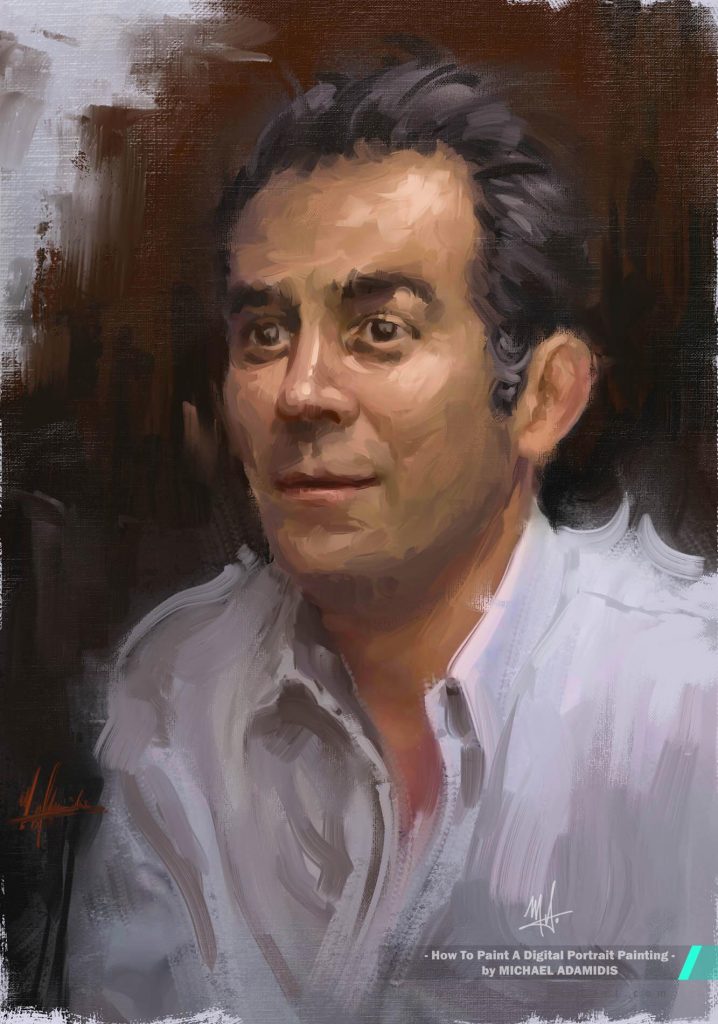
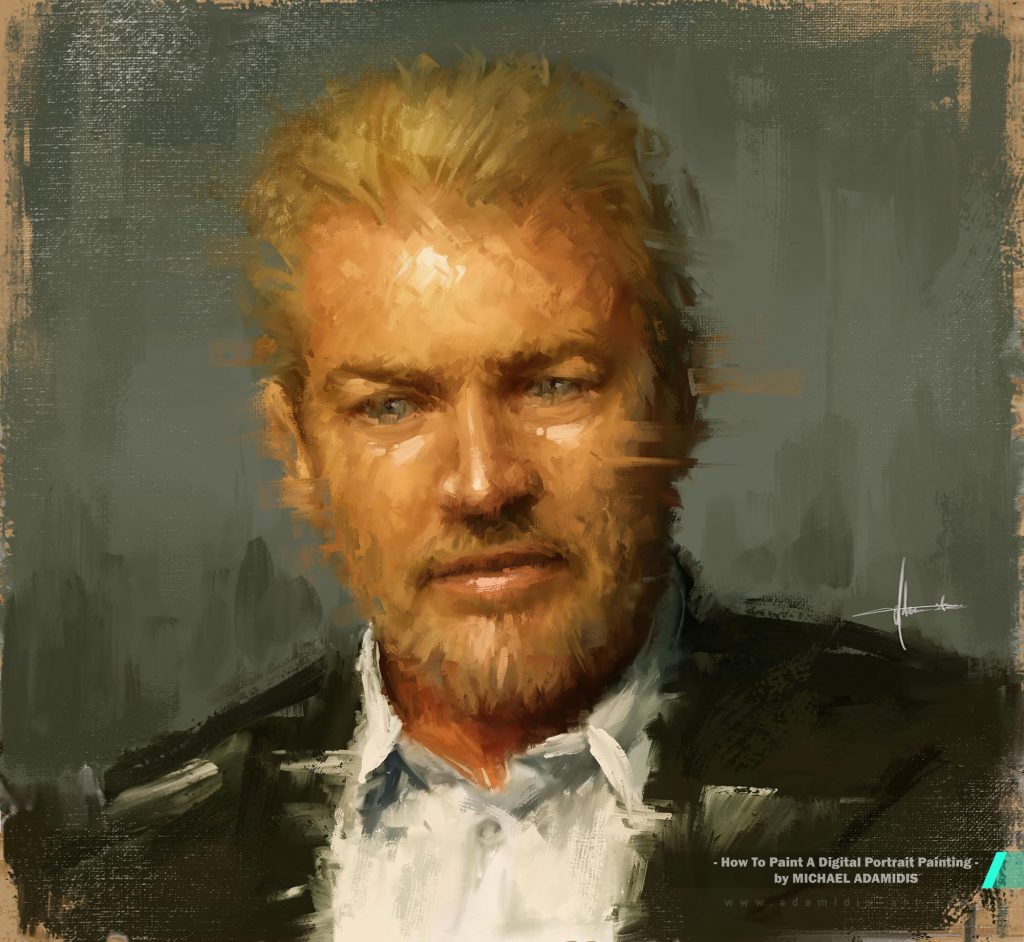

Table of Content of How to Paint a Digital Portrait Painting:
I will start first with all the basic preparations, but you can
also jump directly to the start of this tutorial (–> jump)!
Preparation:
1 – Choose the reference image
2 – Prepare your canvas and tools
3 – Choose a style and have the right brushes for it
How to paint the portrait (–> jump):
4 – Start the drawing of the face
5 – Find the right colors
6 – Start to block in the colors of the background
7 – Start to block in the colors of the face
8 – Paint the details
9 – Work out the details
10 – Finish your digital portrait painting in different ways
Start of the Digital Portrait Painting Tutorial
1. Choose the Portrait Image / Reference
Well this is a part that is sometimes in our hands and sometimes not, because as part of a commission you will get a photograph to paint from.
Choose the Reference Image
If you can choose your image, start with the right ones. Start with an image of a person that is looking directly towards the camera. As long as you are a beginner or a slightly advanced painter this is my suggested way to go – it’s the easiest one to go, and you will learn easily everything you need about the facial proportions.
It makes such a huge difference in terms of skill, if the person you are painting is looking directly into the camera – that’s you, the artist’s eyes.
If you are an advanced painter of course, go for other types of angles like the known ¾ portrait painting. I’m also not saying that a beginner should never try it, but for the start, this is my advice.
The next step of choosing the reference image for portrait painting is the lightning. I have never in my life painted a portrait painting done with a flash directly from the front, which means coming from the camera or mobile phone directly. And even as a photographer, I have never taken such a photo. I’m quite shocked when I see a photographer who uses the flash directly in the face of a person. Looking at it from an artist’s perspective that’s something like an artistic sin.
So, choose a reference image with a natural, authentic lightning source. It doesn’t have to be a candle hanging from the ceiling, but a normal lamp in the middle of the room will do the job.
Before I forget it: If you are using the image just to practice for yourself without posting it, take whatever reference image you want from the internet – I do it too.
And if you want to post your digital portrait painting, find a good source like Pixabay or Unsplash.
But, you can also ask a person or directly a model or the photographer for permission to paint their photo. Believe me, most will allow it, and also be thankful for it and excited. It is always a win – win situation where everybody has something to win.
You will do a great job for them!
So, it is not like you have nothing to paint from –
We are living in 2023 and not in 1590. Imagine how much more variety we have today instead of back then!
Here’s a pro tip: You can use known persons and cut parts of faces from others into theirs or use a tool like the Photoshop “liquify”, where you can drag someones face and change parts. A Face quickly loses it’s character with small changes. So now, you’re not having troubles with the rights of the image.
If it’s a Commission for a Digital Portrait Painting
Now, if you are doing a commission, these are the points you can kindly ask your client for. Tell them that the outcome of the painting will be much better when you will get such a photograph and it is worth it. Often it is possible, sometimes not – these are the hard ones!
So, you could write something like:
For the best outcome of the painting, it would be great to have [name] looking directly to the camera and the photo should be taken without the flashlight of the camera/phone, but with a normal light, which is placed in front of [name]. Maybe he/she could sit slightly left or right to it, so it’s shining from the side. What do you think, is this possible?
Of course you can ask for this.
Later you AND the client/commissioner will benefit a lot from this step, believe me.
If it is not possible. No problem, you are able to paint even from a difficult photograph with a really bad lightning source. Yes, things will be more difficult, but still possible. Experience will help you in this case of course a lot.
Clients sometimes really want to have that particular image to be painted, because it is special to them.
Don’t argue, respectfully accept it and do the best you can to bring even more life to this special photograph. You are the artist!
2. Prepare the Canvas for your Digital Portrait Painting
Now you have the best ever photograph, ready to be painted by a great artist – BY YOU!
First of all, think about it as a real painter. He or she has to prepare the canvas and the colors very carefully.
Do the same!
It will later on save you a lot of time.
Imagine having the wrong resolution and later on you like your painting and you have it very blurred because it was painted in a low resolution. You can not really fix it and believe me, this has happened so many times to me, it’s quite a tragedy.
My advice to you is to start with a resolution of 2000 pixels to 2667 pixels, that’s the 3:4 ratio, and I feel like this is the best format. With this resolution you can not make it wrong. If you go higher, many of your brushes that you have for digital portraits could change their behavior and you could also have troubles while zooming in and creating more and more details, where it is really not needed.
Yes, in my eyes, too much detail is not needed. If you are creating a photograph of the photo what is the point?
So, it’s obvious, and I will lead you to a more characteristic and artistic digital portrait painting. I’m also talking in my other blog which is mainly about digital brushes, why I think it is so important to give your own special style to the digital portrait painting.
In short: It’s like I’ve said, what’s the point in creating a copy of a photo? You need to do more – or call it less. You are an artist, not a copy & paste machine.
In real, traditional art photo-realistic painting has surely more value, but we are facing digital art here.
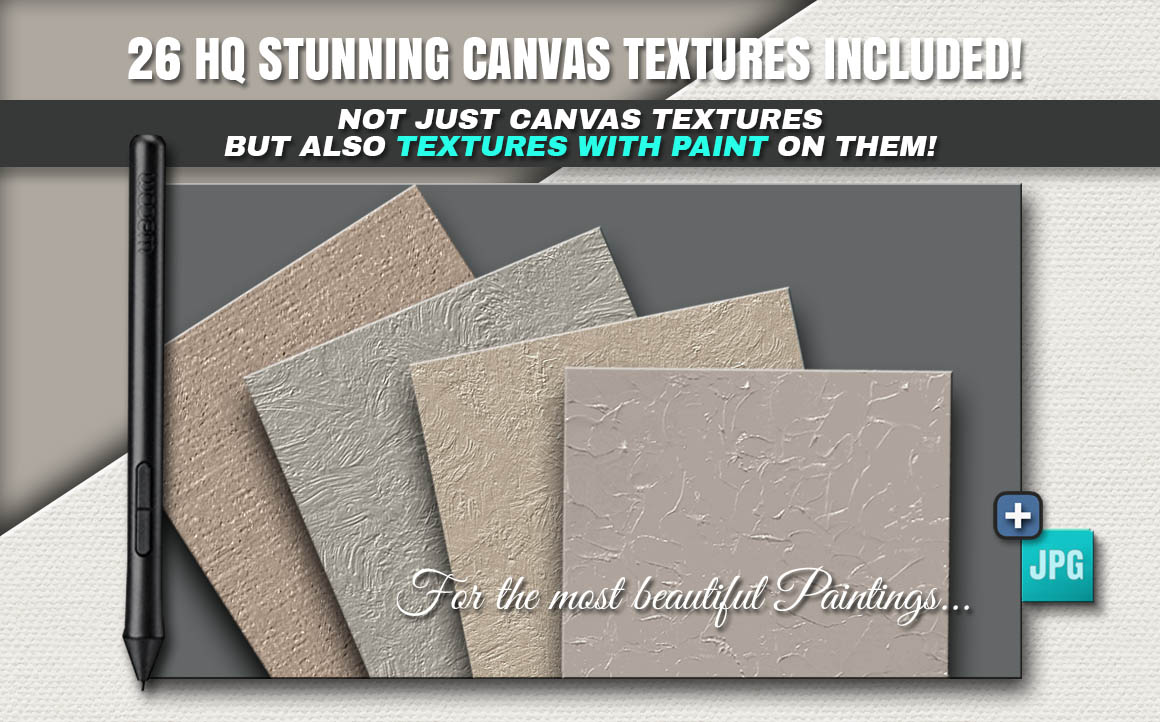
I’m using always the Magic Canvas. It’s included in the MA-Brushes and it’s giving me the very best fine tuned, high quality canvas texture, that I need for digital portrait painting. It’s such a helping hand and a great shortcut to achieve naturalness and an authentic look.
For digital portrait painting there are different styles..
3. Choose the Right Style for Your Digital Portrait Painting
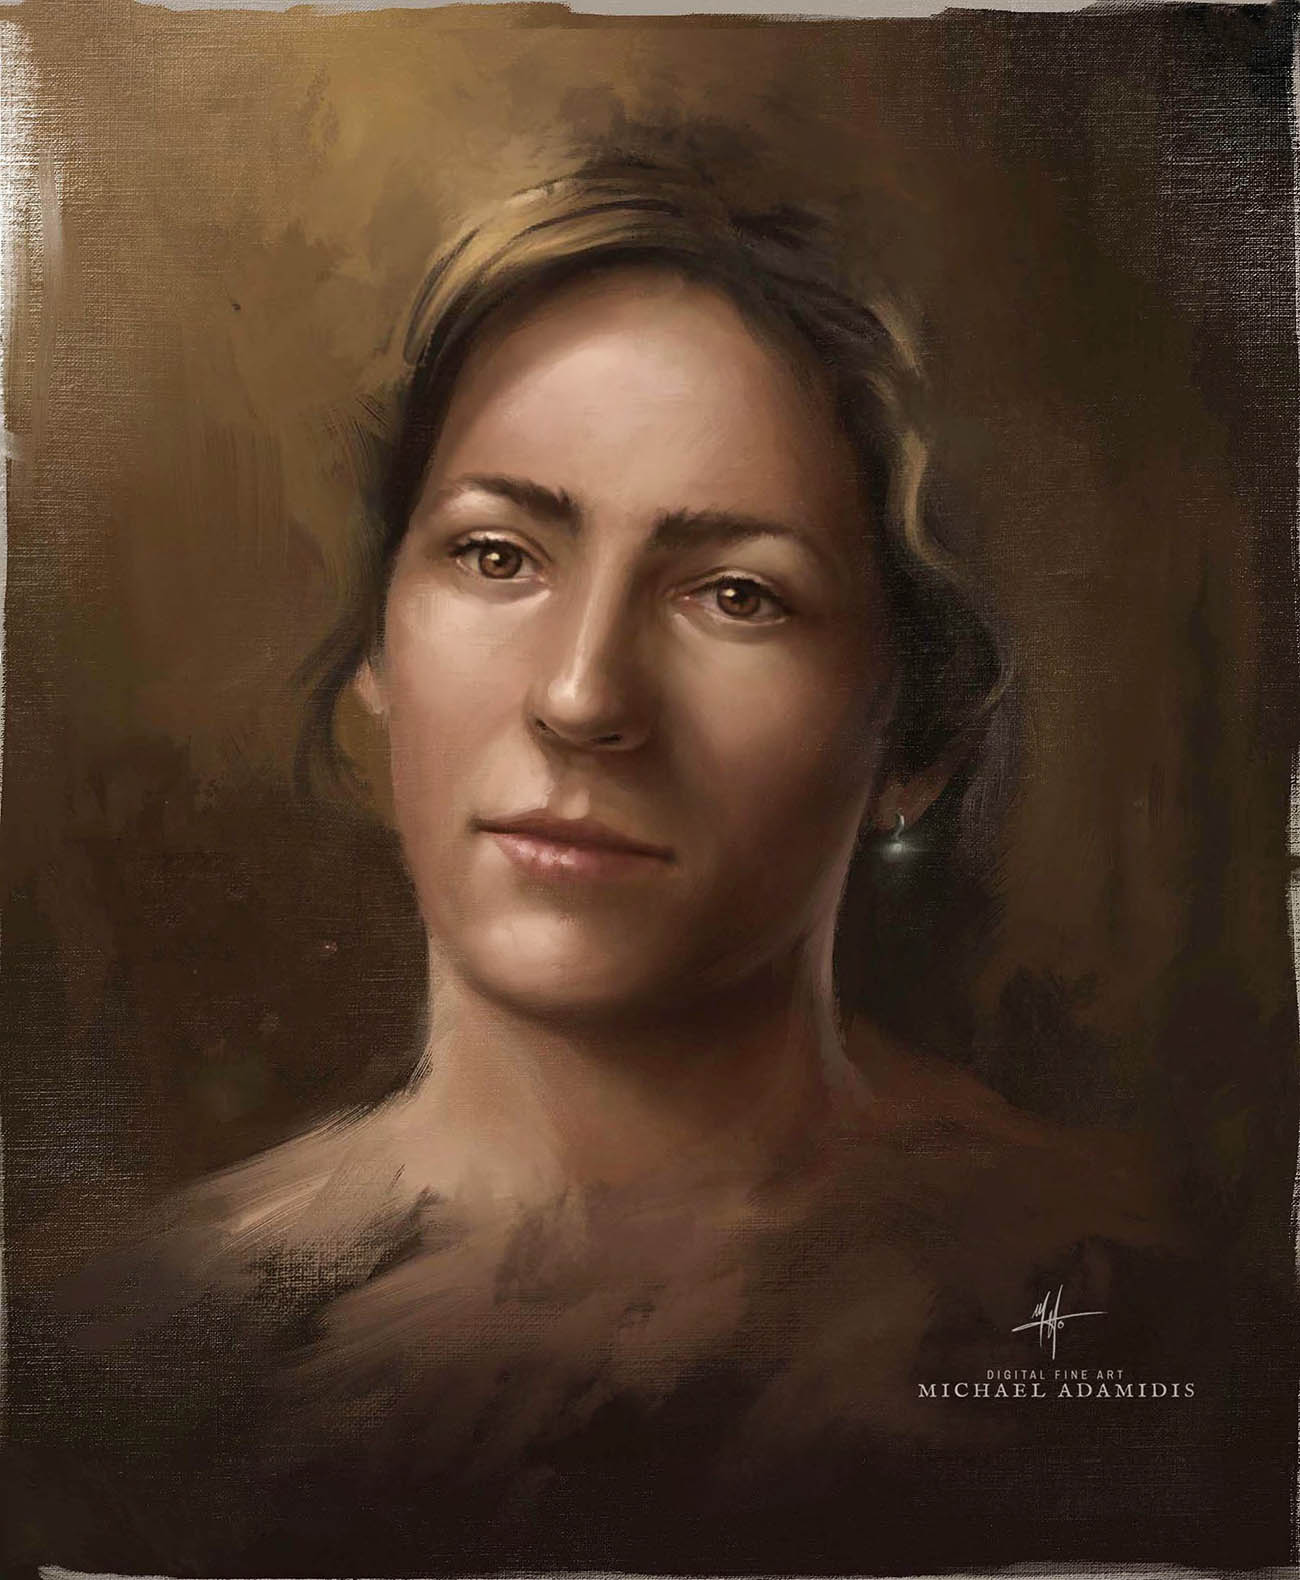
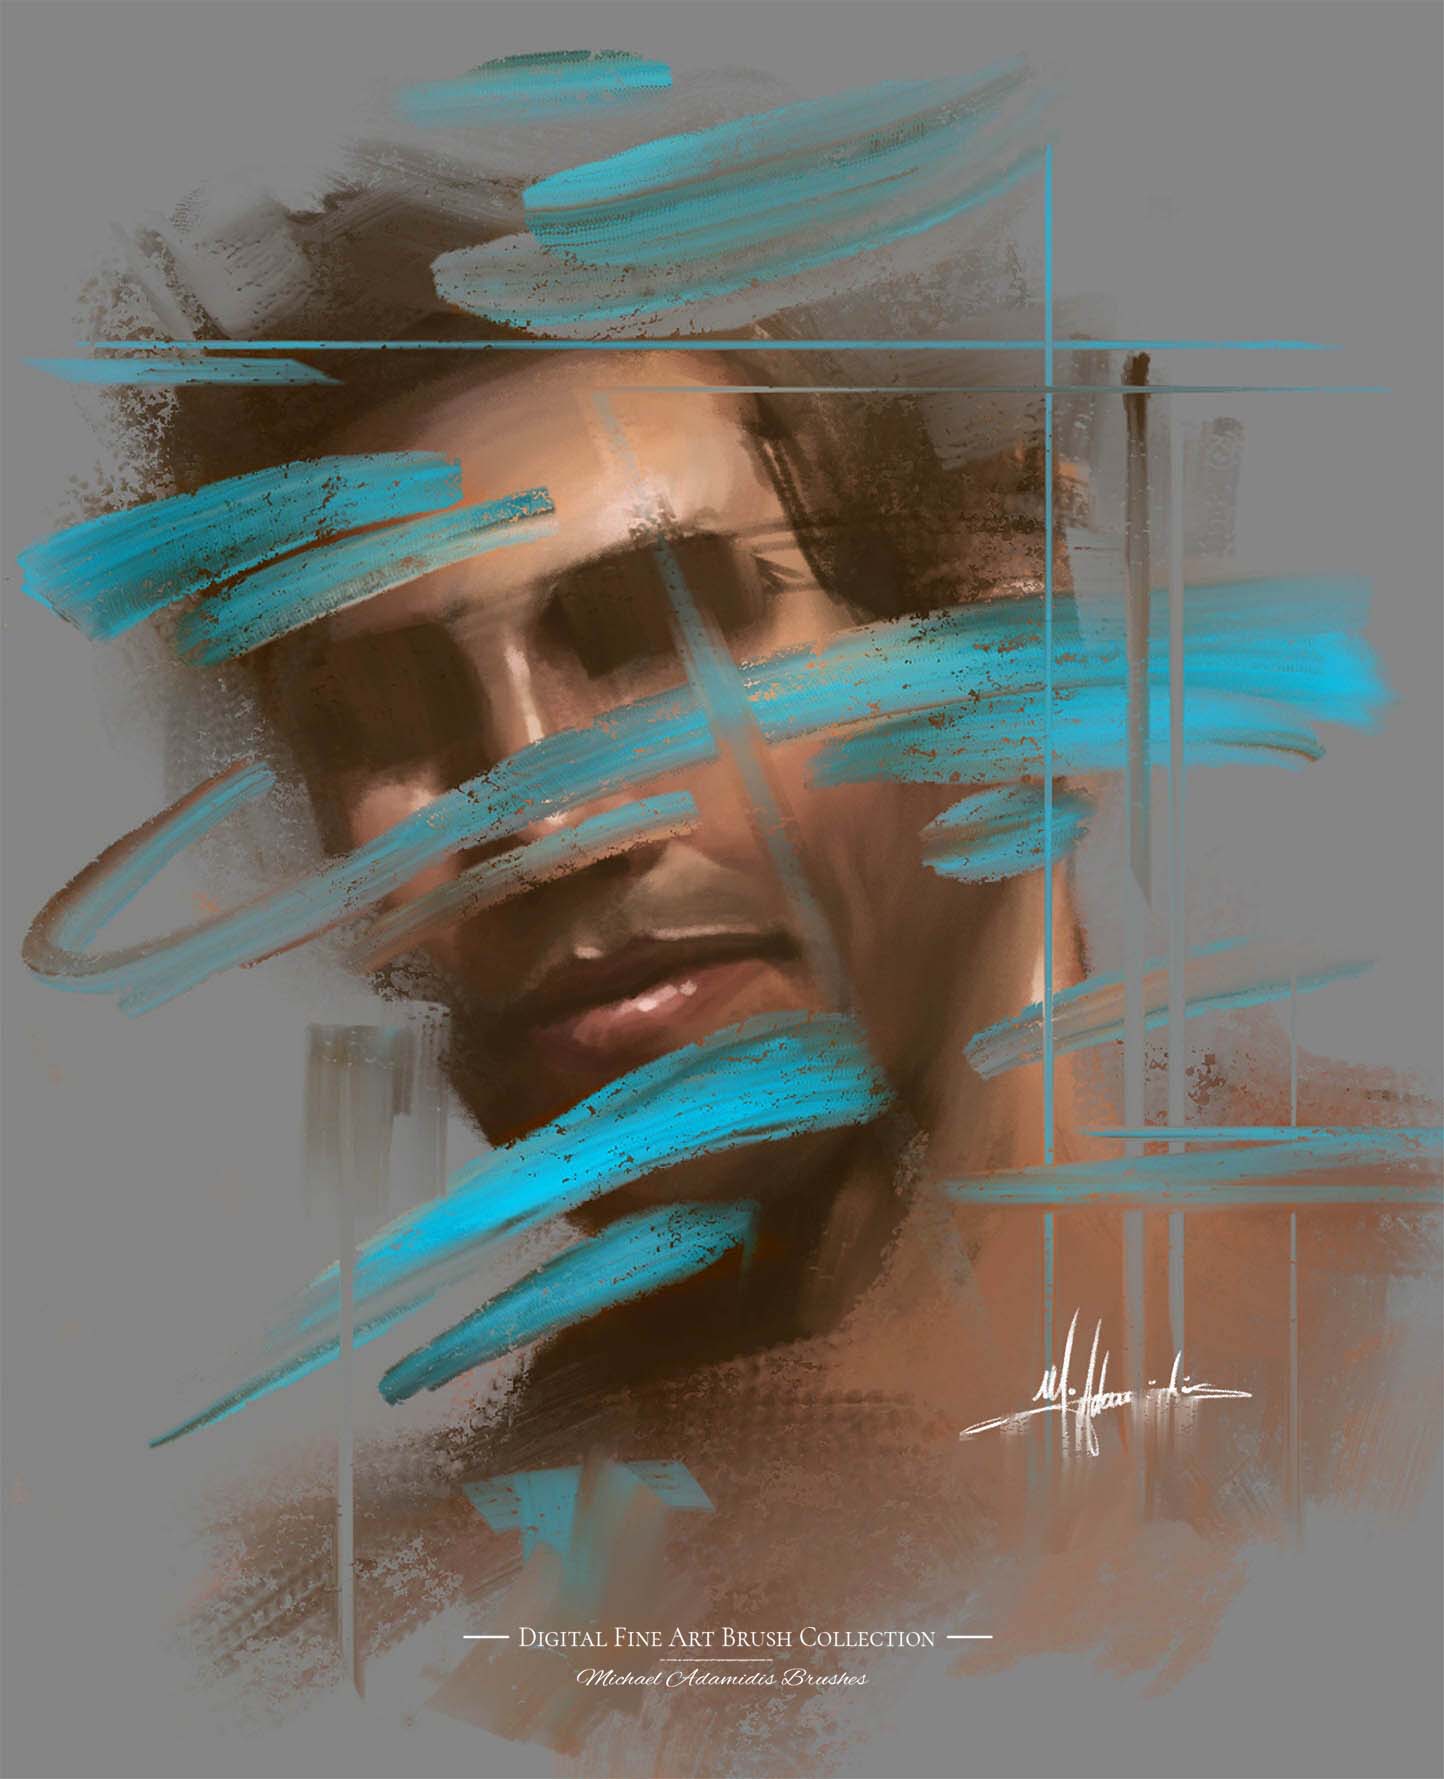
Here are some of my digital portrait examples:

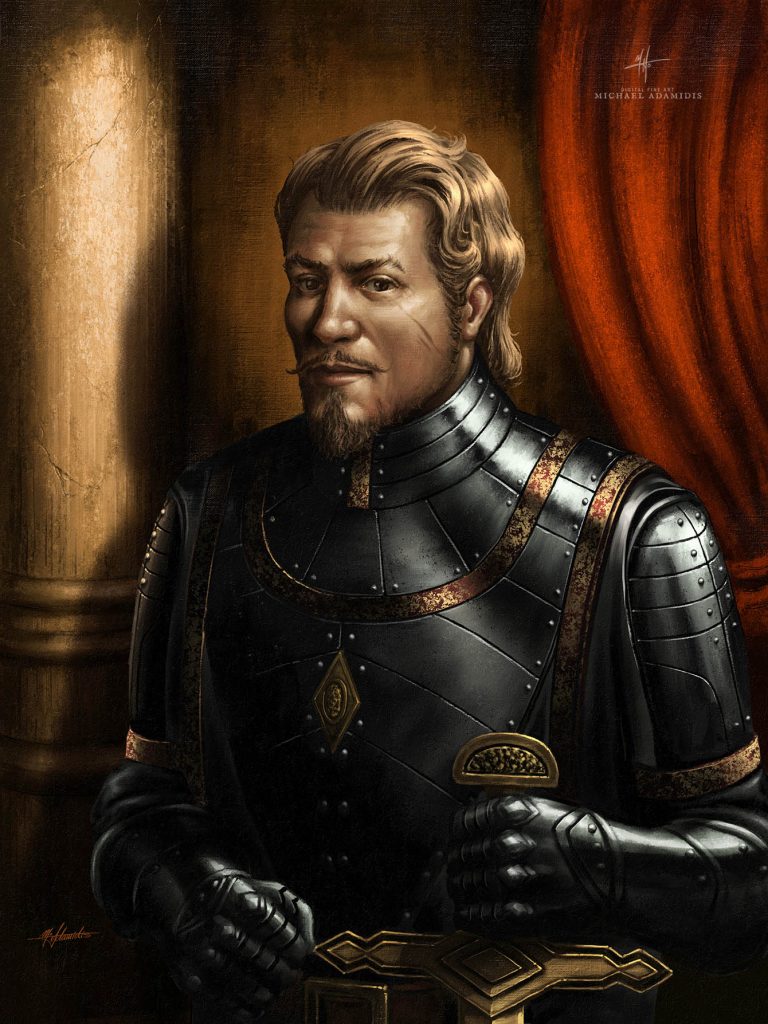
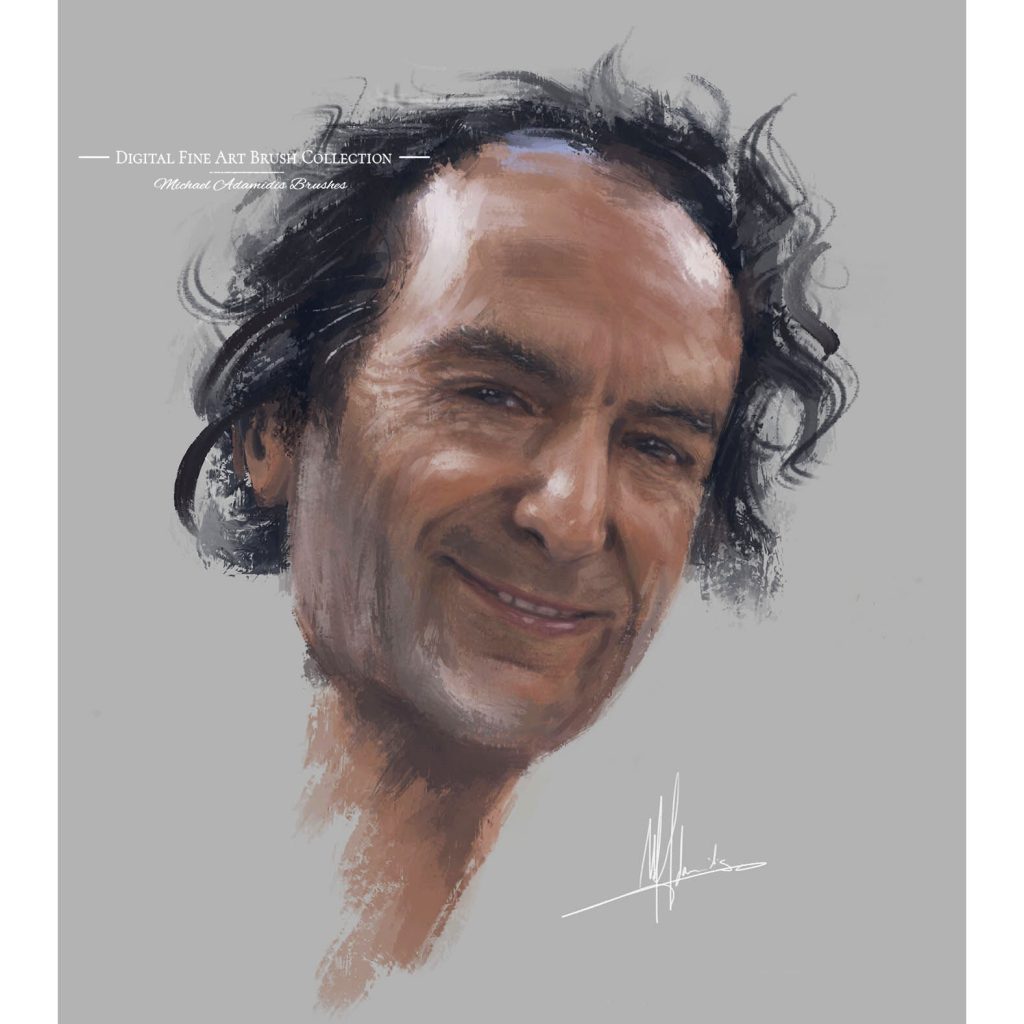
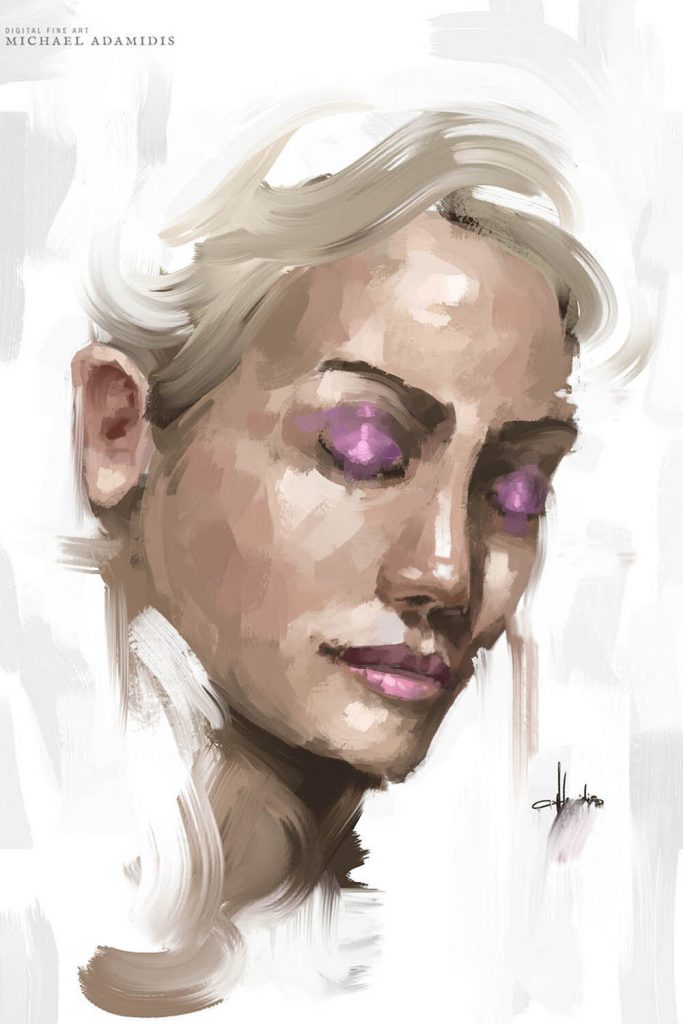
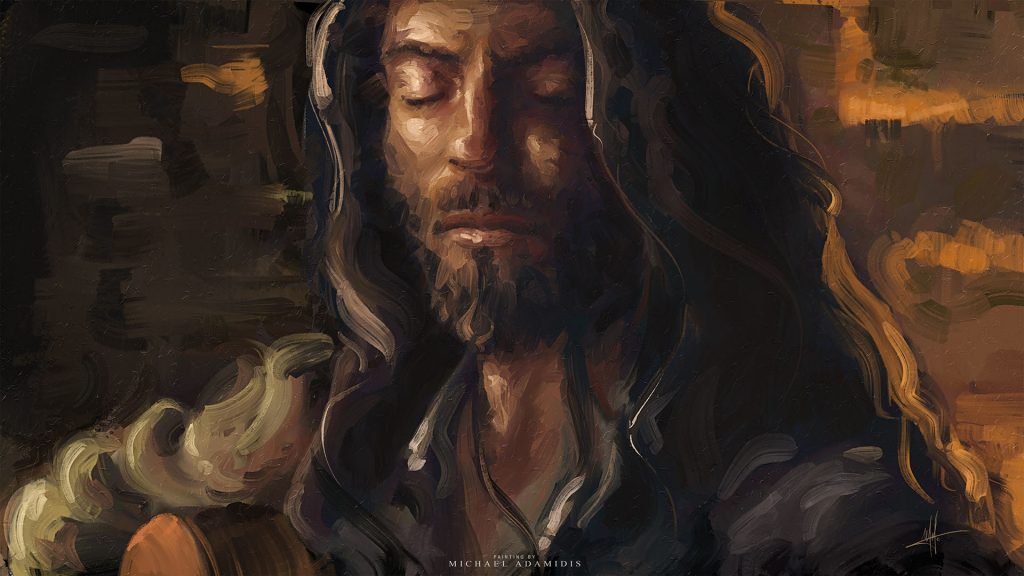

They could be named like artistic portraits, abstract portrait or impressionistic portraits, digital oil portraits, concept art style (like character design paintings), digital art style (colorful or manga style..), loose style and so on. The list is never ending..
By the way, you don’t have to search for your personal painting style, like many claim to do.
But if you want to do it, you can find it this way:
Your style can come automatically to you, and will be developed over time. You search for a style for example of a digital portrait painting you like and try to achieve it.
This is a journey where you are experimenting with things and trying out. While you are processing, there is the possibility that suddenly you like what you are painting and more and more ideas of what you can do will come to you. Some will be great some not – nothing costs you anything, just your patience and your love towards your work and passion.
How to Create Your Own Painting Style
So the main idea is to copy the style you like of someone else, and then it can happen that something new, something special will be created and formed out of it, because you have suddenly a good idea or something good has happened by mistake! Ideas do always come while you are creating something – even if you wanted to stop them, you couldn’t!
They come hardly when you just sit down to think, they come in the process.
You know it yourself: Whatever you are doing, you can not perfectly copy somebody else’s digital painting style. It depends on so many different things like the variety of brushes and the techniques the other painter was using, so it’s almost impossible to achieve the same painting. But at the same time, this means, that you will have it your way. And this way could be a good one or not. If not, try another one and so on. Enjoy every painting!
And by the way, if you can’t develop something very special and unique, but have a good painting, where is the problem?
You have a good painting, that’s what it’s all about! Do you think a Rembrandt or a Sargent they were trying to find a personal style? Their main goal was to paint the person they saw sitting in front of them.
That’s the whole story.
With abstract and impressionistic painters came also the question about the style, but are you one of them or are you maybe just interested in painting a normal portrait?
In my case, it was always very clear (and I have never spent a second thinking about that..), I want to paint a portrait. Simply a good one.
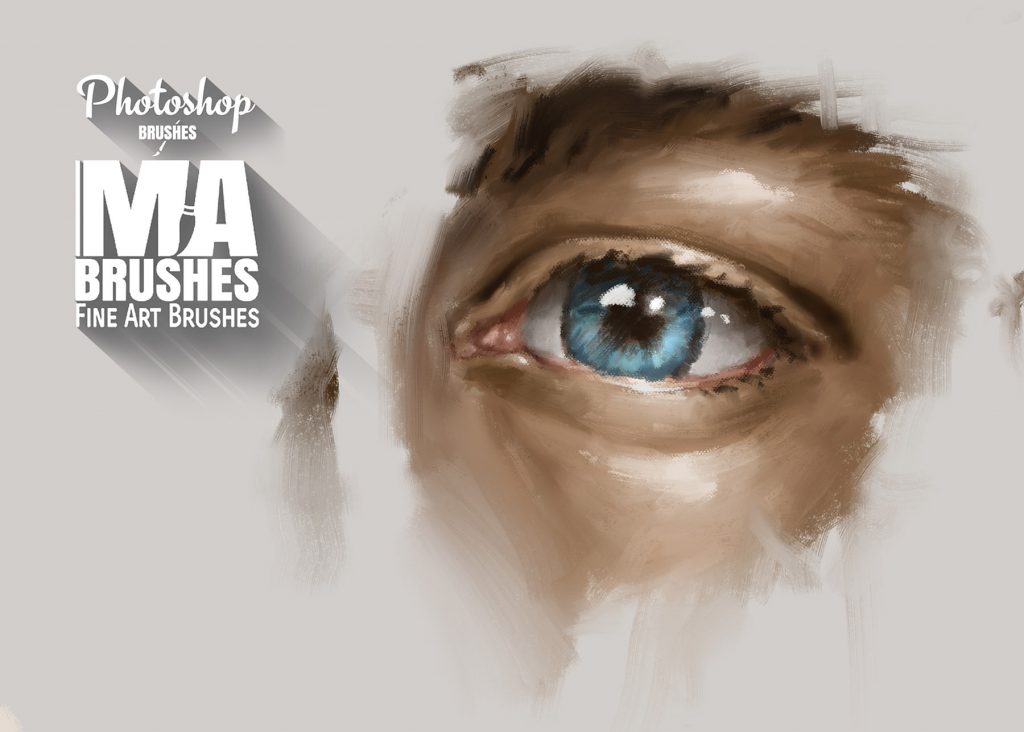
Have the Right Digital Portrait Brushes!
Yes, you can go with the normal round brush for a digital portrait painting or any digital painting, but it will hardly bring you to your goal, and it’s not like it’s often claimed in one or another YouTube clickbait title.
The moment those artists get their commissions for a bigger painting project they will of course use their custom made brushes. I’ve never seen anyone not doing that in the industry.
It’s of course the best thing to have good digital portrait brushes ready on your side to help you to create an amazing painting with lots of character and artistic elements.
Brushes that mimic real painting brush strokes on your digital computer or device. Brushes that have a texture of paint or the canvas itself in them, and brushes that will smudge the paint, so you can blend the colors together like a real painter!
This all is a big plus in creating a digital portrait, because without these, the digital portrait will look too digital, like out of plastic.
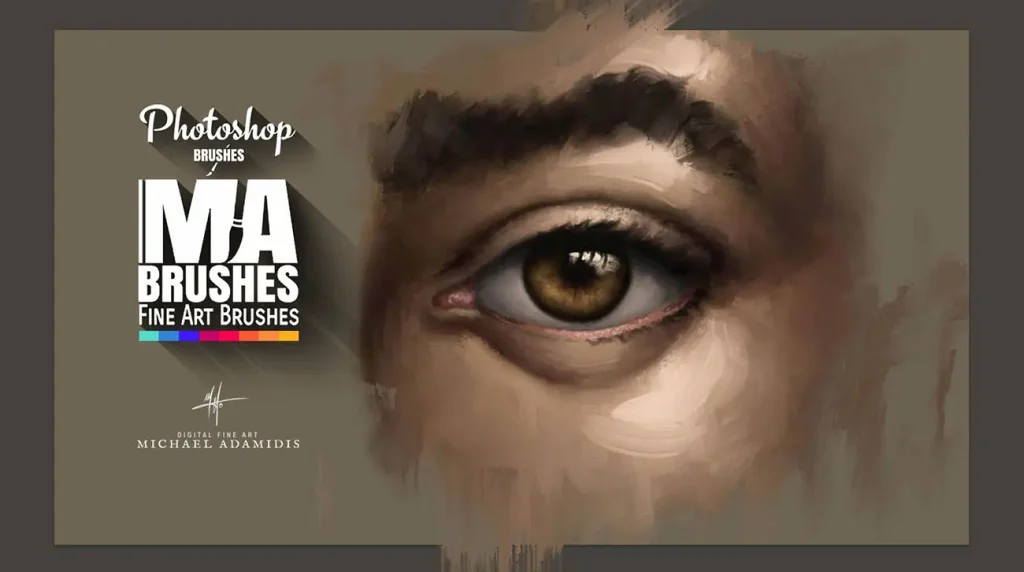
In my eyes, it’s great to achieve a more painterly style with your digital portrait painting.
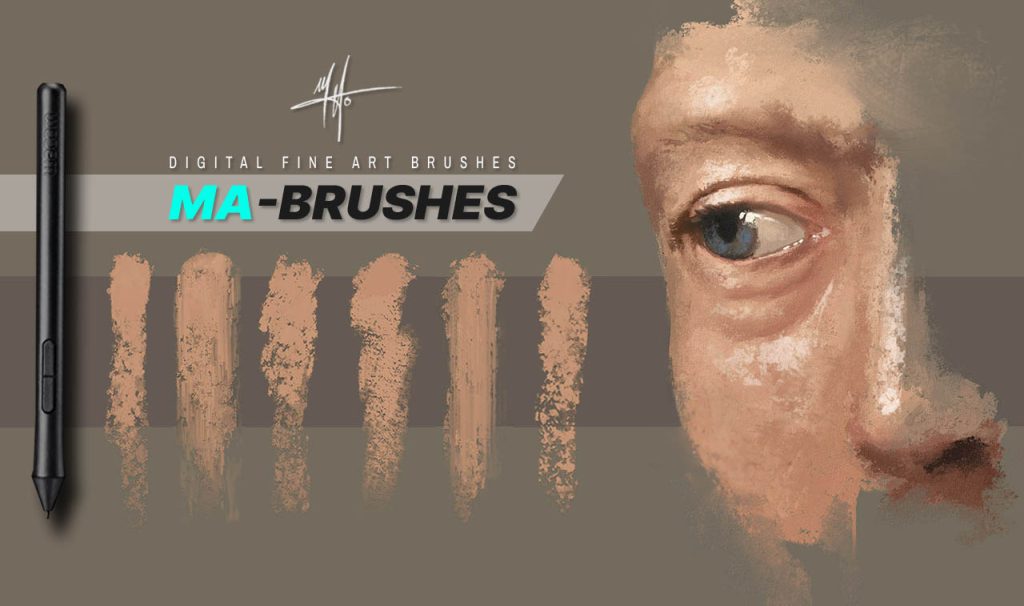
It is priceless to have a variety of digital portrait brushes (you will have the best possible portrait digital brushes with the MA-Brushes) in your hand, so you can achieve just everything you want to, from the pencil brush of the sketch, to the different brush strokes that lead to a perfect portrait painting, and finally to the different forms of mixing and blending forms and colors together.
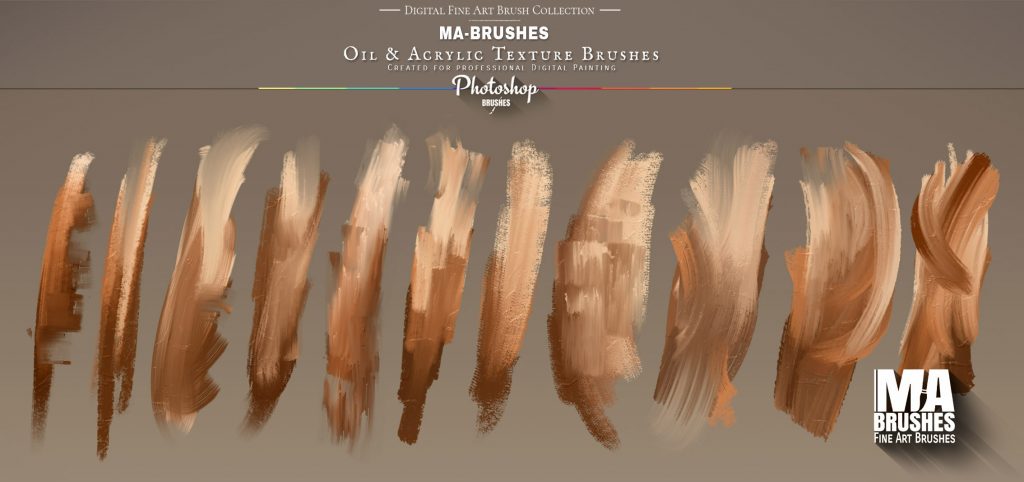
I recommend the MA-Brushes to everyone who asks me for advice – those brushes are made after decades of experience – for me it’s a short path to much better results, that I never want to miss. They have soft brushes with great textures made directly out of canvases and filbert like brushes for a thick paint effect and mixer brushes for different blending styles. All of them are perfectly balanced and tested over years of development.
Have some great brushes –
and you are ready to go to the next step!
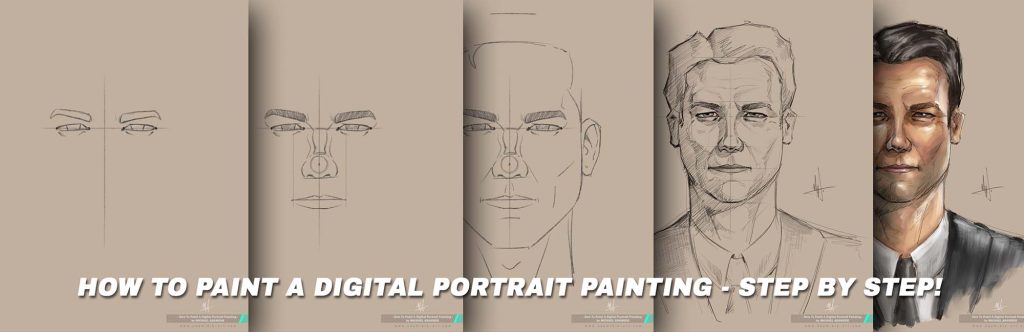
4. How to Draw / Sketch the Digital Portrait Painting
(Which is also the MAIN PART of this “How to Paint a Digital Portrait” Lesson.)
Important note:
These here are the main and basic rules for facial proportions – rule of thumbs.
Knowing these will help you to draw all the different other faces with their own proportions.
So you have to check them for yourself for every portrait painting you make.
If you also want to know how to set up your digital painting program like Photoshop for portrait painting you can watch my video about it here on my YouTube Channel (will open on a new tab)!
Now, let’s go and start with the cross!
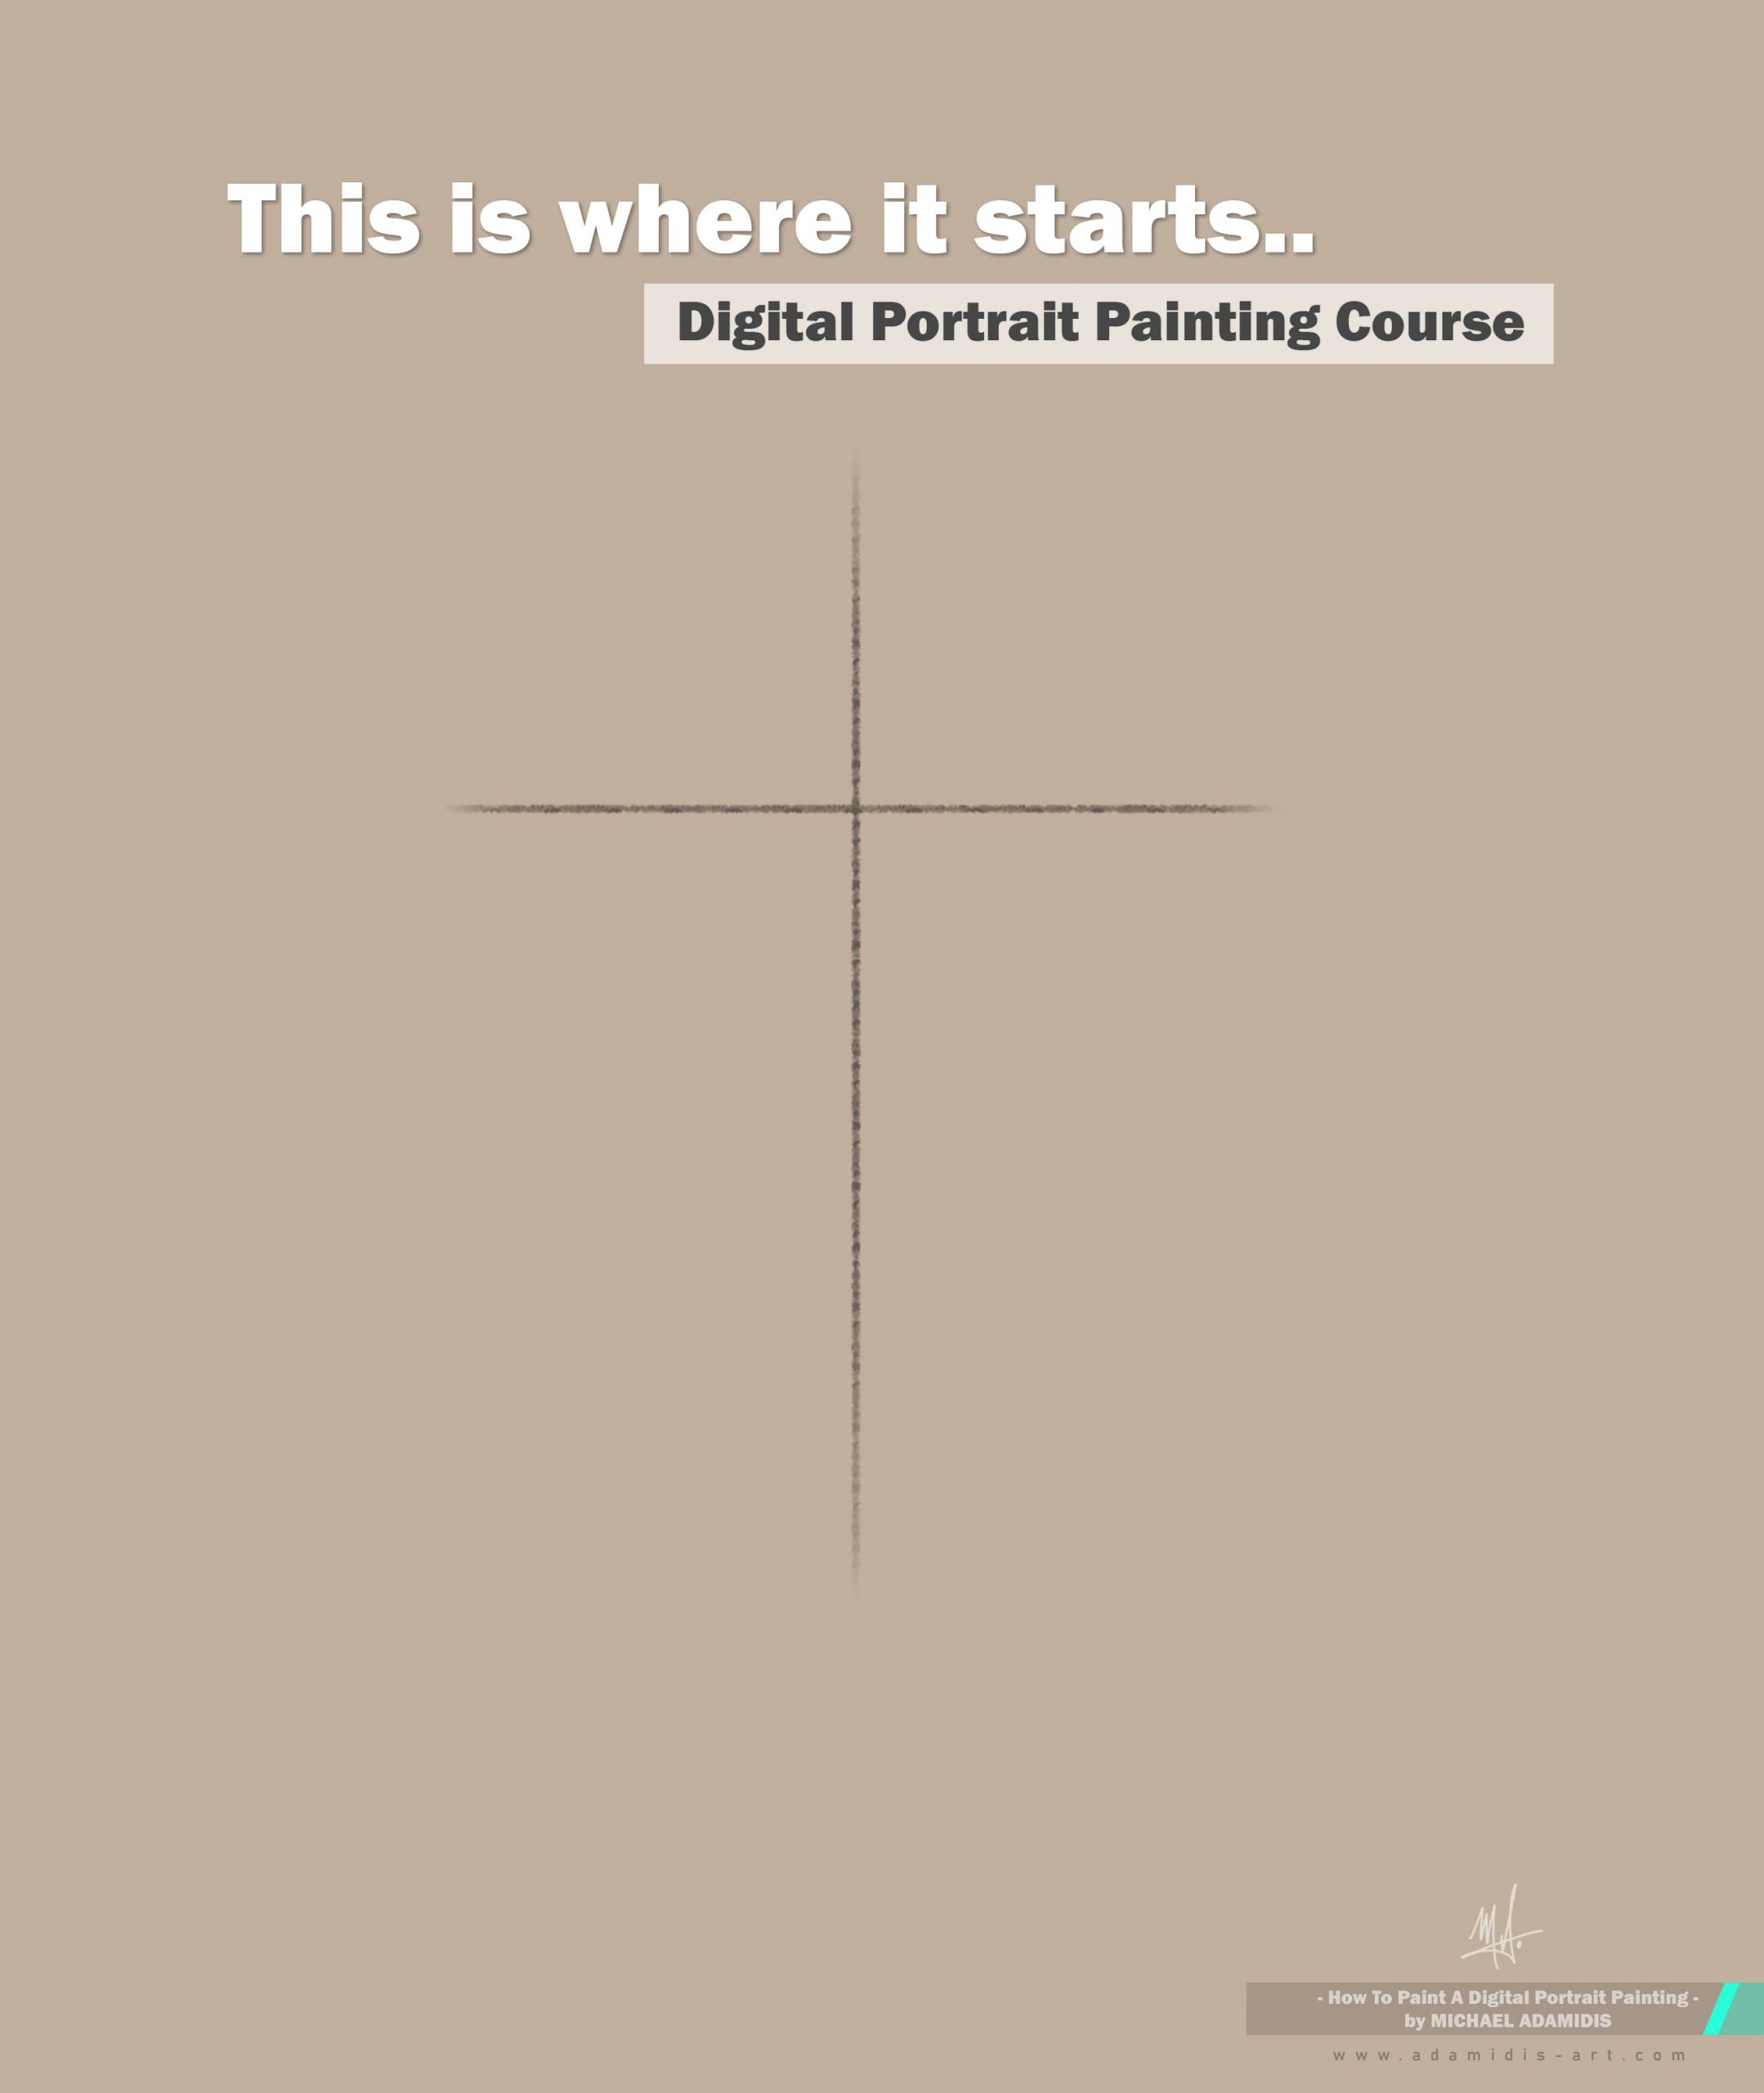
And, yes, in all my personal experience, this is the best way to start a portrait and also a digital portrait painting.
I’ve tested for years and decades all the known and not known techniques for drawing the main proportions of the face, and I’m always coming back to this one.
It’s the most accurate one, thus the one with the best result – the easiest way to achieve a good portrait painting.
I will from now on mark every rule in bold, red colored letters.
My style of drawing is created for the best results. It differs in some ways from the known standards. That’s wanted. I wanted to find the very best way of drawing the portrait. Not just rules, but rules practically applied.
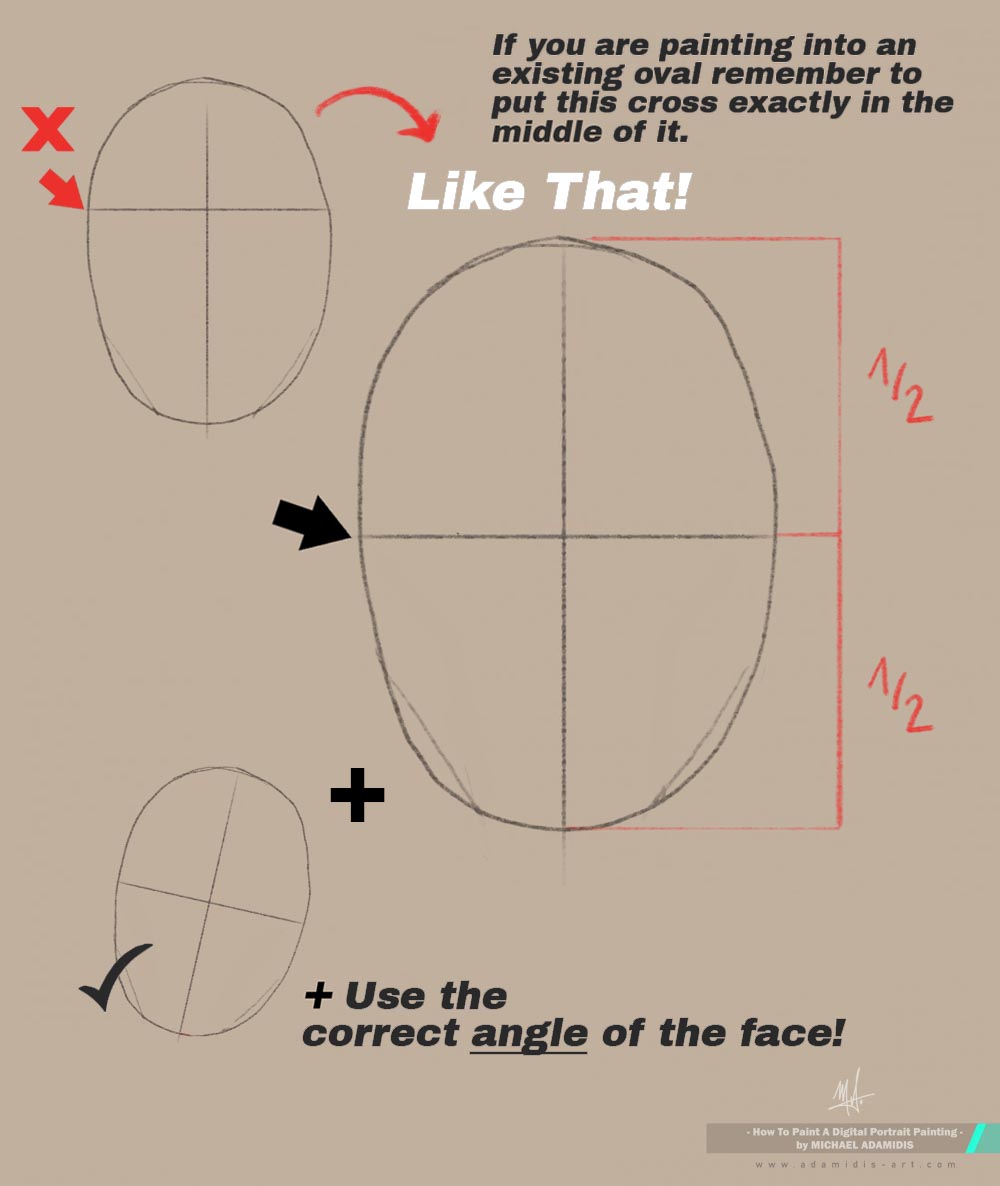
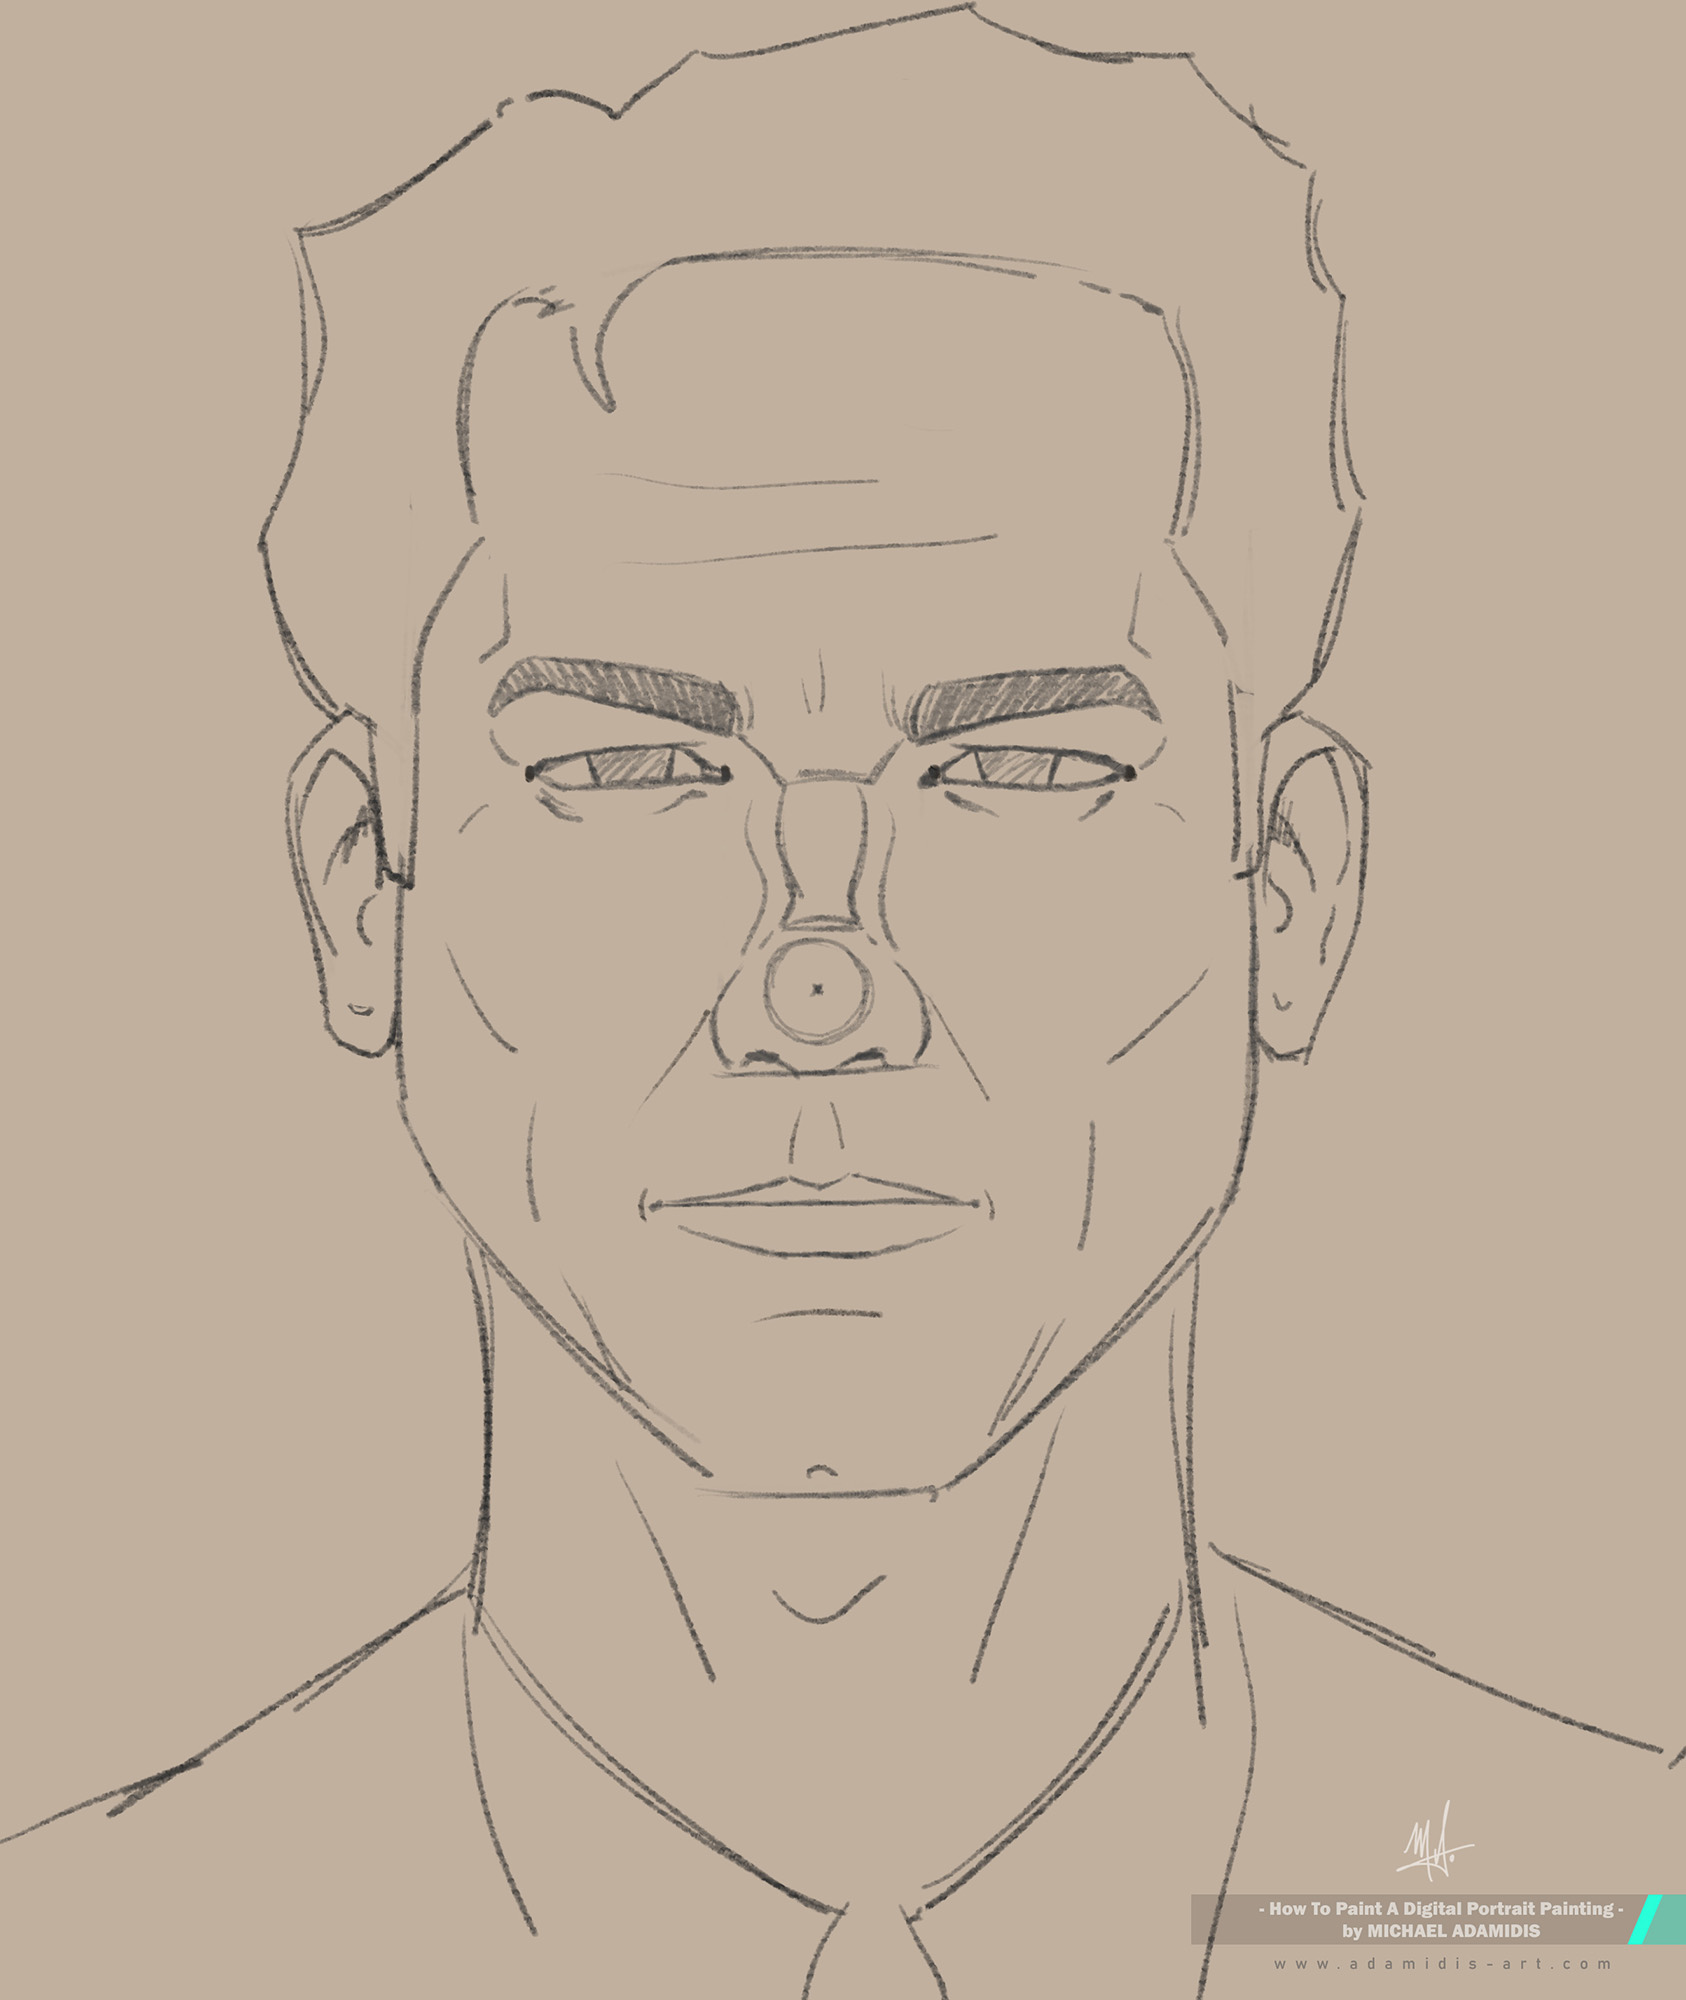
So, draw the lines of the cross at the same angle as the reference face. It’s a good help to use the pen of your drawing tablet to hold it in front of your monitor to check the angle.
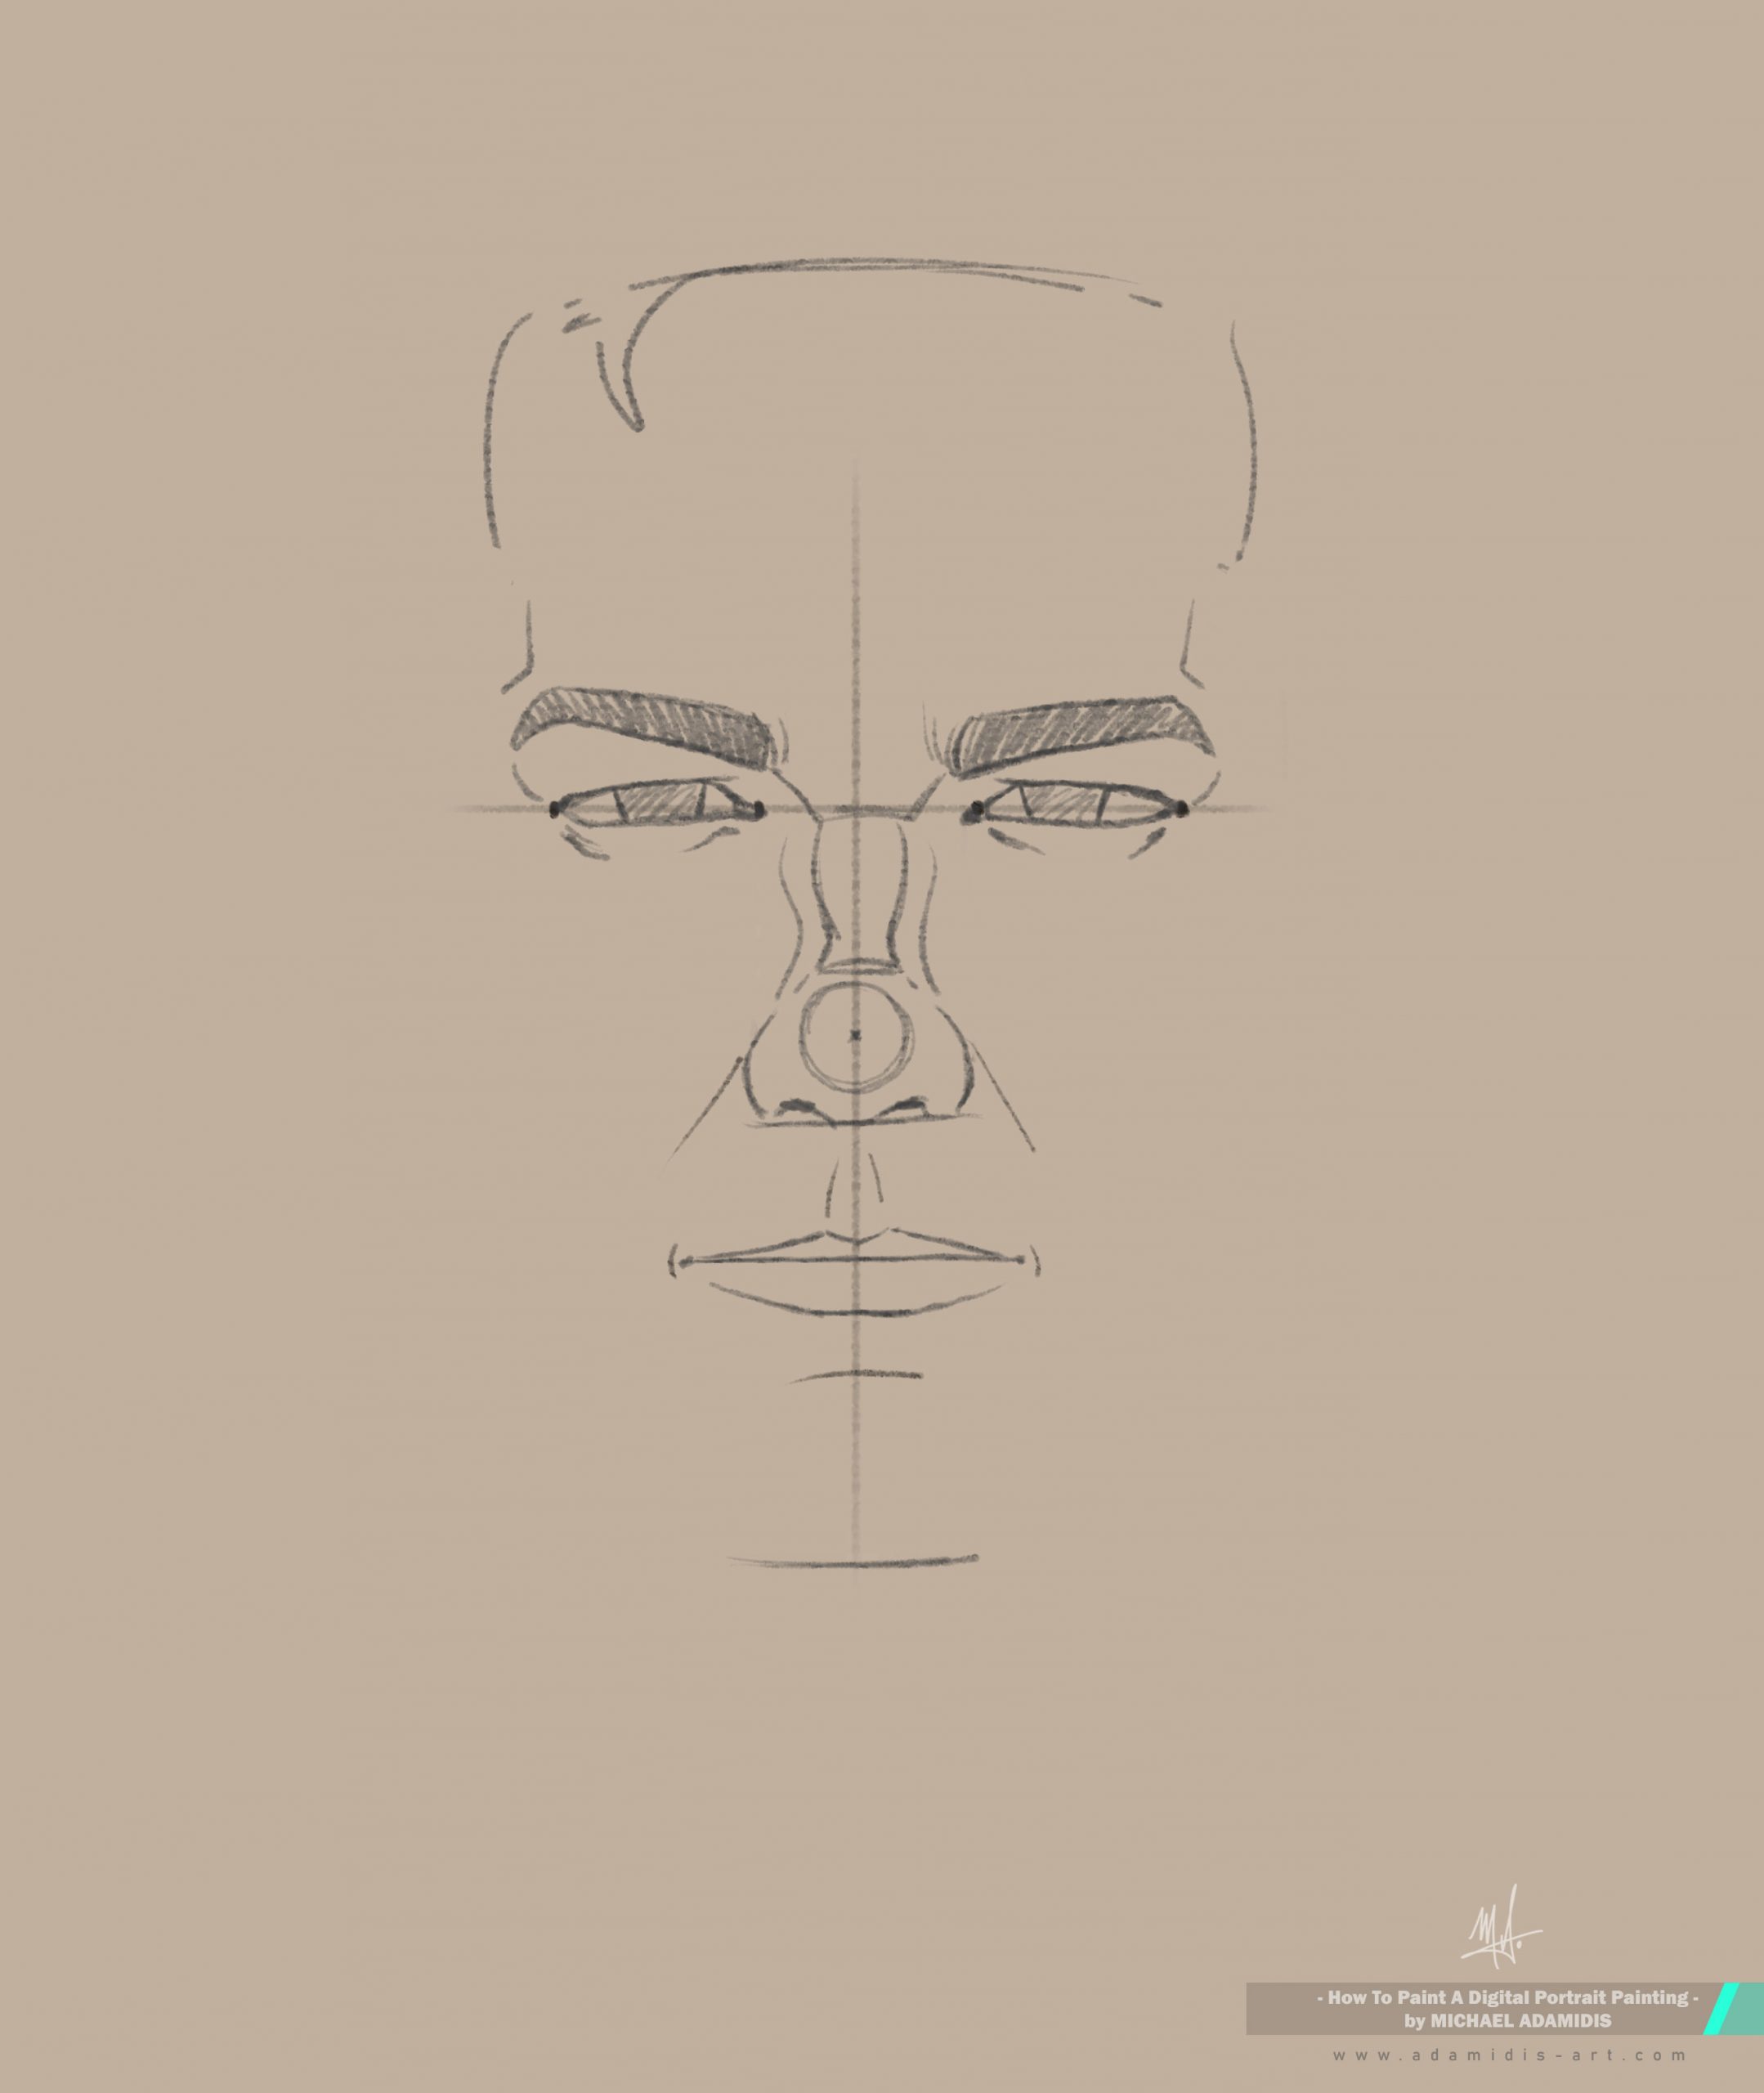
The horizontal line is for the eyes.
The vertical line is for the middle line of the face (it crosses the nose and the mouth at the middle).
This is not directly a rule, but the first and important step, so it’s also marked blue.
The first rule is that the eyes have a distance of an eye to each other.
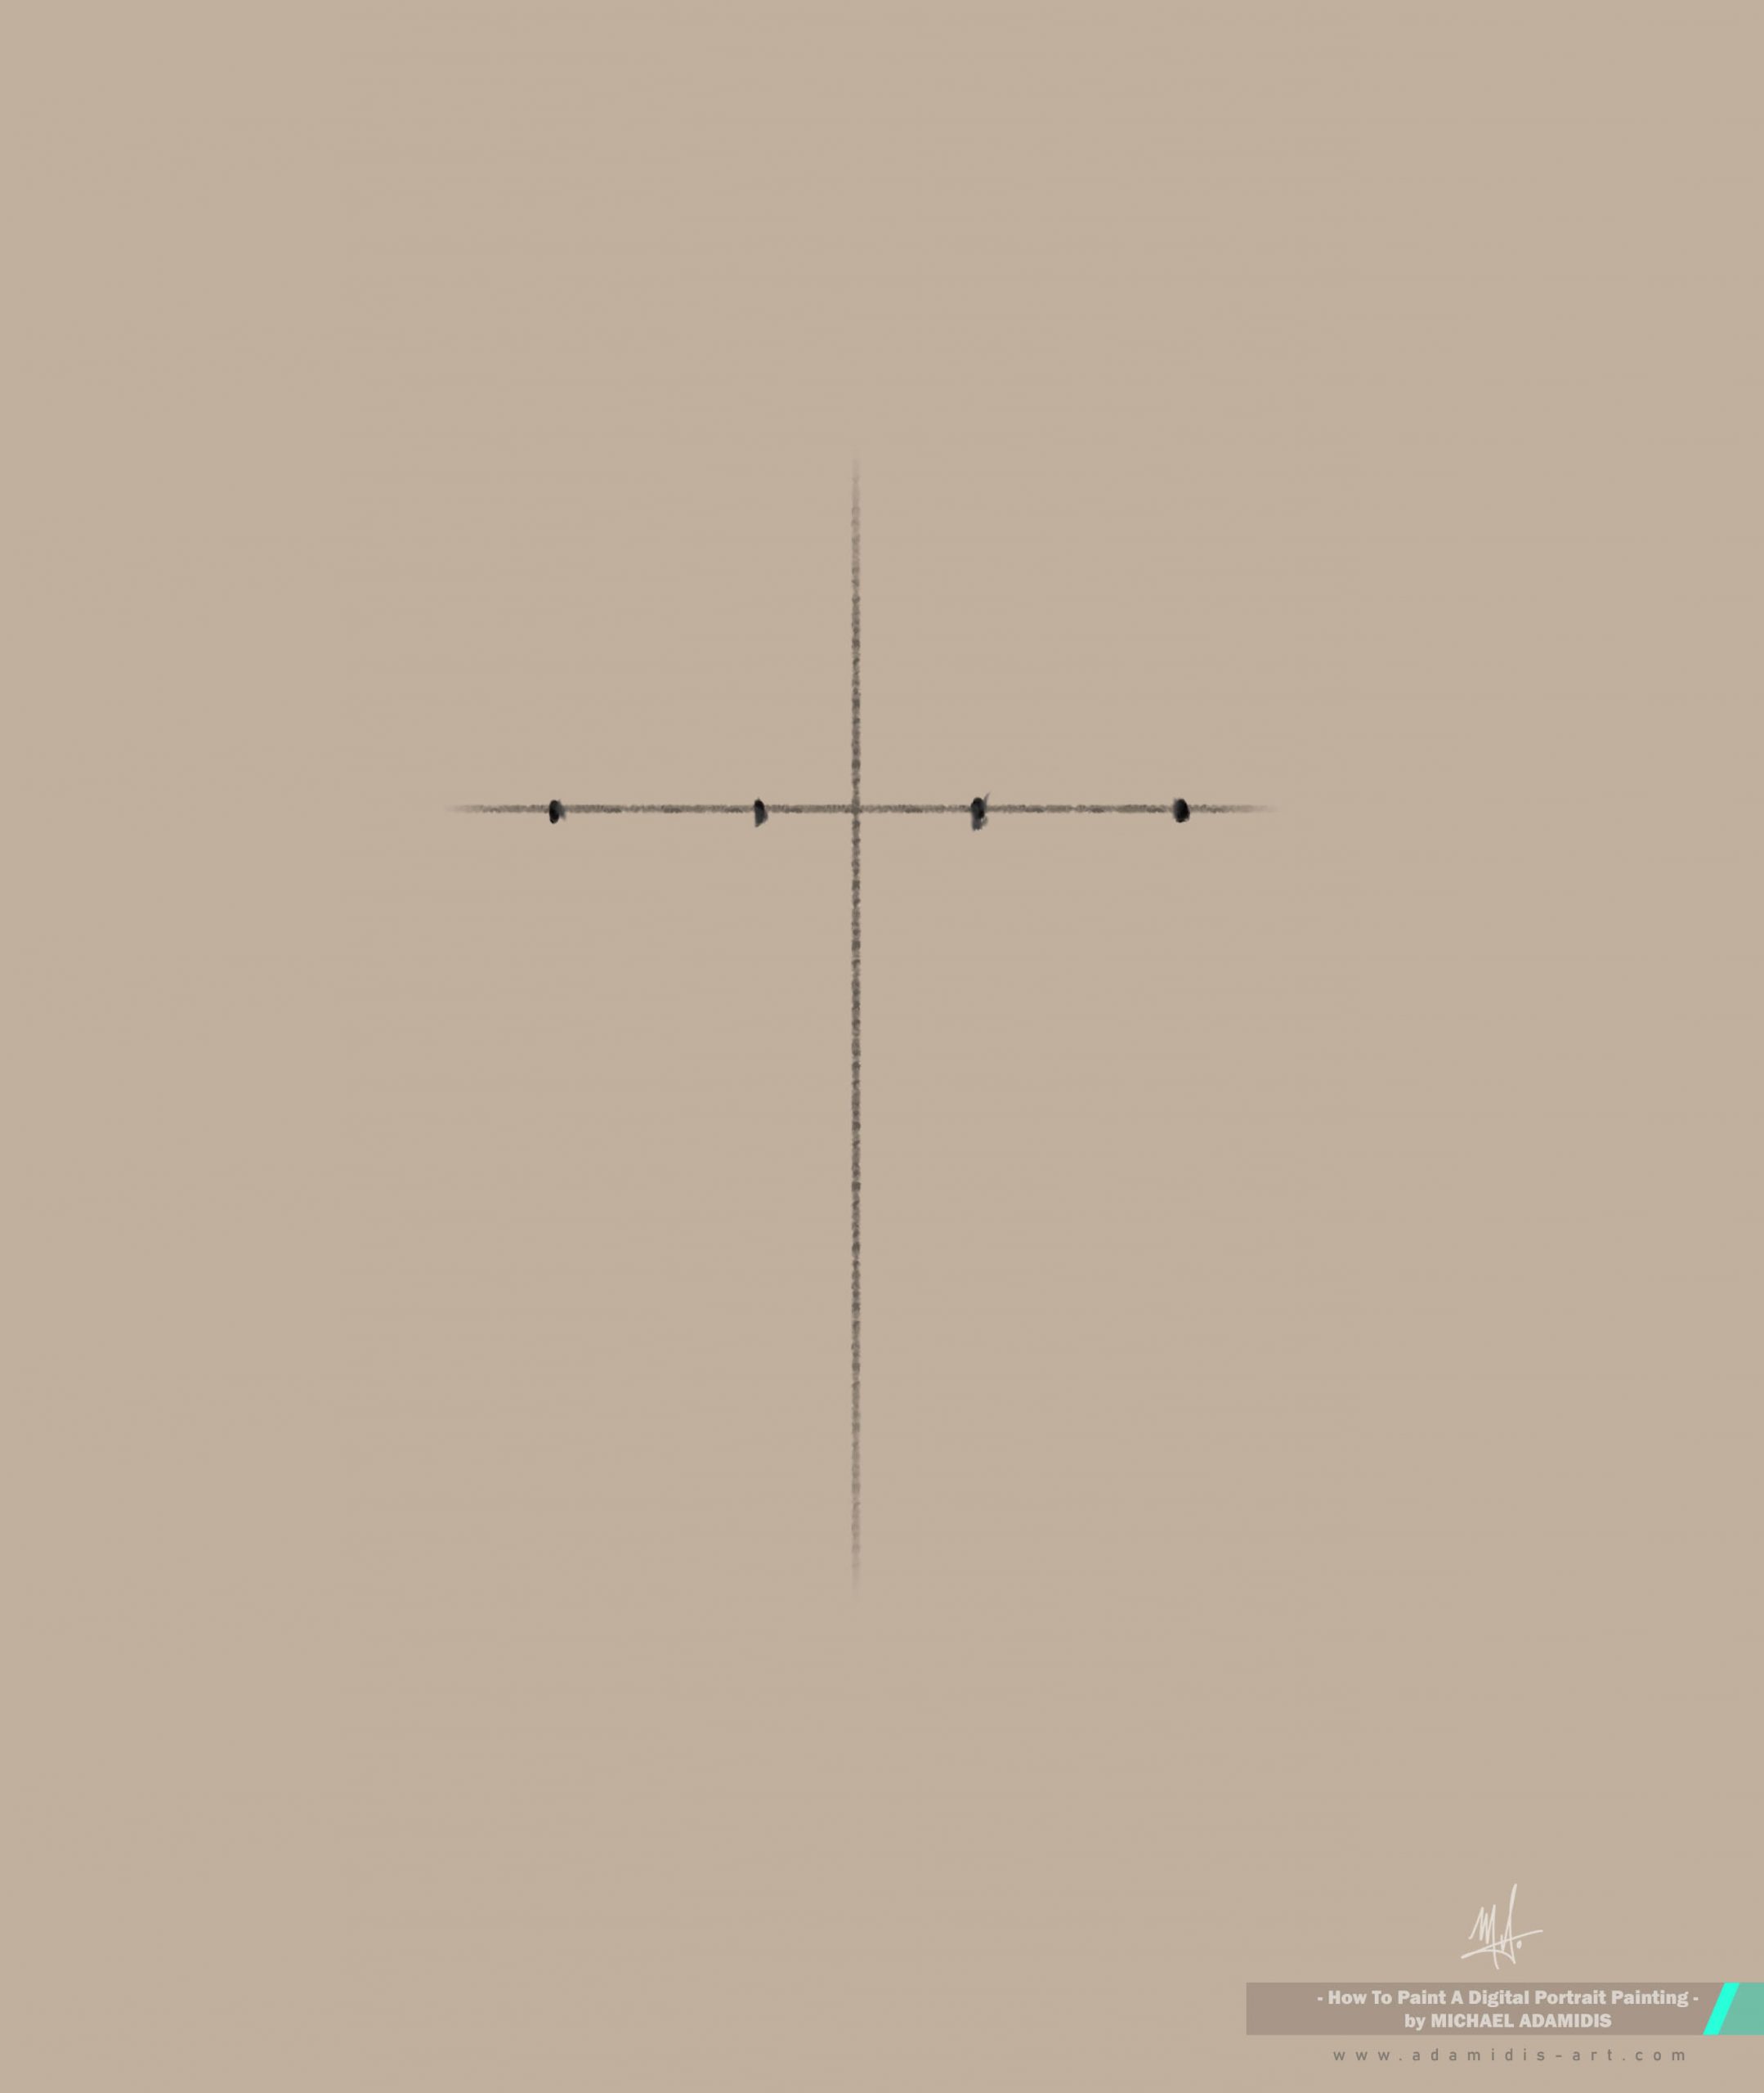
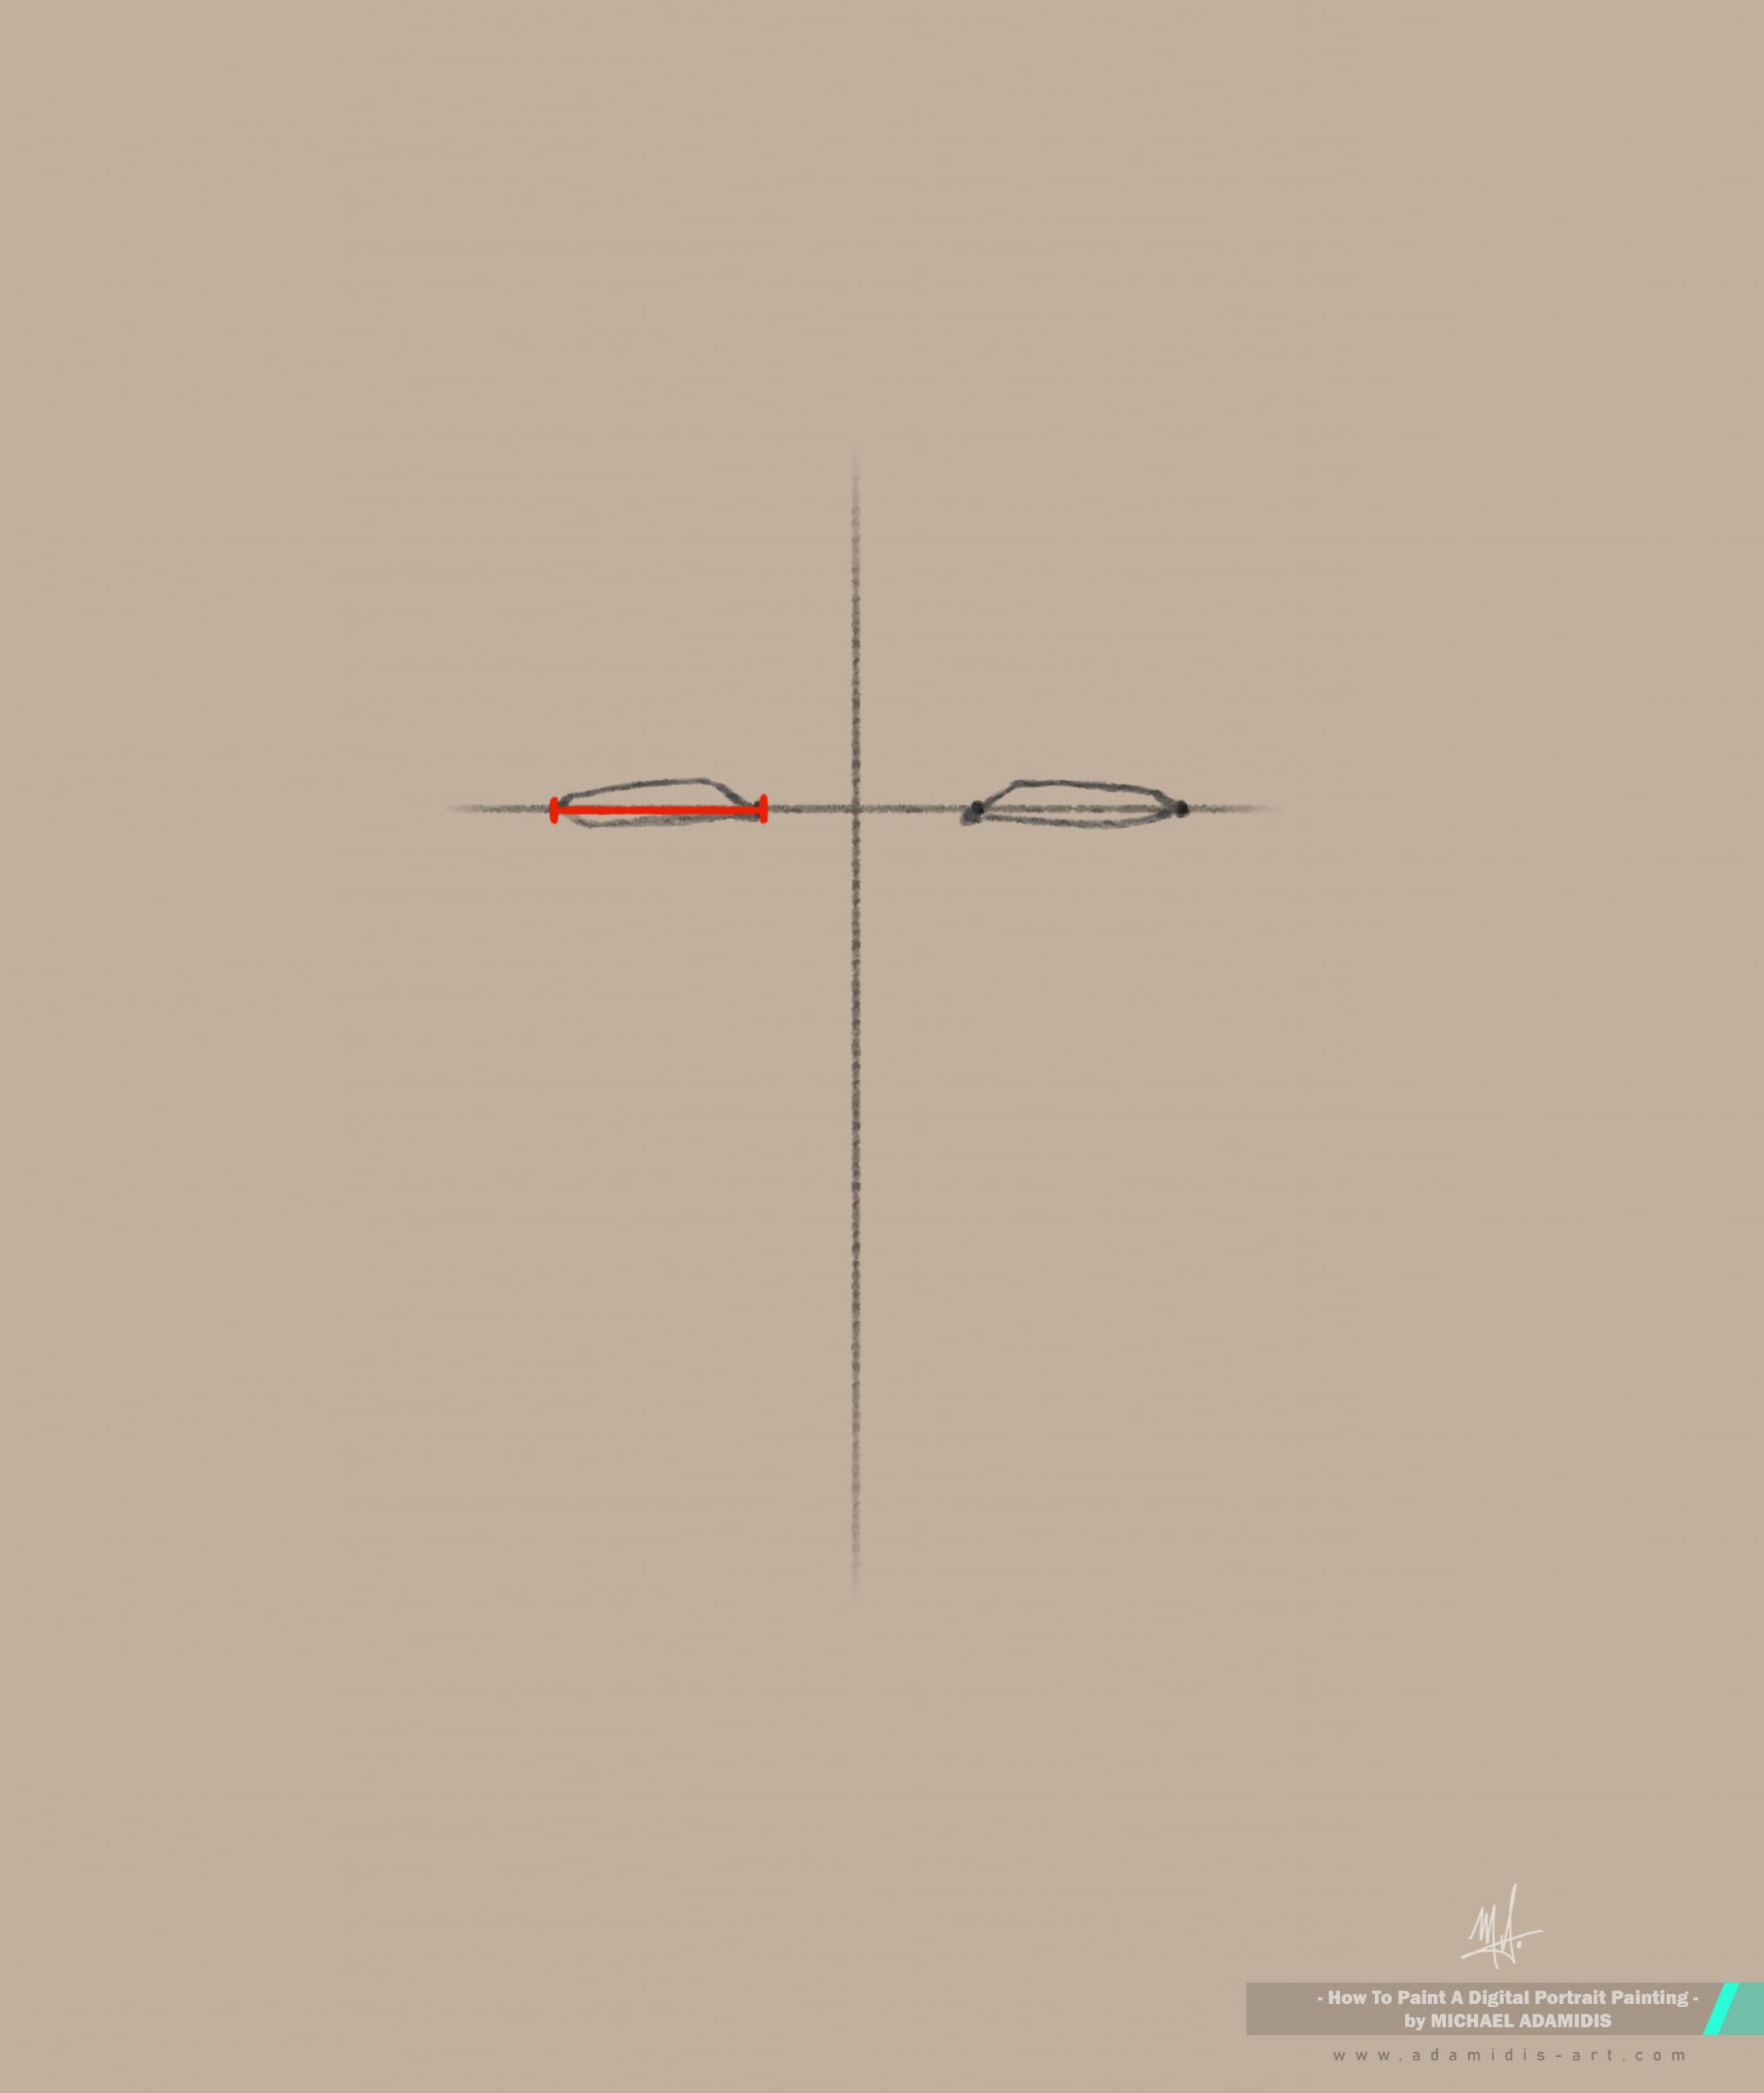
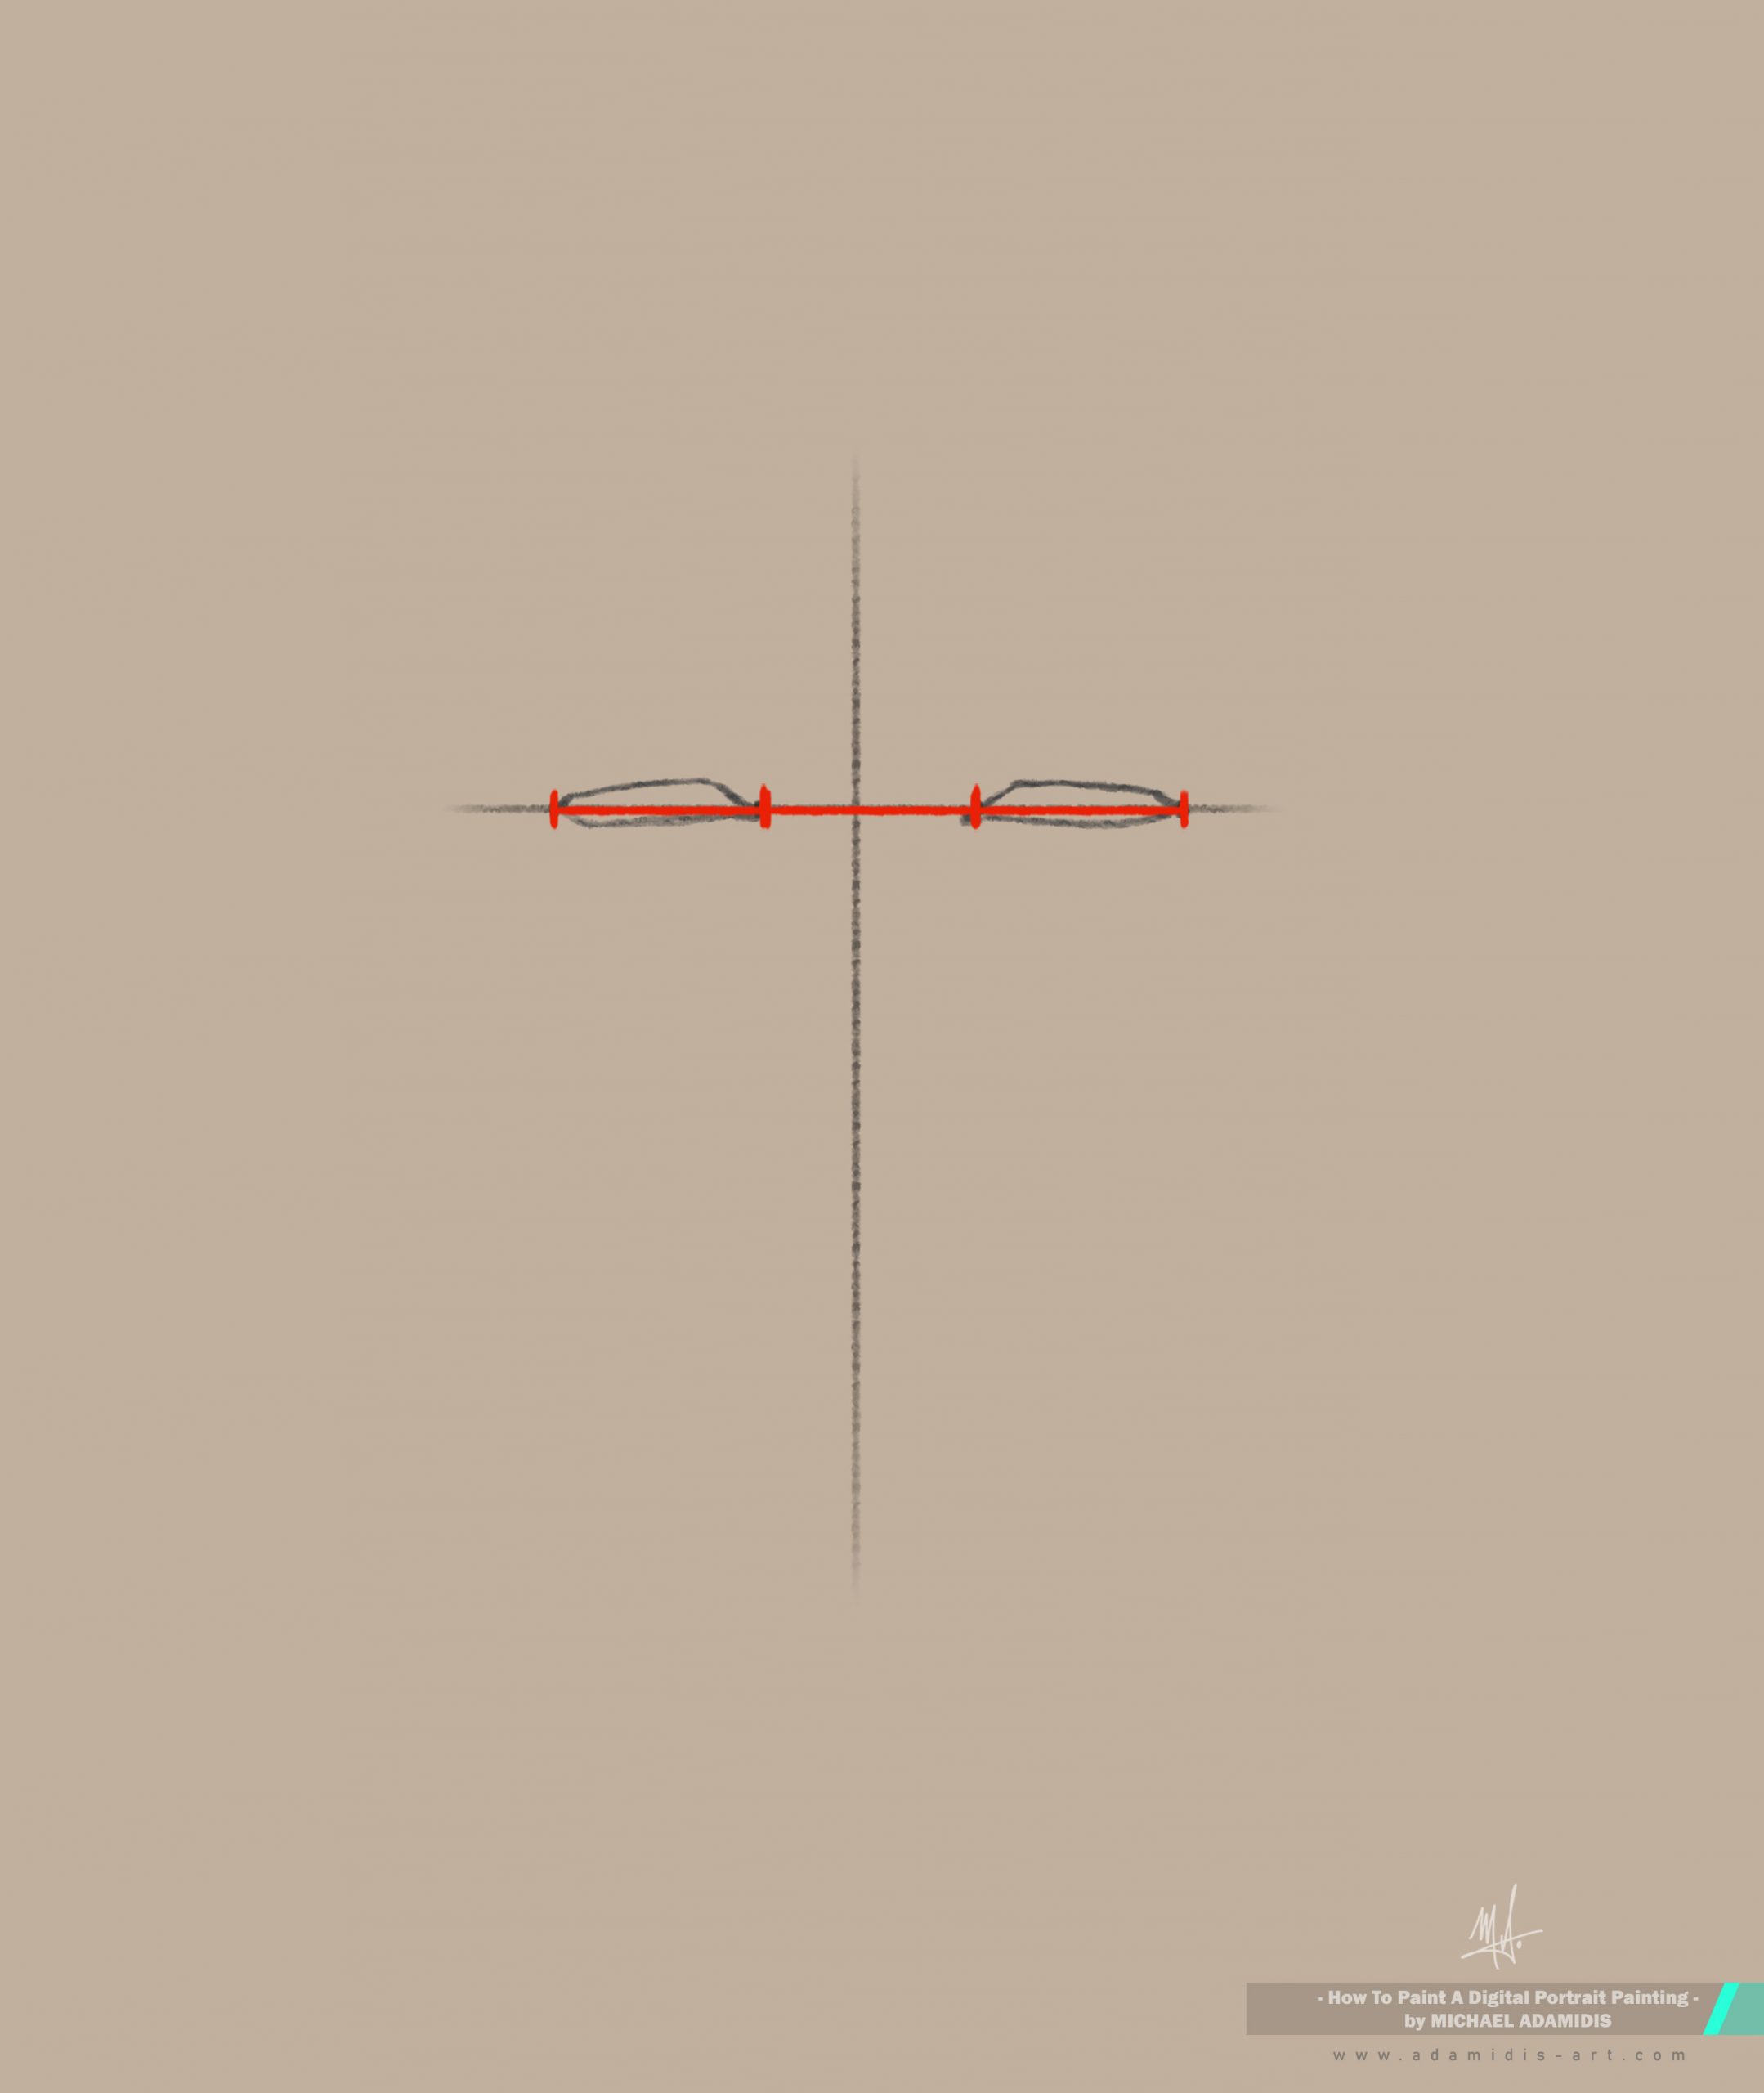
This, like all the other rules here, is a rule of thumb. They are approximated rules, which are a good help for a starting point. With this rule in your mind you can check the distances. If the distance between the eyes is smaller, you are able to recognize it and draw it. Train your eyes to understand such relationships. Those relationships are key to a good proportional digital portrait painting.
-> By the way, I will not say this repeatedly for each rule.
It’s always the same: use the basic rules to see and check if they are the same or if they differ. Are there smaller or bigger distances? You have to recognize it and draw accordingly. Let’s call this also a rule: Draw what you see and not what you know!
It’s the main skill you need to develop as a true portrait painter and believe me it’s possible. It’s the science part of painting. You are the scientist and your world to discover is the face you’re painting.
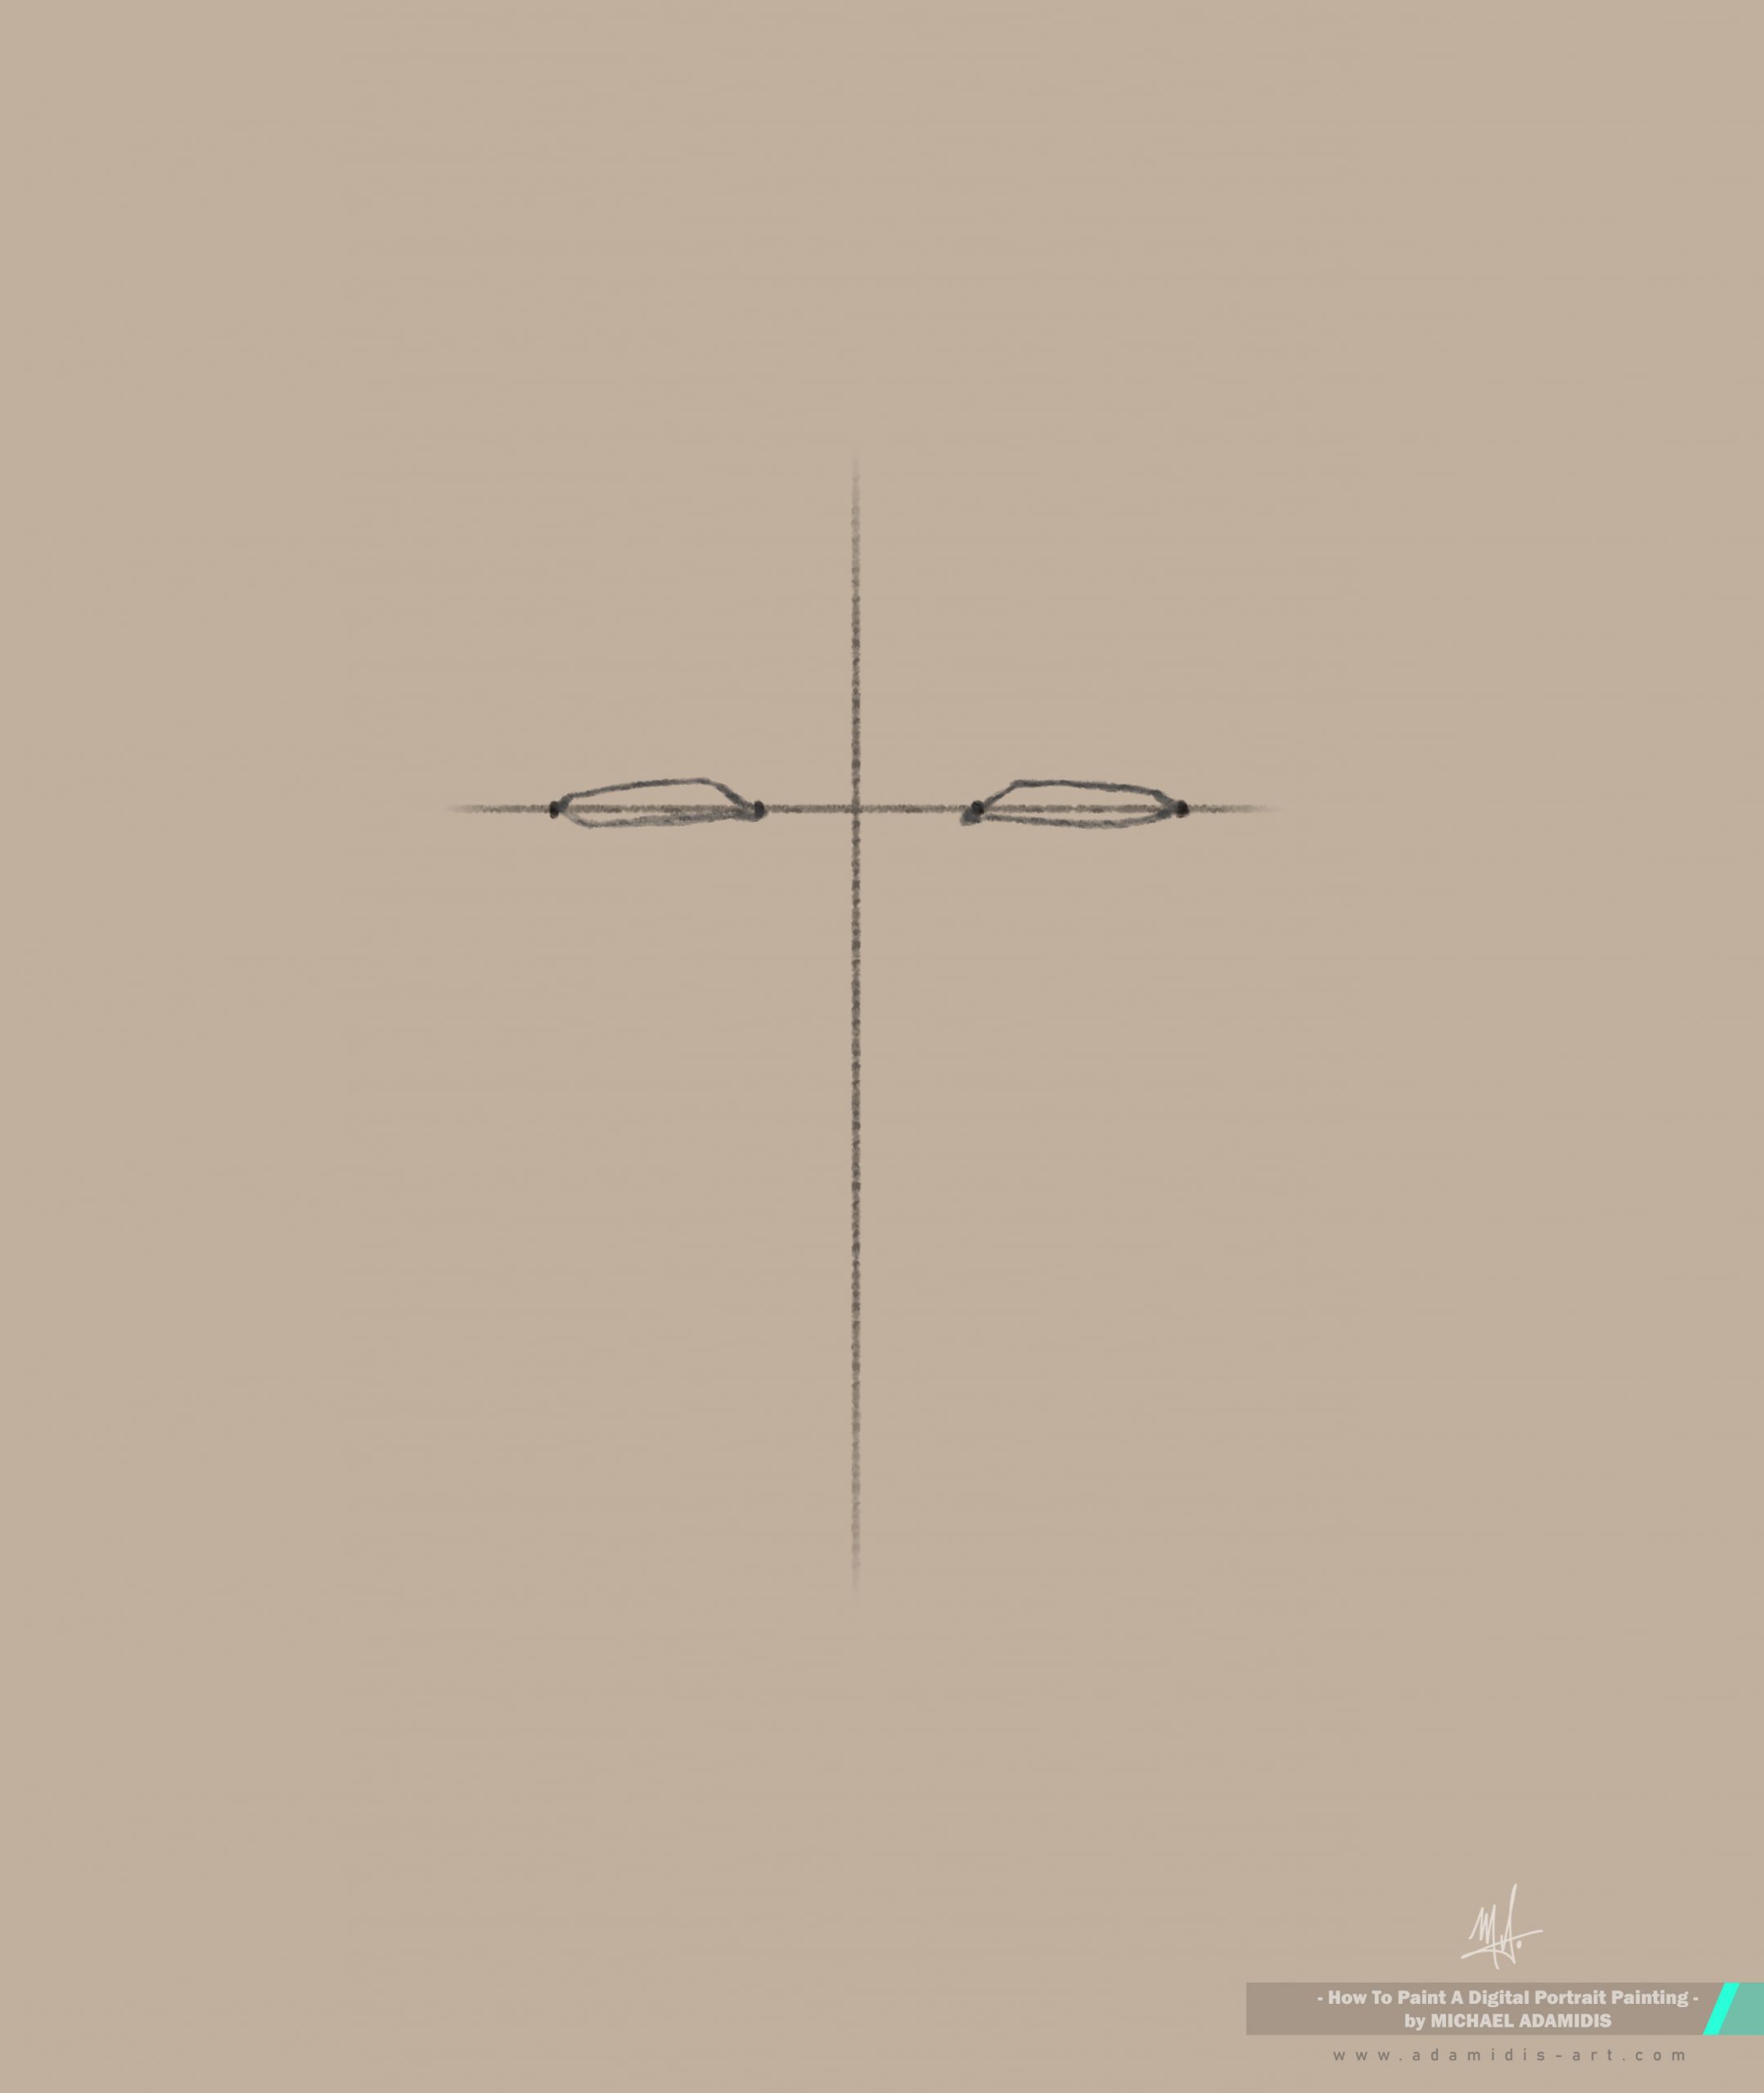
Now you have placed the dots for the right placement of the eyes. Before we go to the nose, draw the eyes. I highly recommend also to you, to paint the eyebrows already now. You will have the right distances and proportions through the placement of the eyes. This here, I will give to you without proportional rule. You will see that if you have the eye shape, that you will know where to place the eyebrows. So don’t use a rule for those.
Use your eyes!
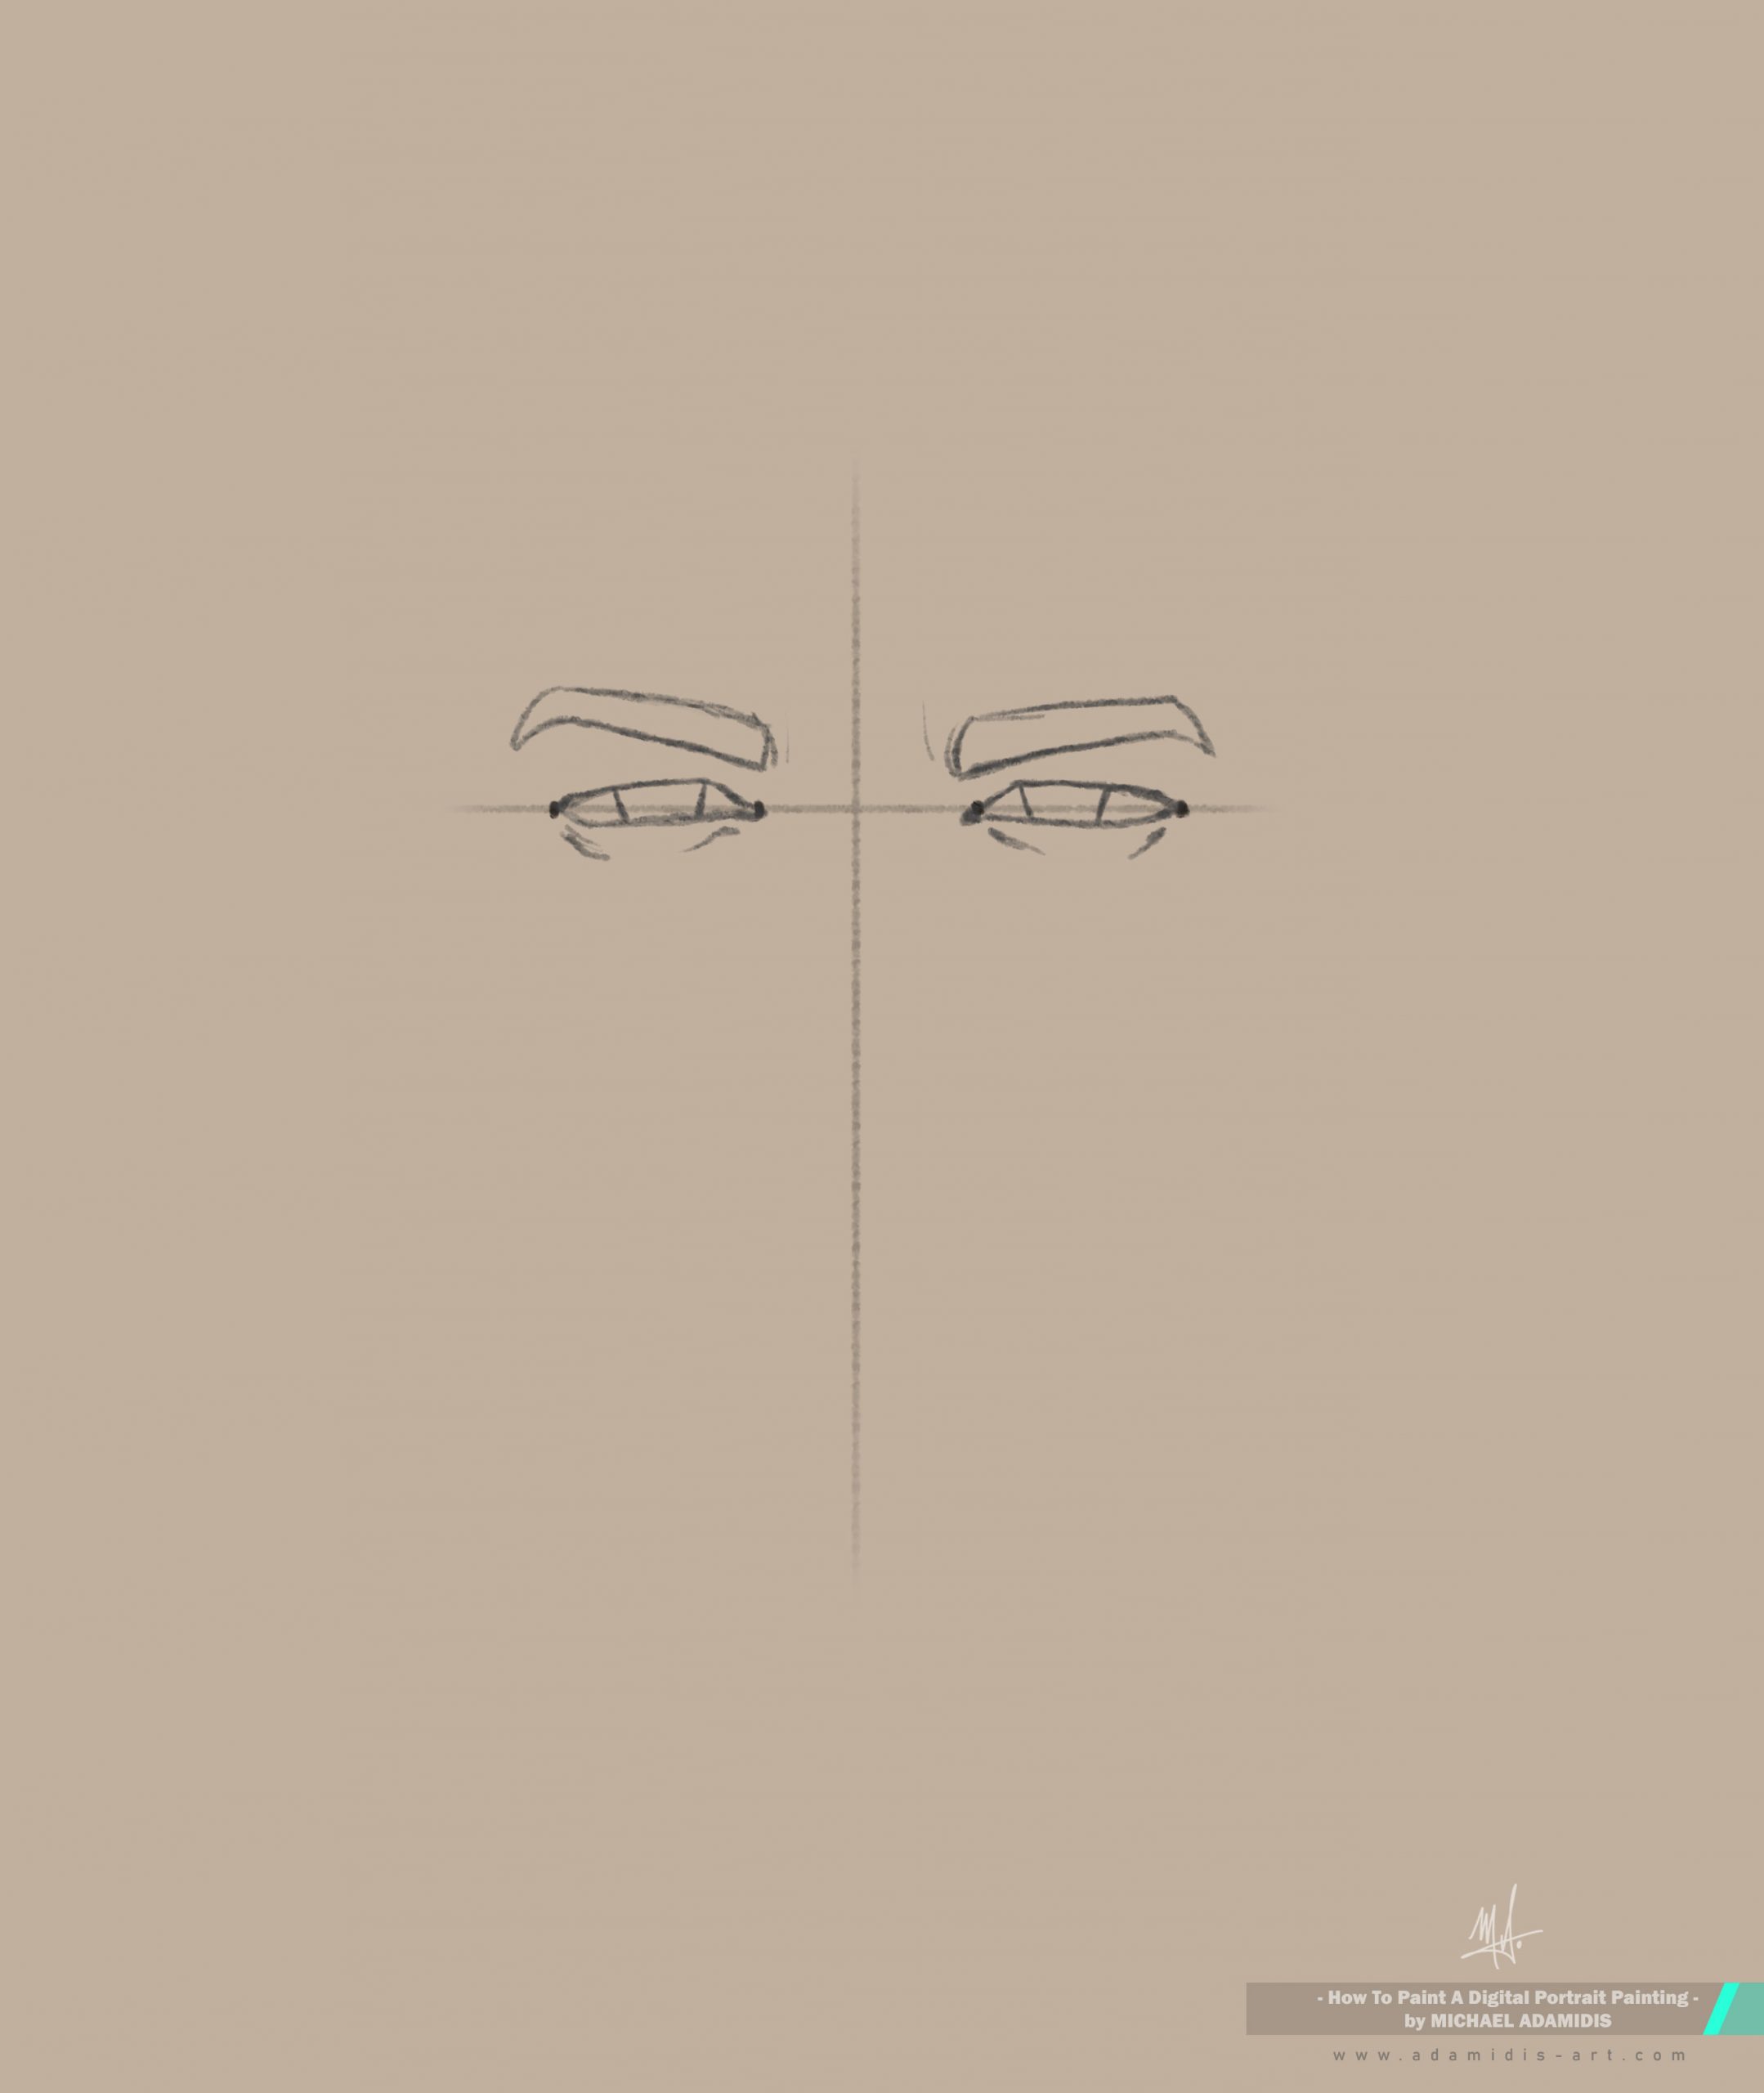
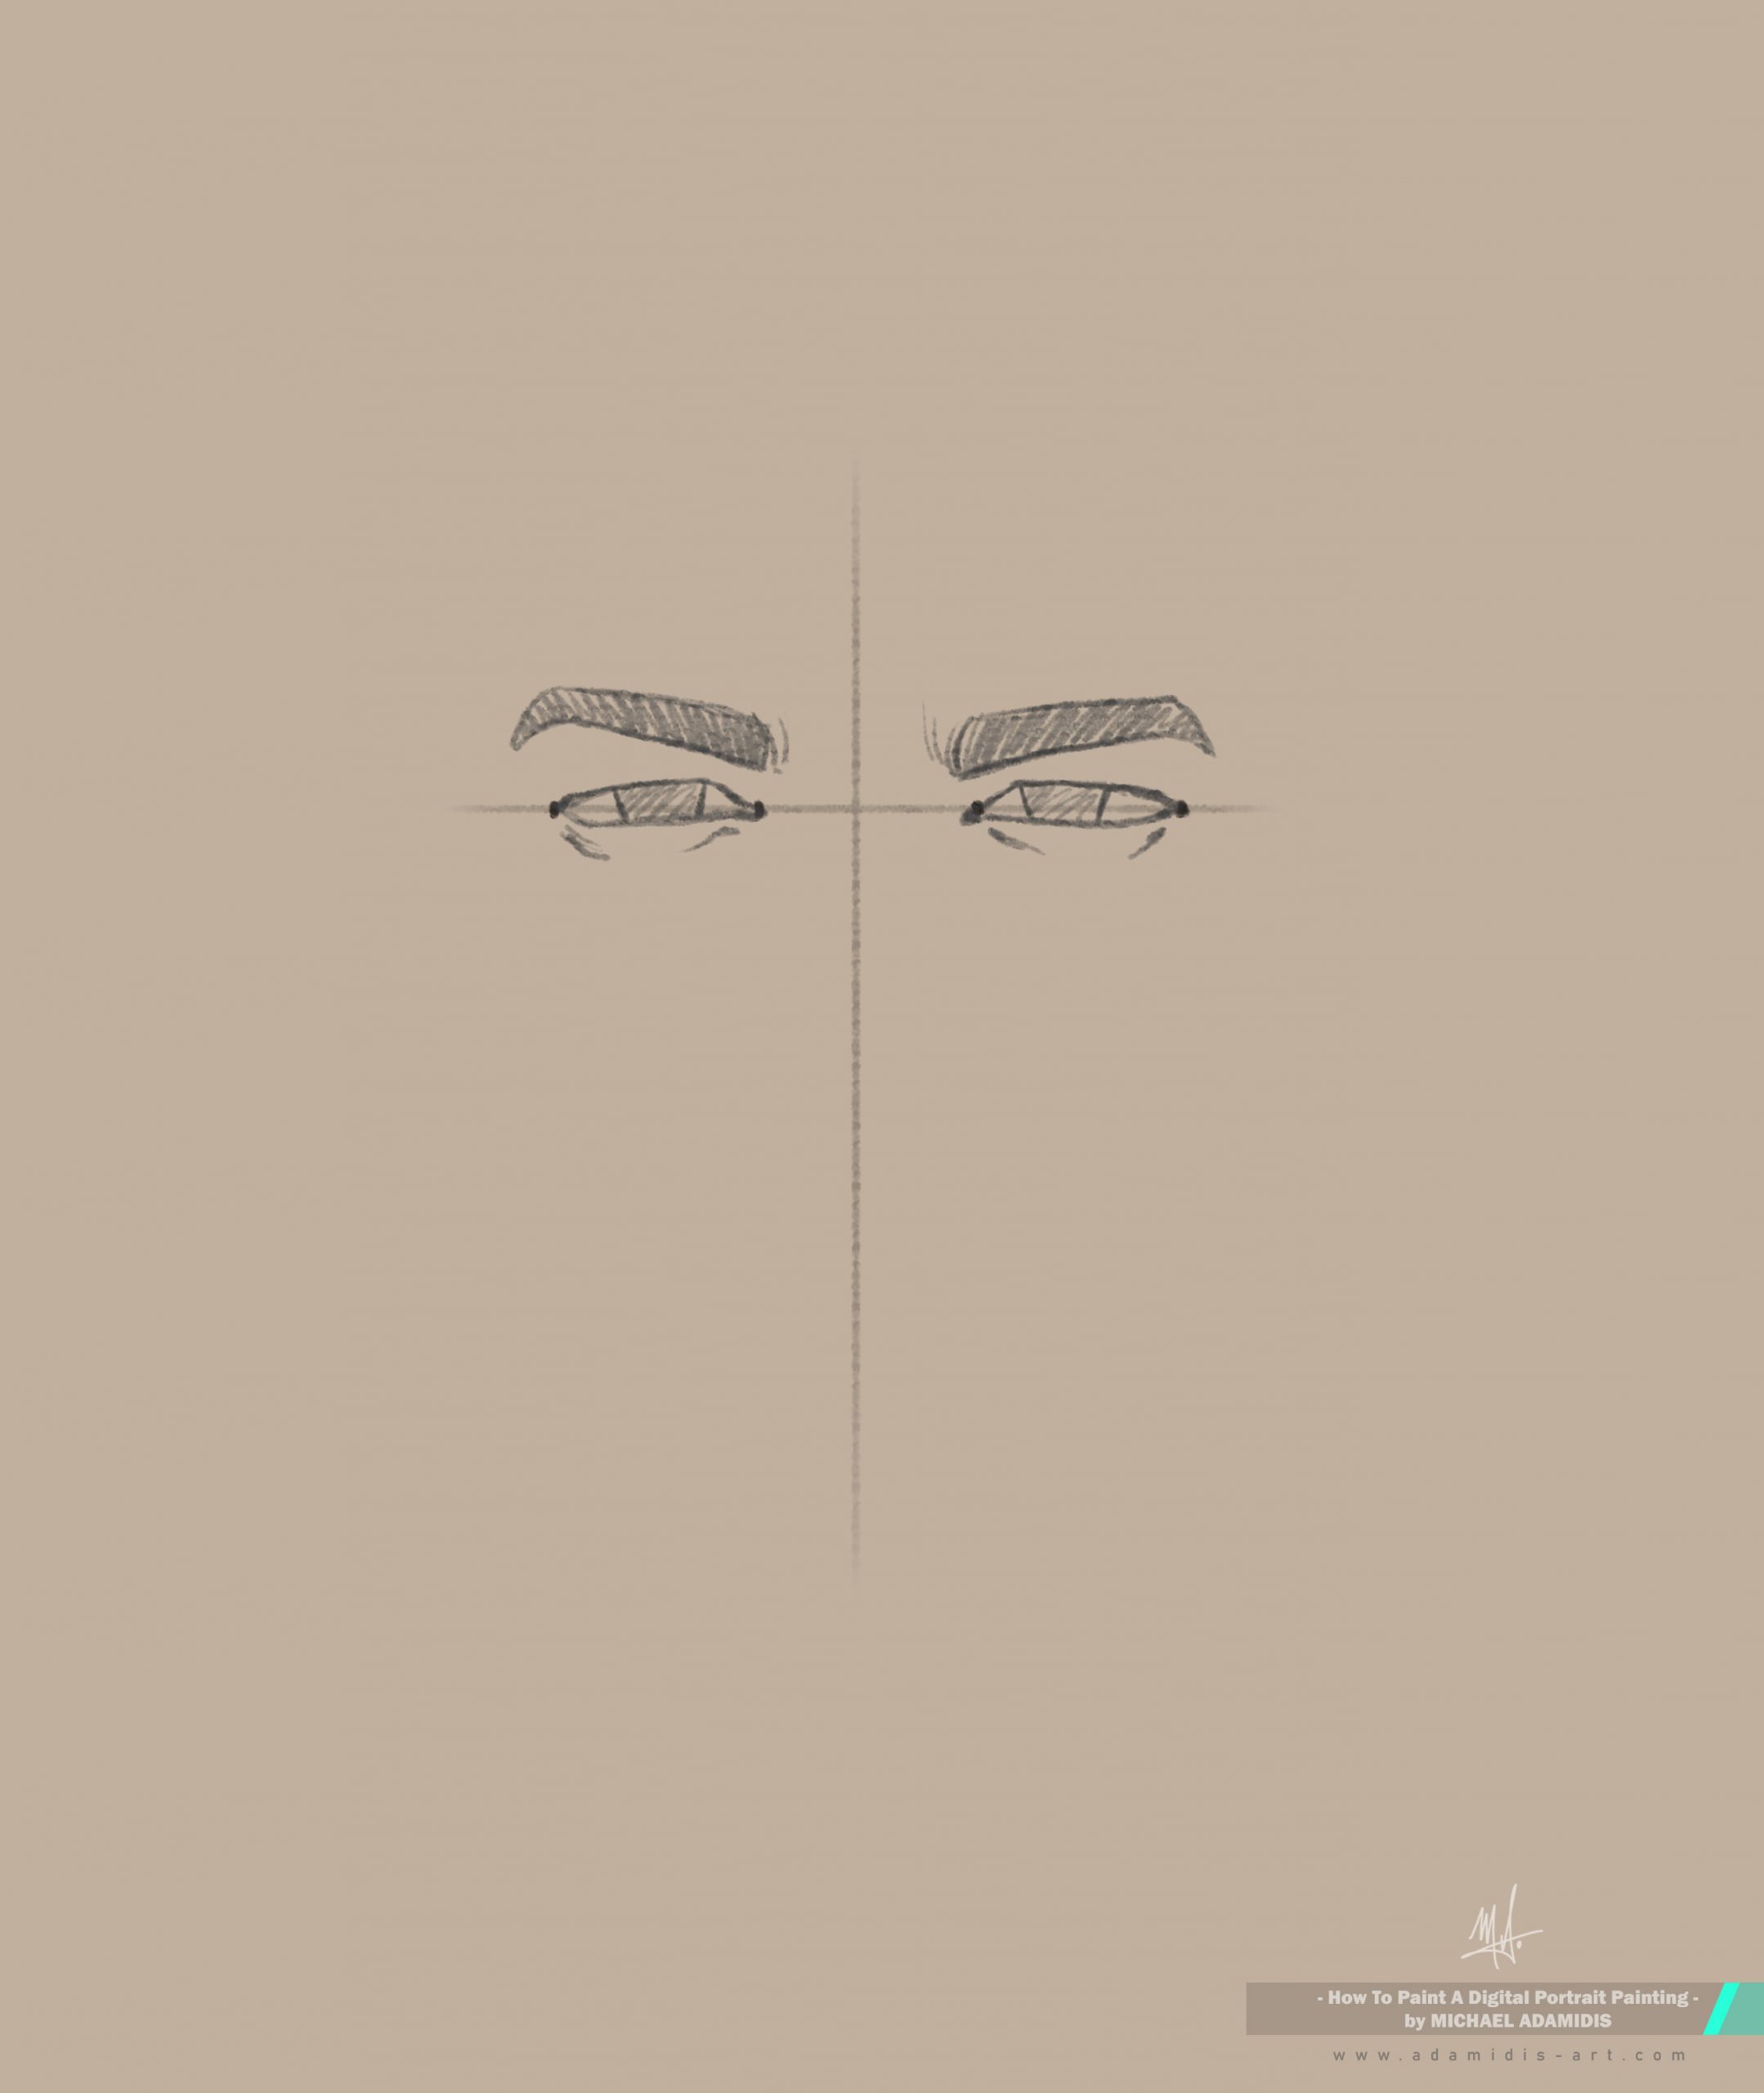
If you like, draw the iris of the eyes now. You can also just indicate them with simple lines, like you can see in the image.
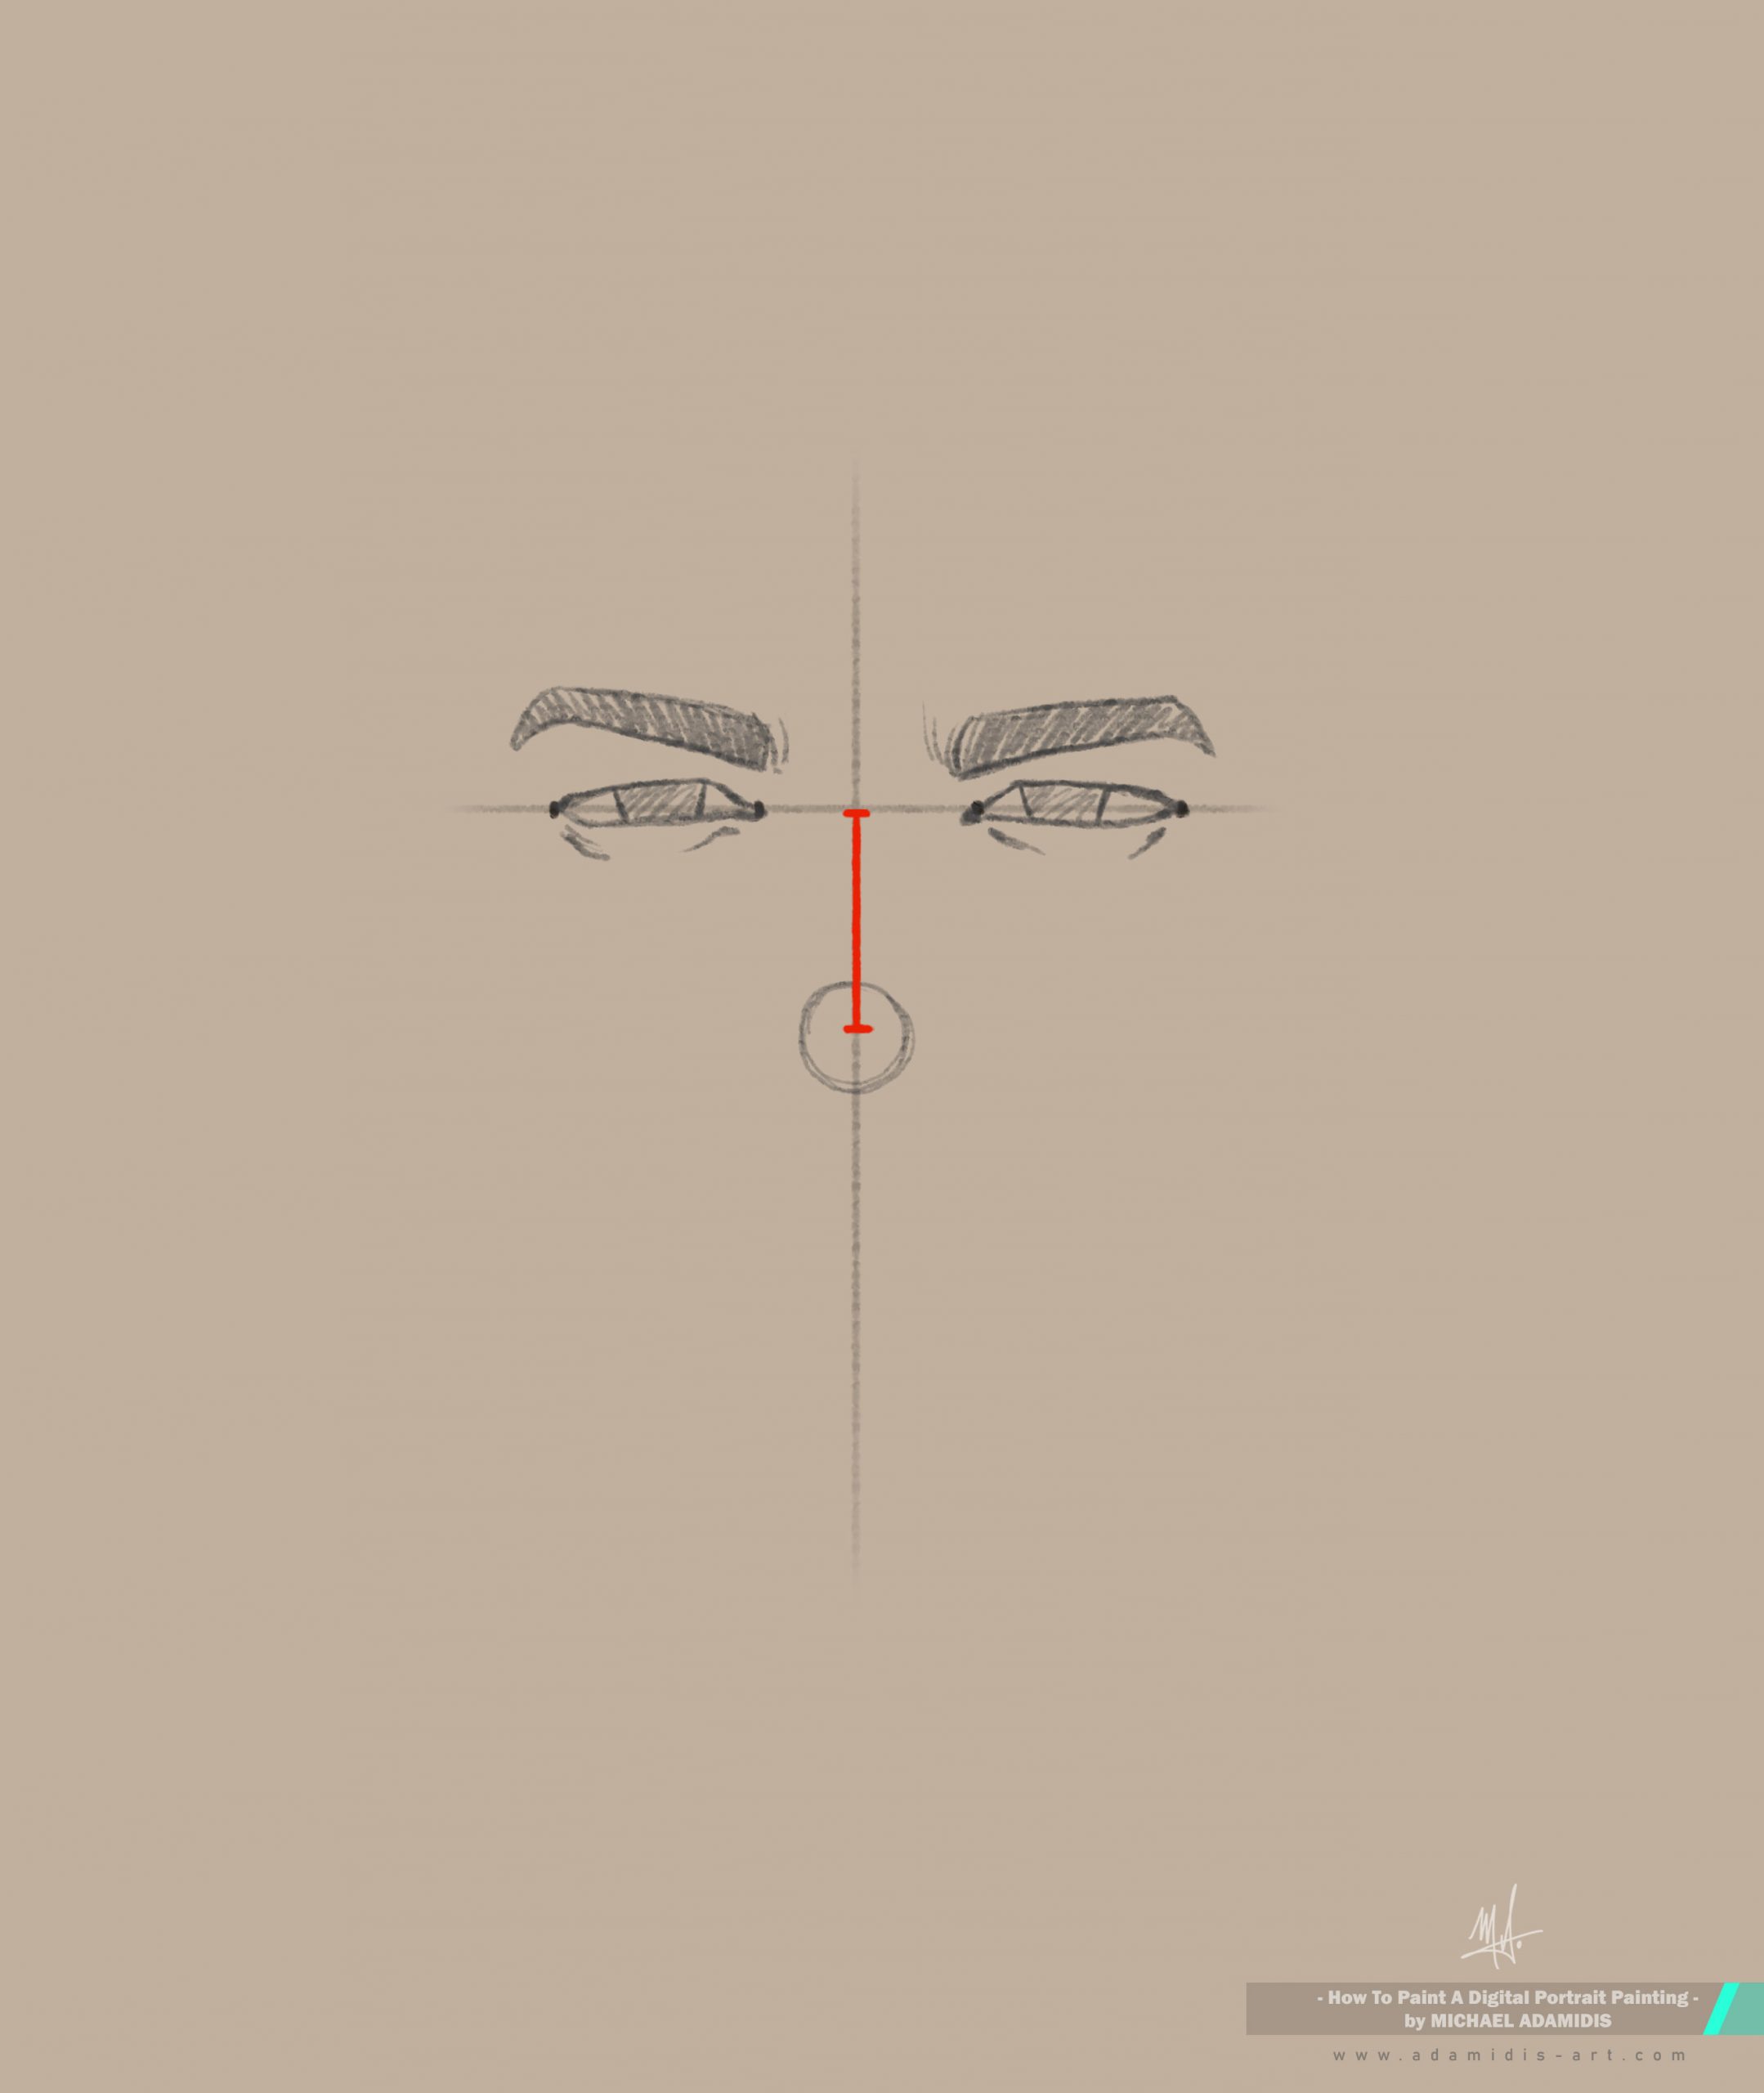
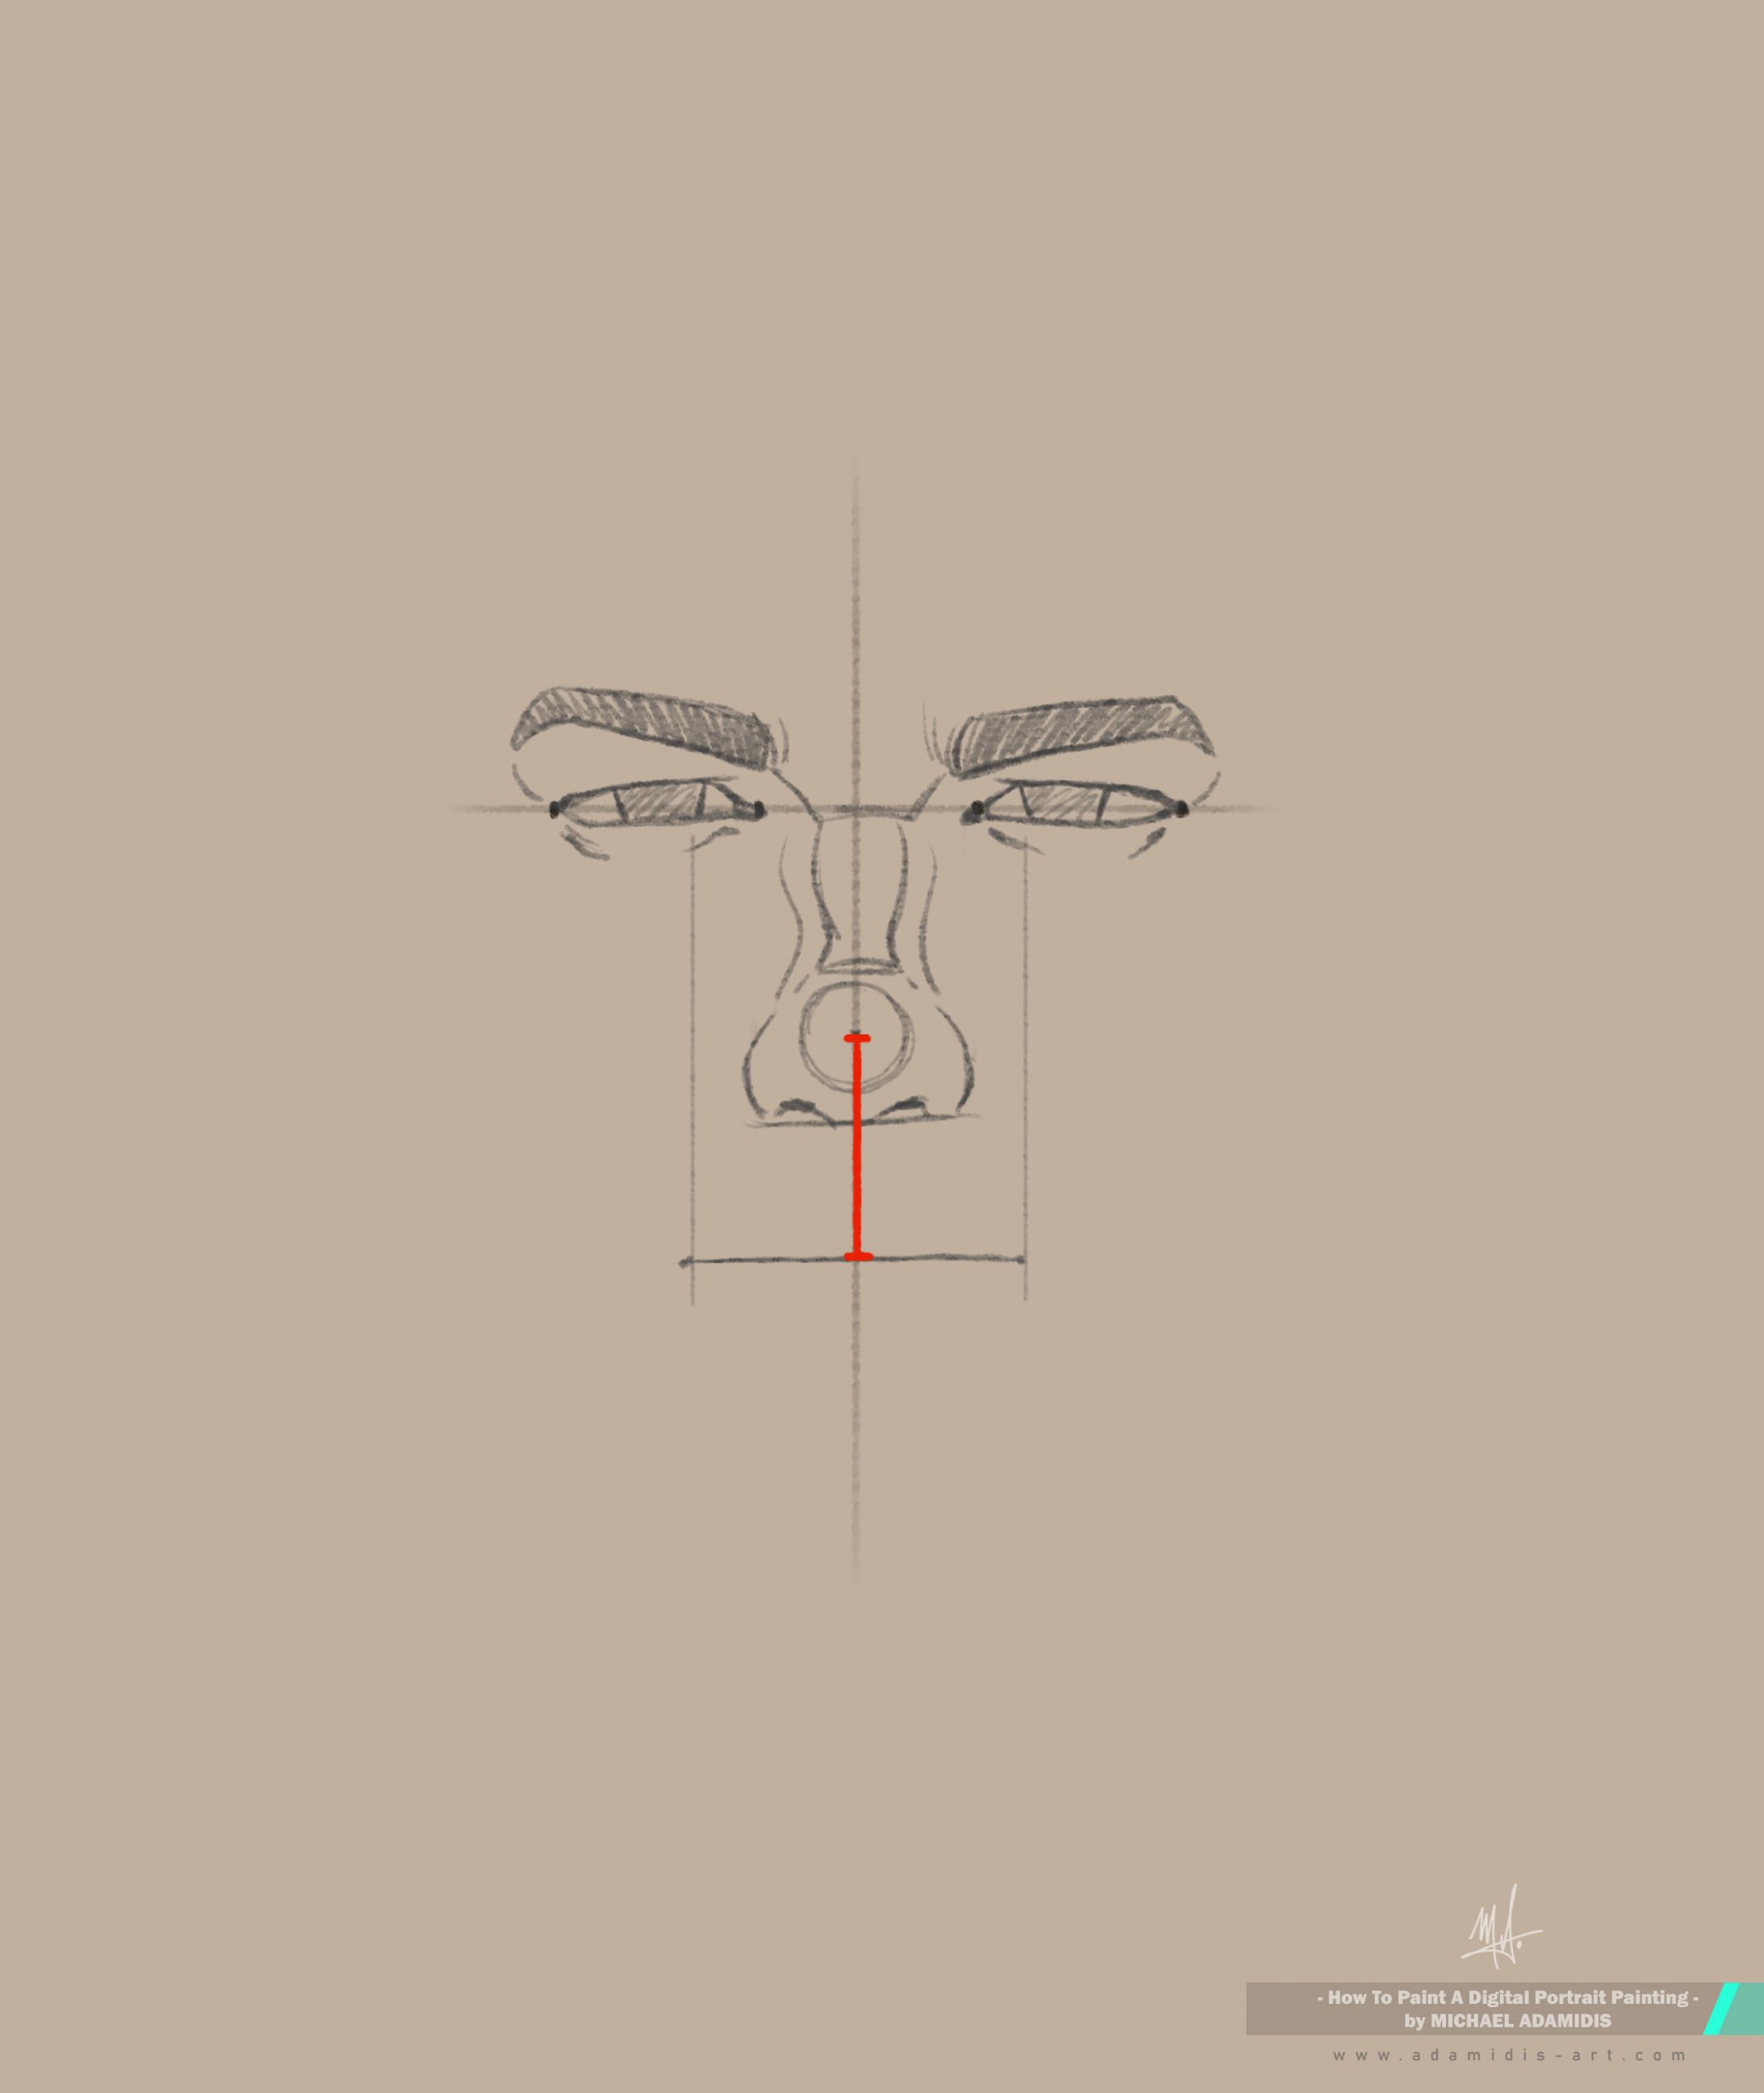
Now you have drawn the eyes and the eyebrows, let’s go to the nose. And we are not going to the downside of the nose. We are going to the circle of the tip of the nose.
The distance from between the eyes to the tip of the nose is also an eye length long.
We can use this length because we have it already, that is why we are going first to the tip of the nose. It helps a lot to take the half length of the eye we have to the middle line of the face and double it downwards.
Paint first a little dot and then try to draw the circle of the tip of the nose.
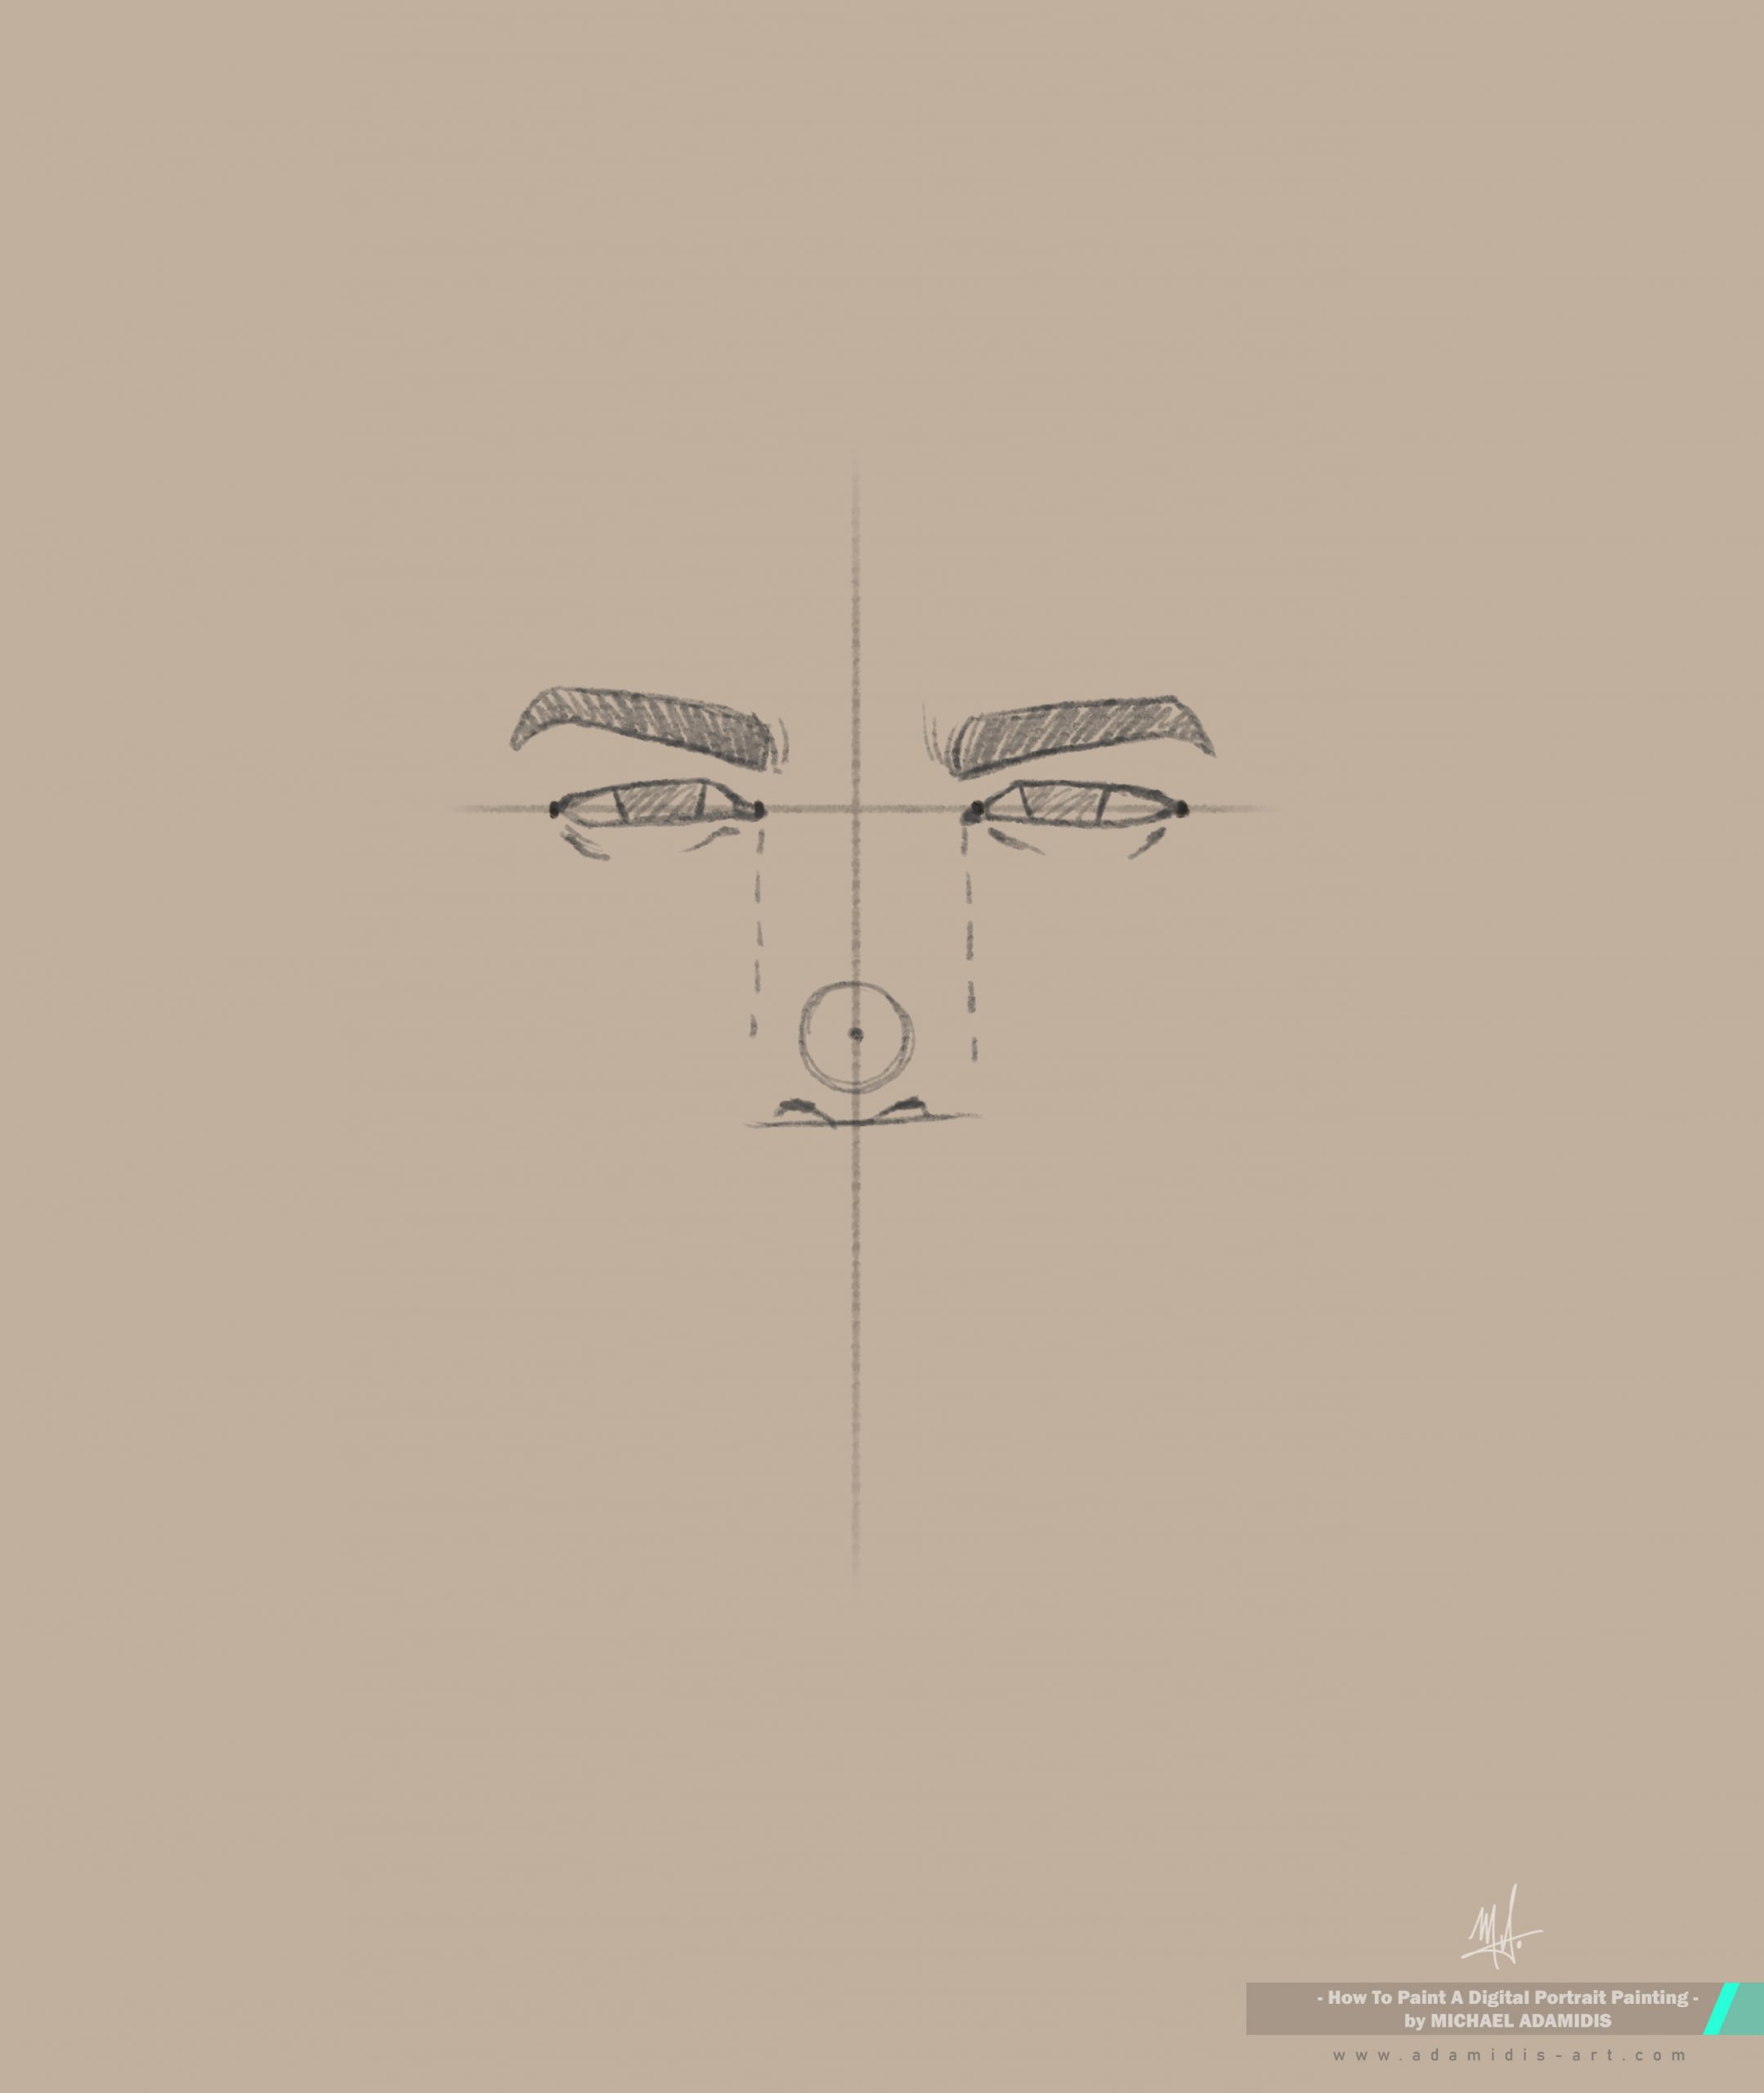
-> Find now also the lower line of the nose (this with the help of you eyes). Put a small horizontal line here.
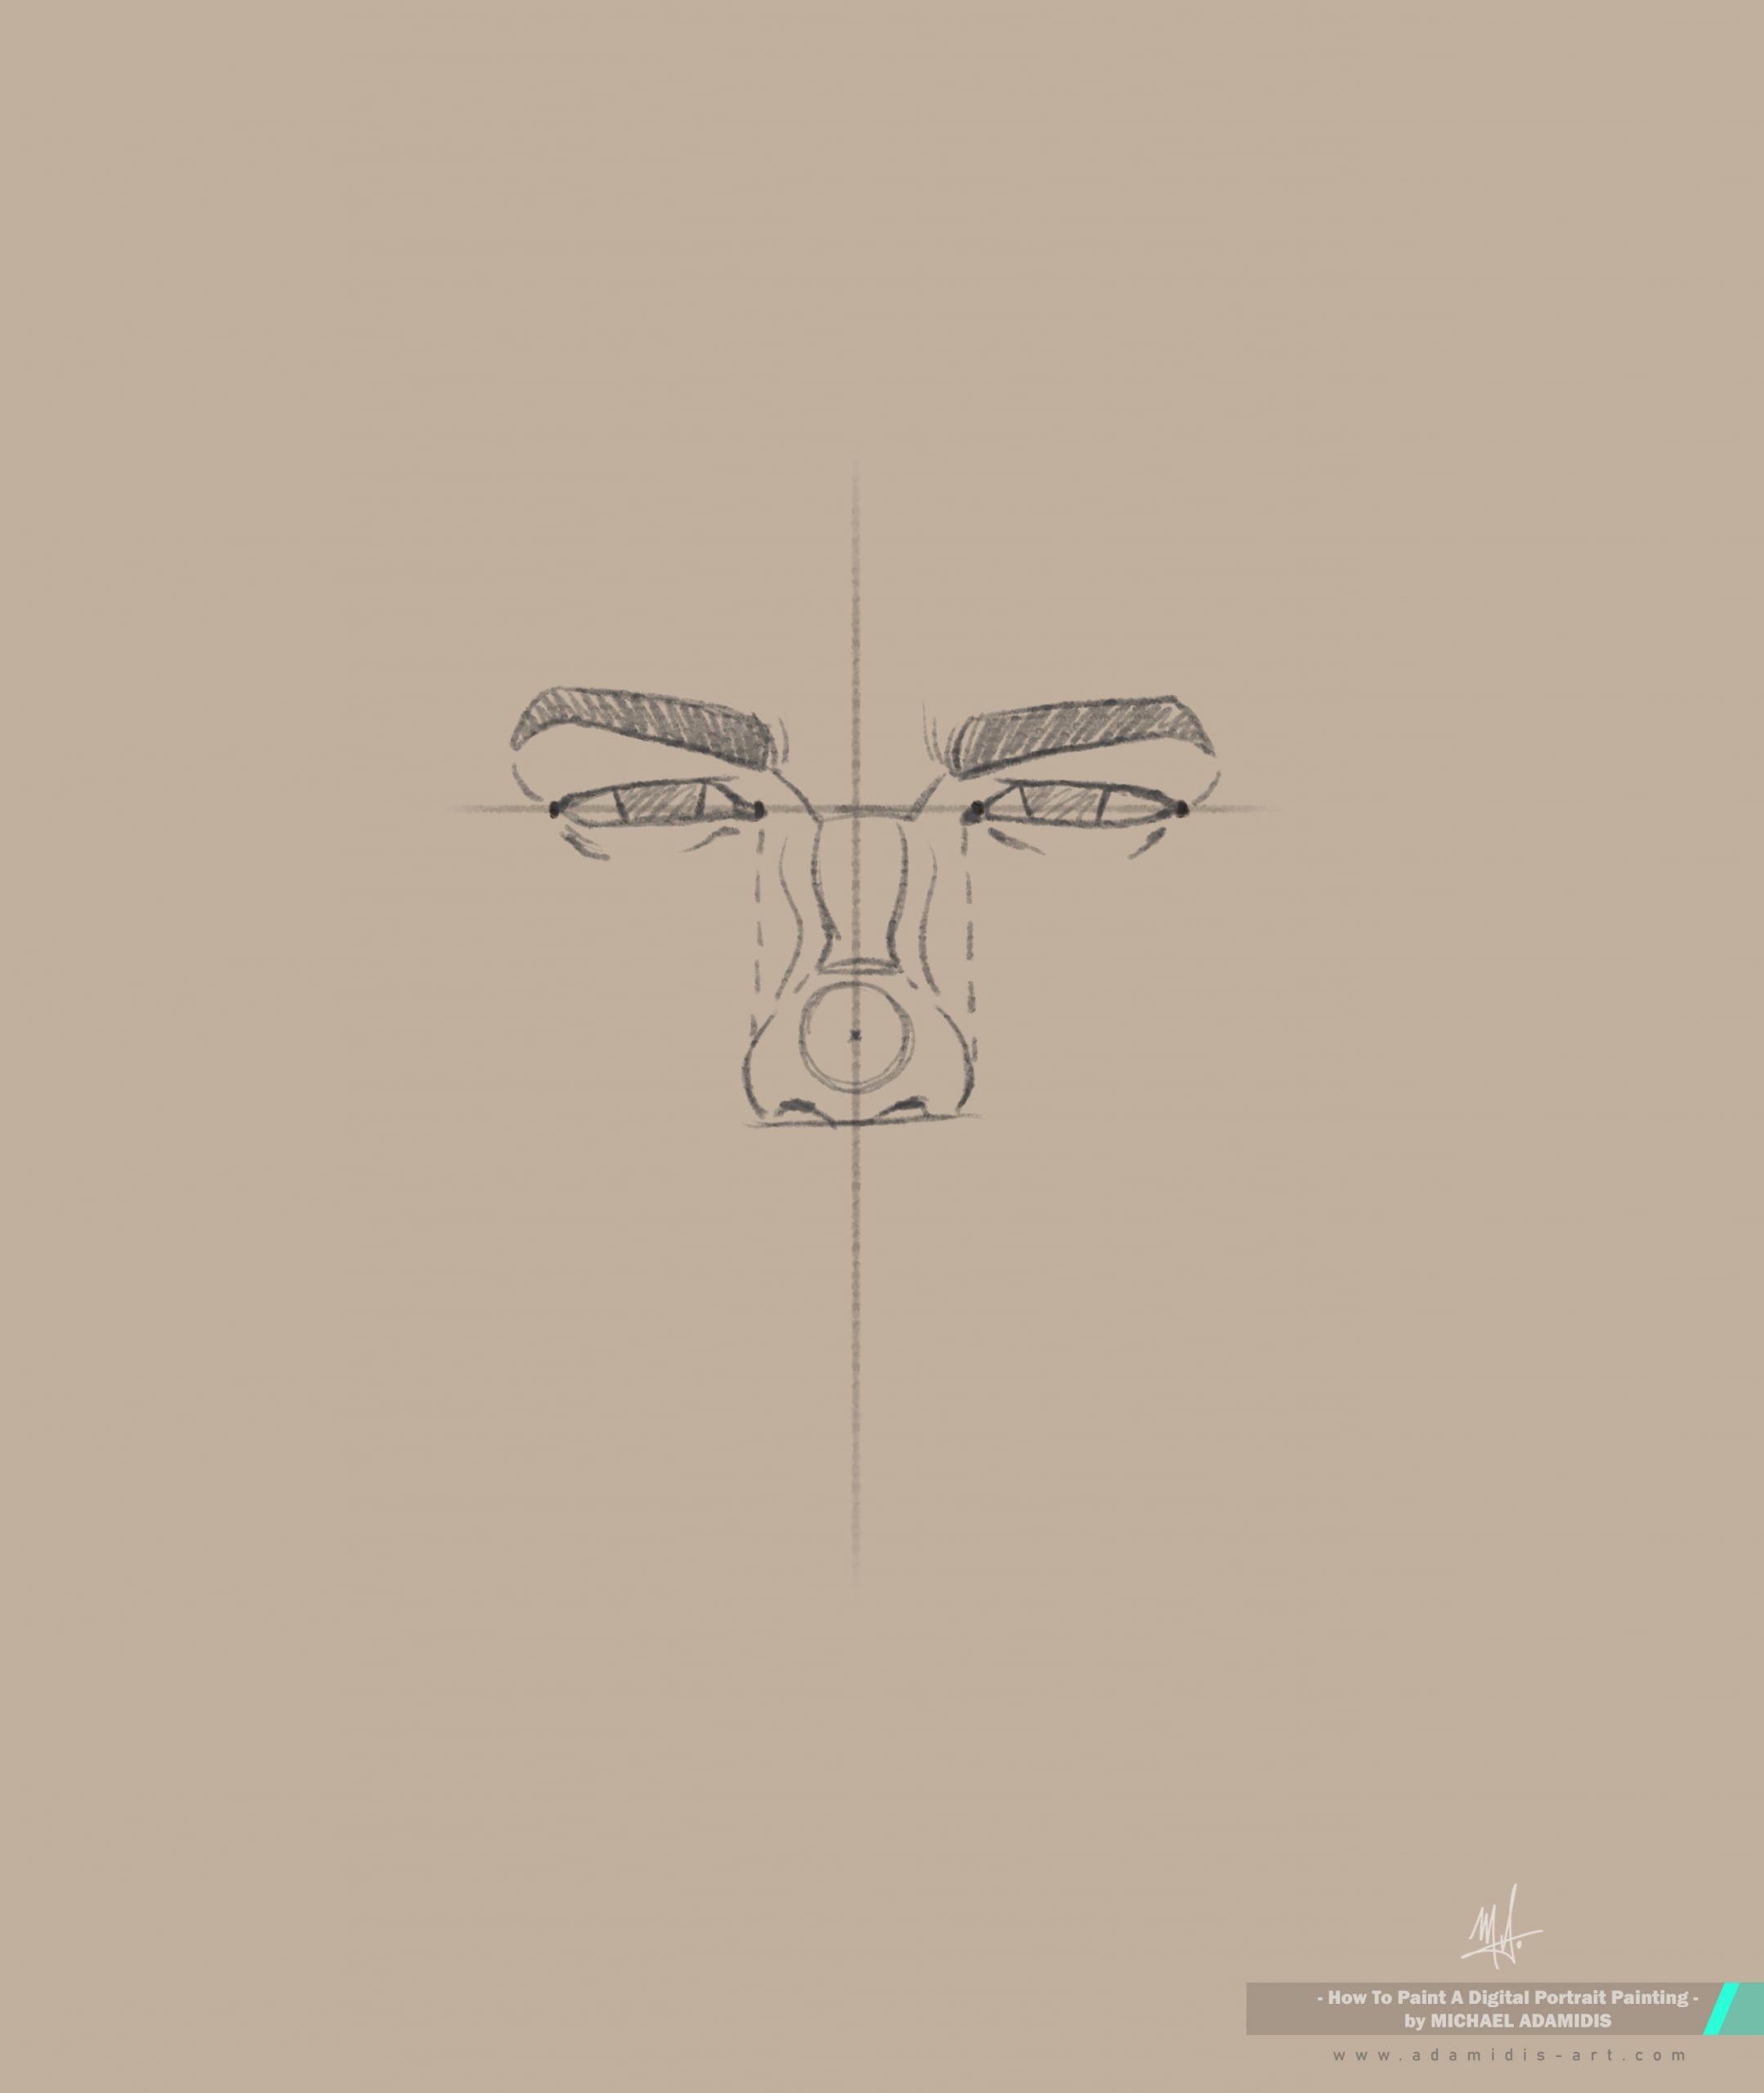
Next, find the side edges of the nose. They are almost every time exactly on an imaginary vertical line straight down from the inner points of the eyes.
> Draw the nose and it’s main shape.
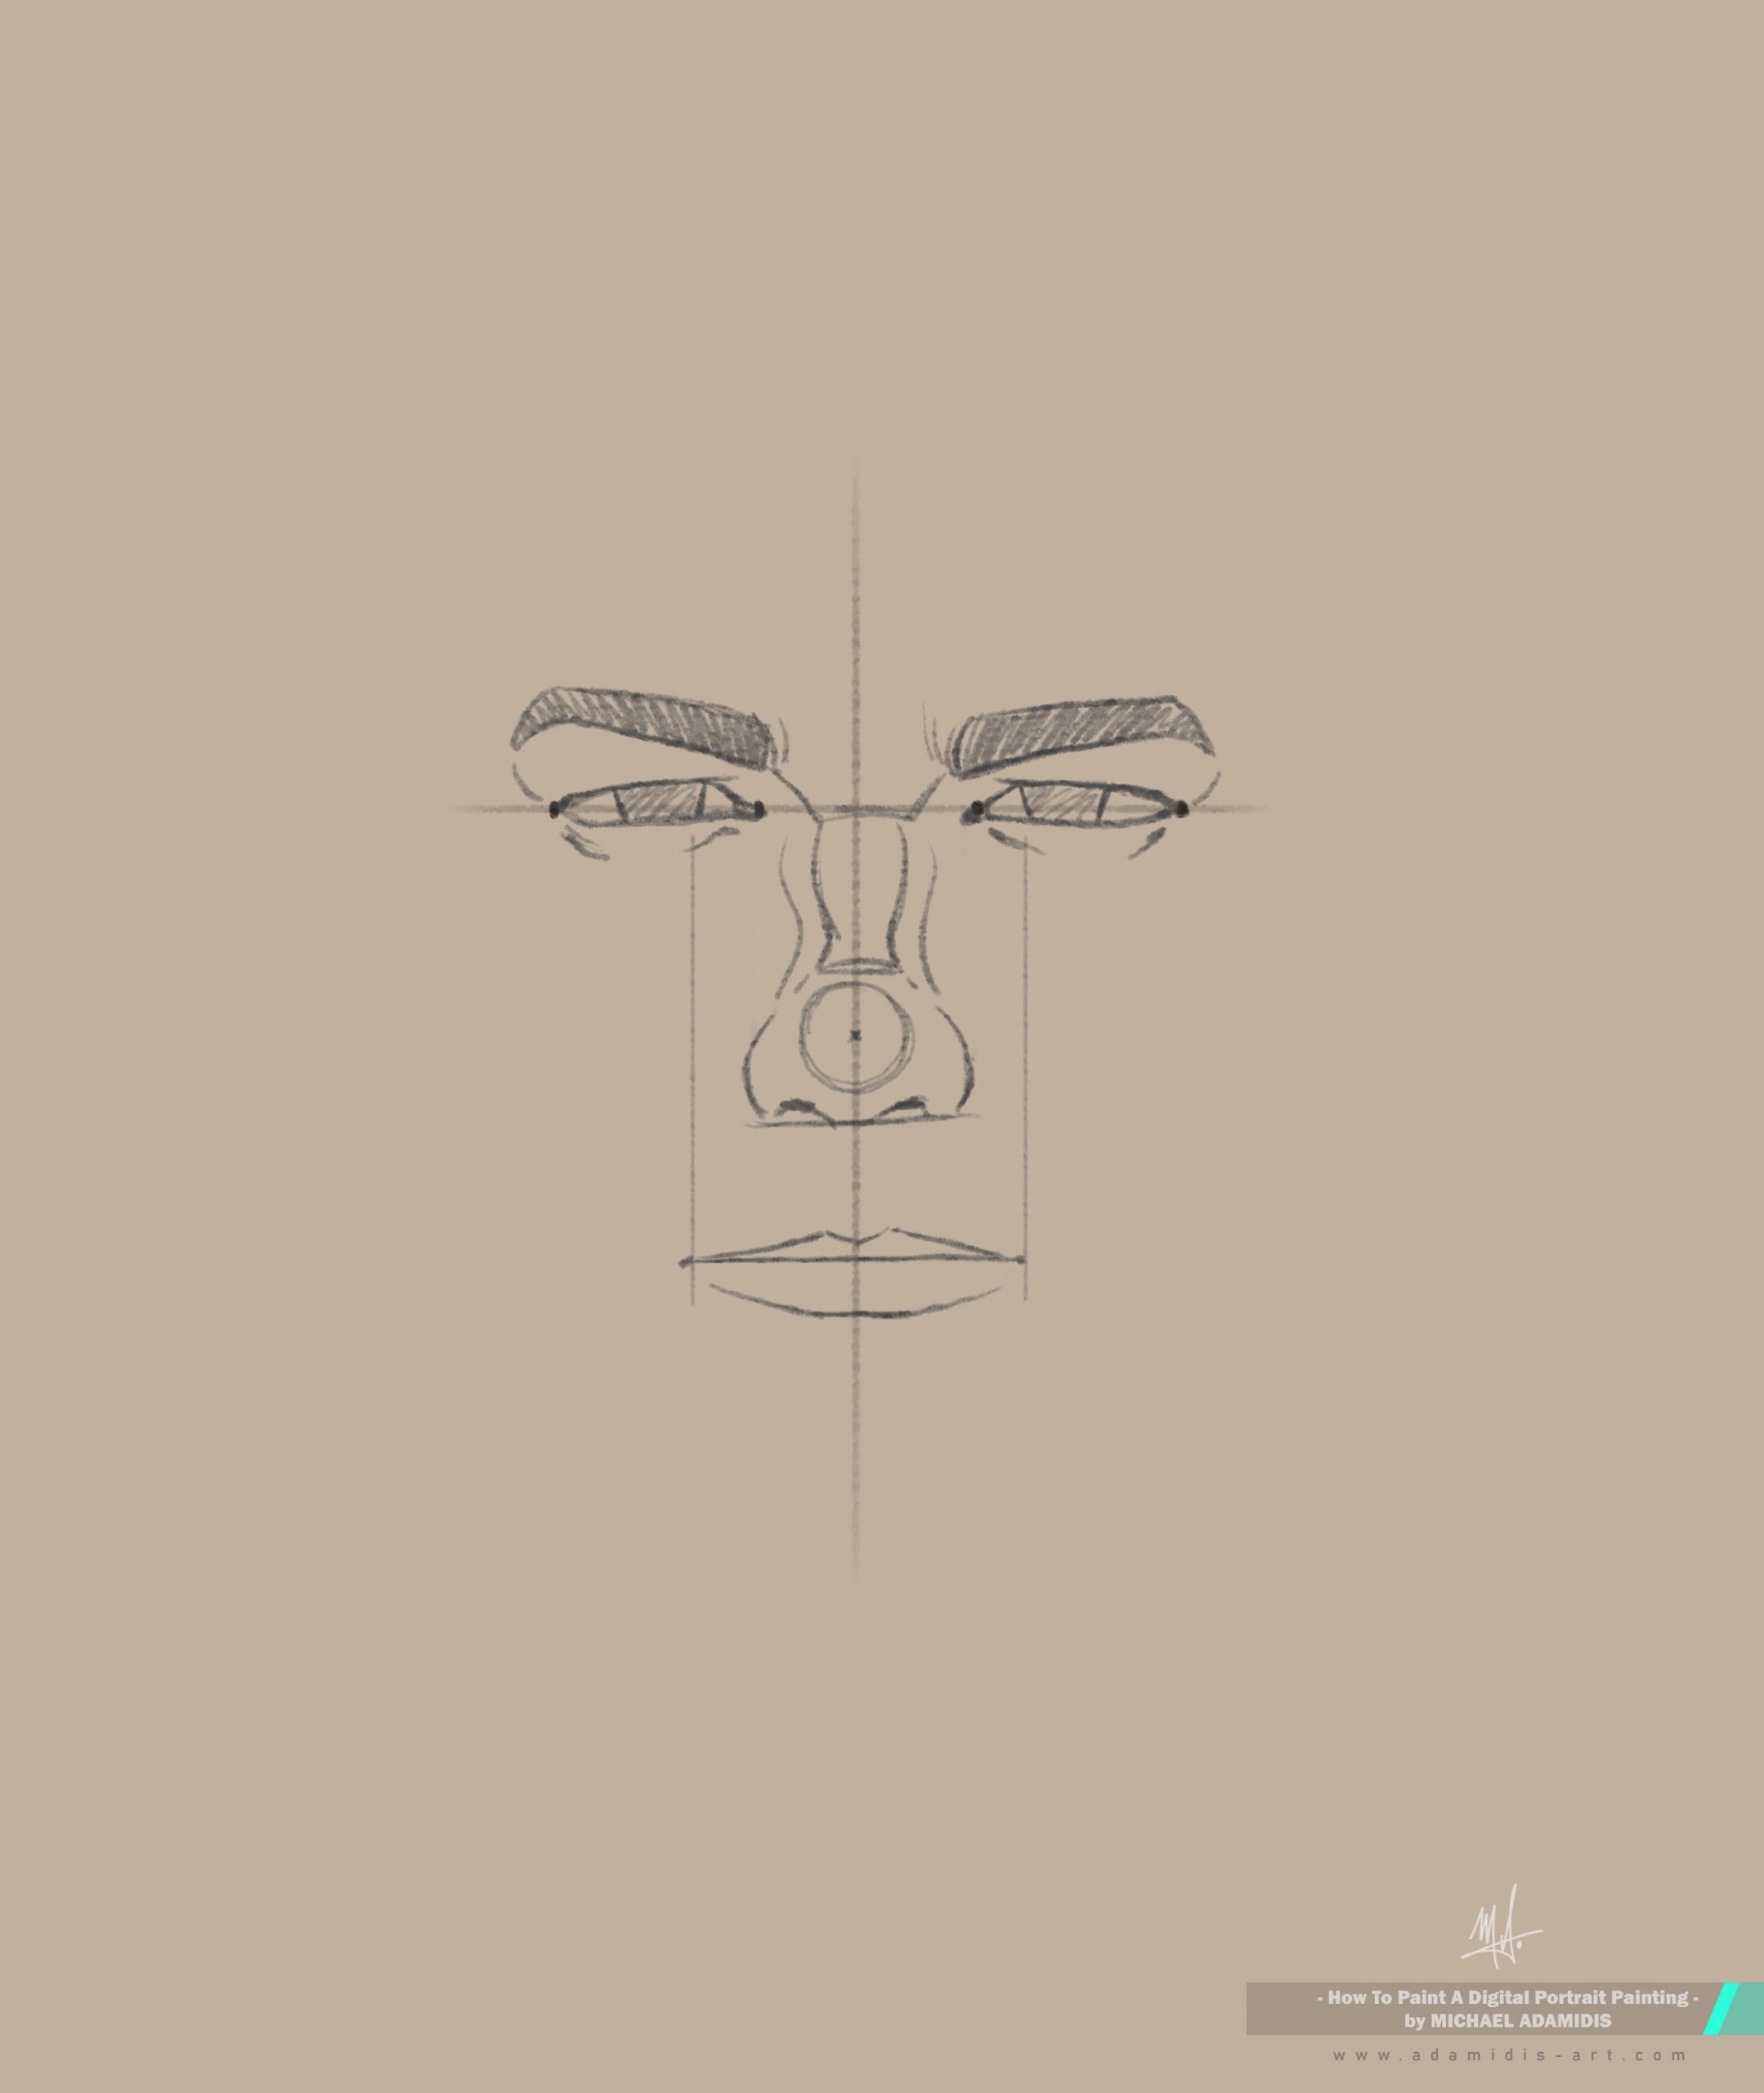
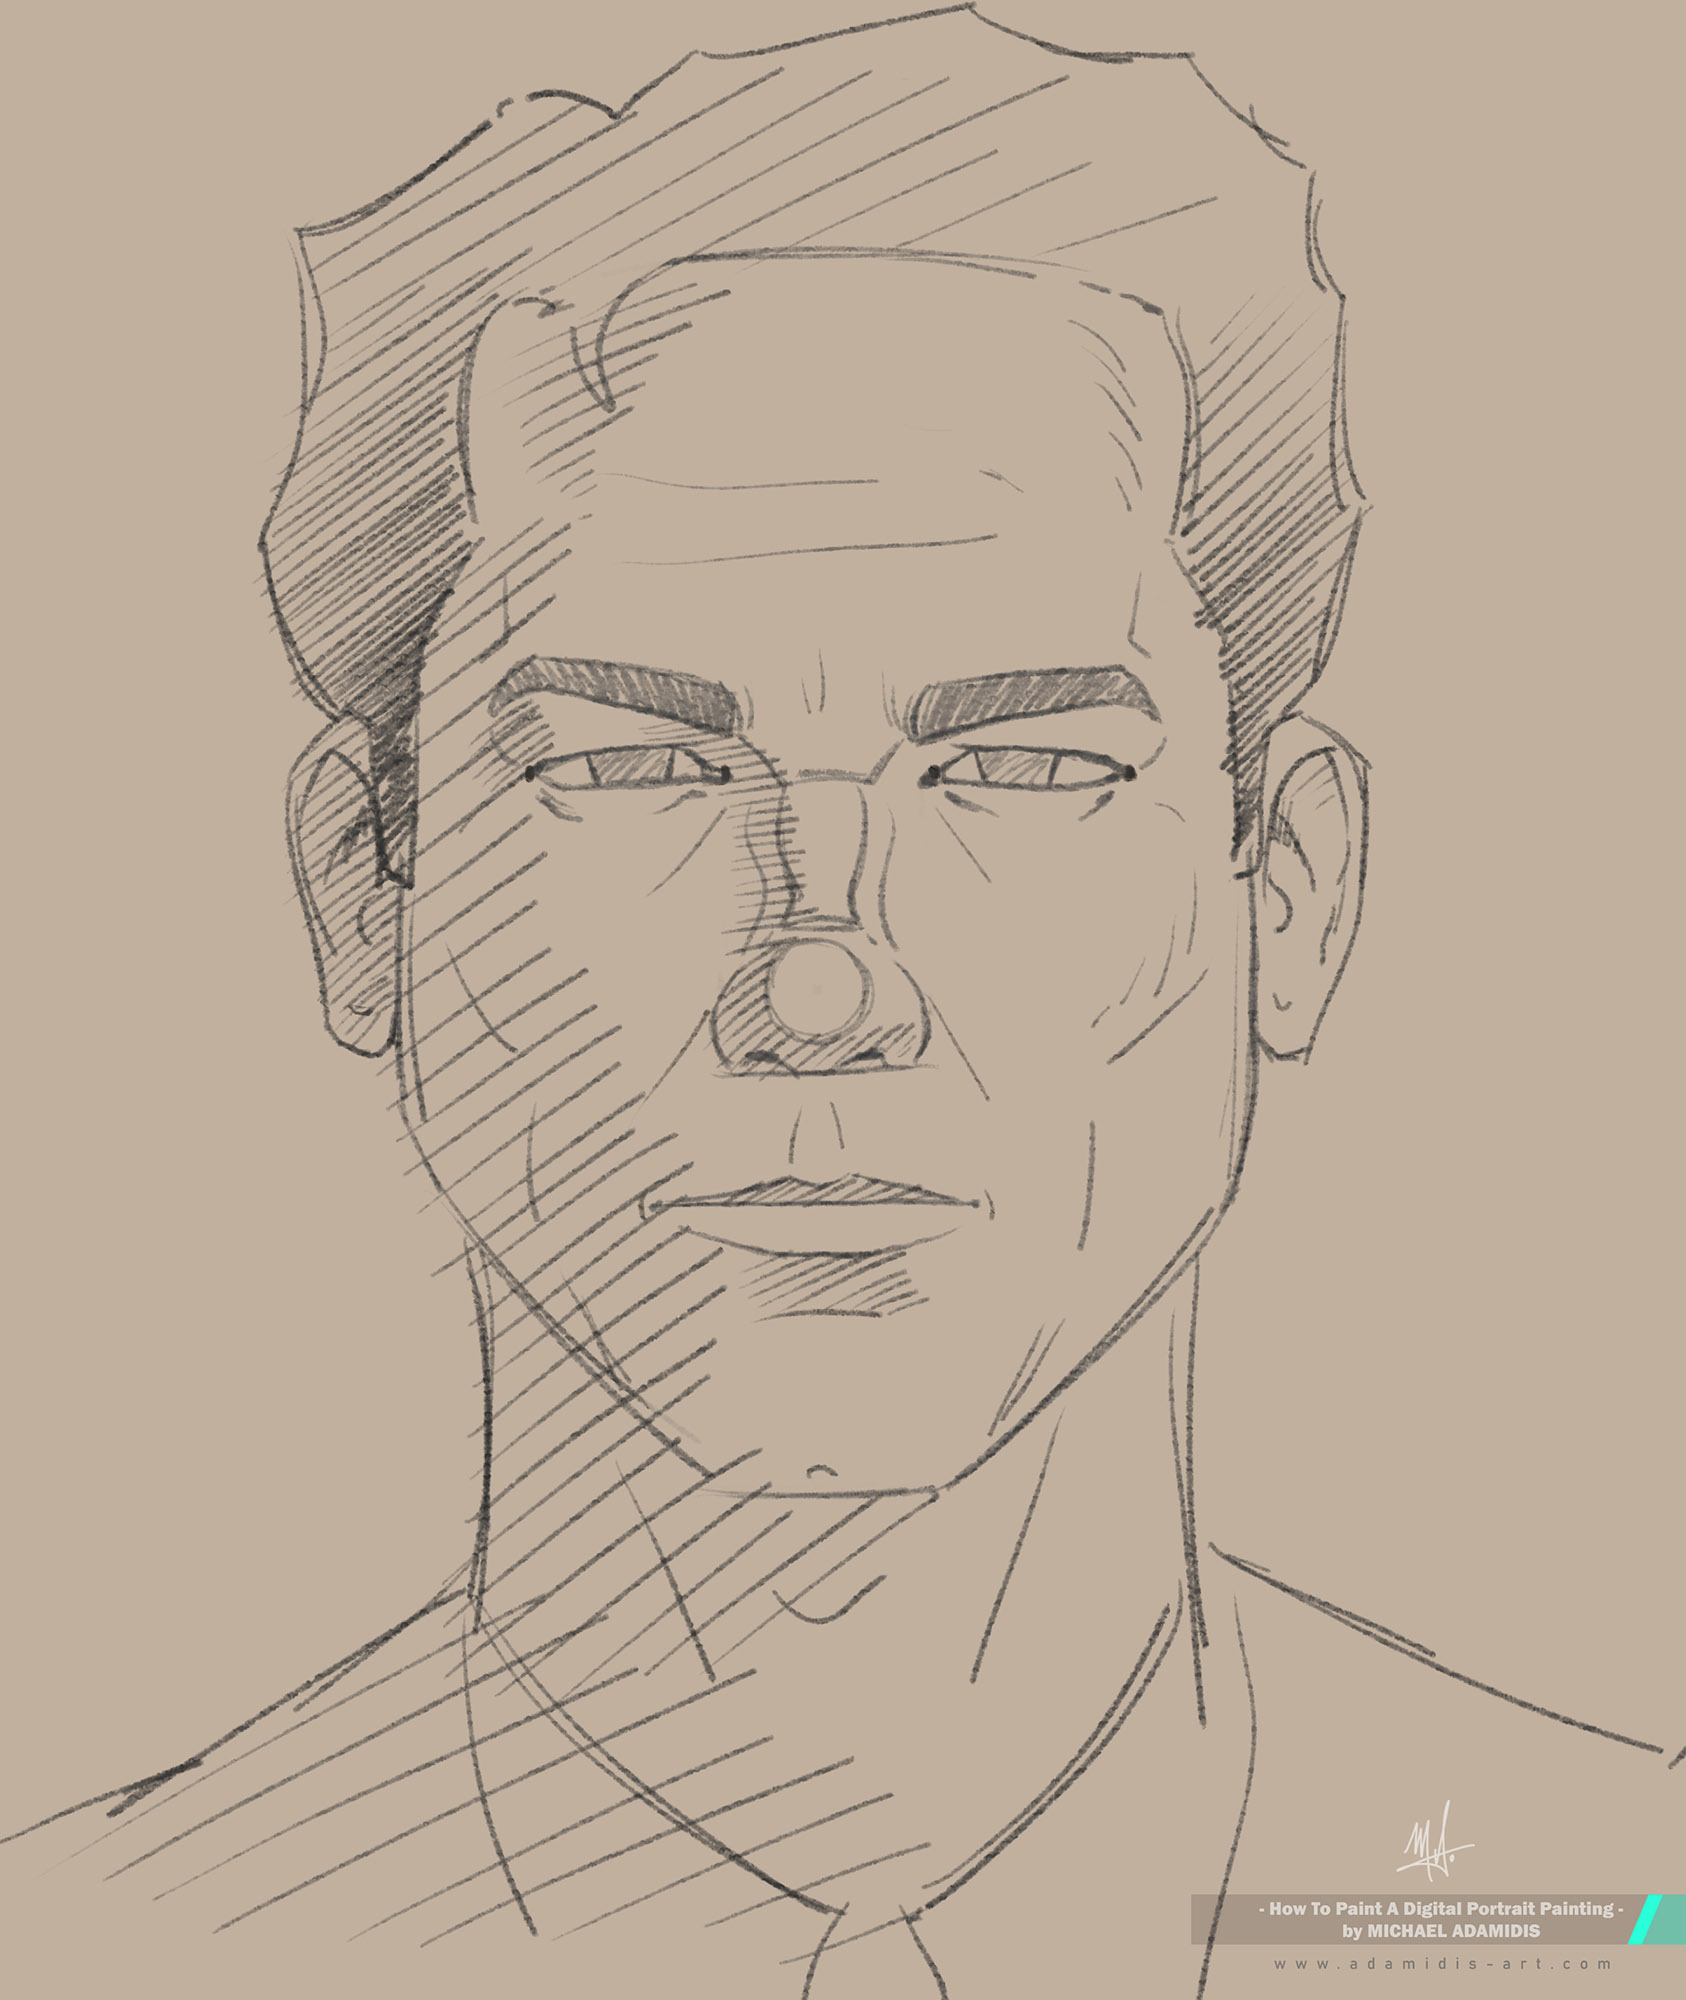
The mouth:
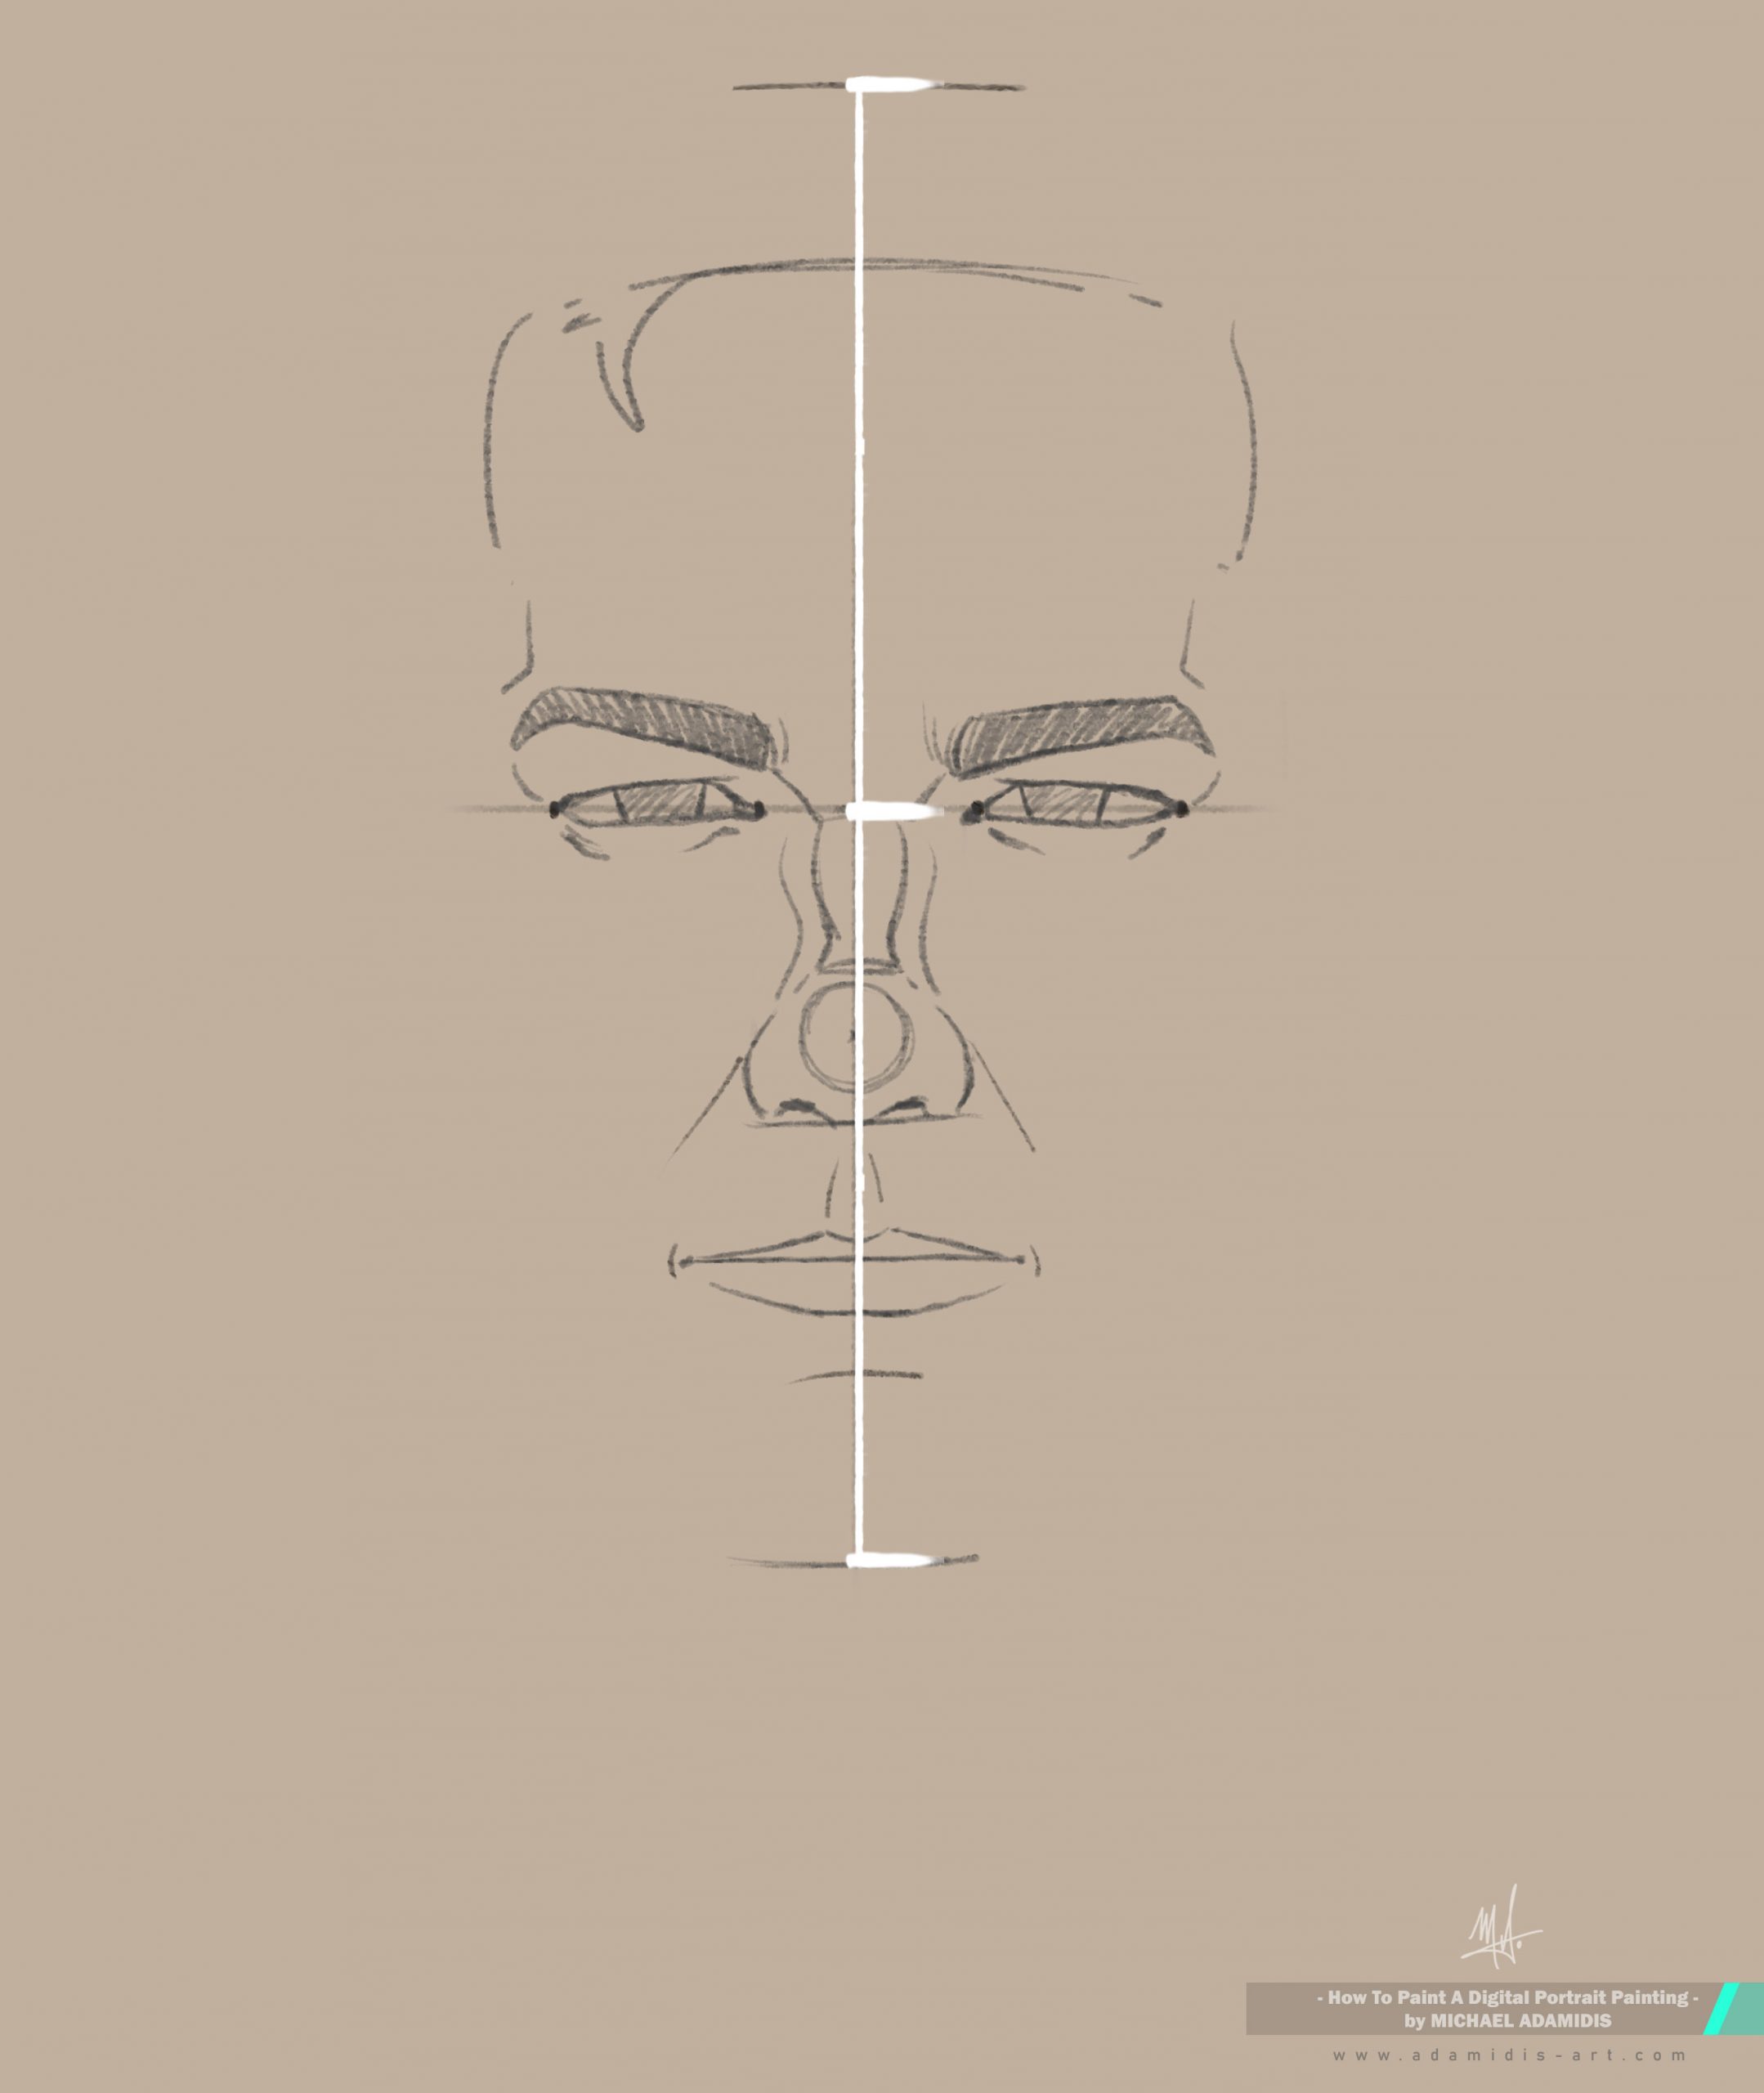
take this same length of the eye and go from the tip of the nose down to find the middle line of the mouth!
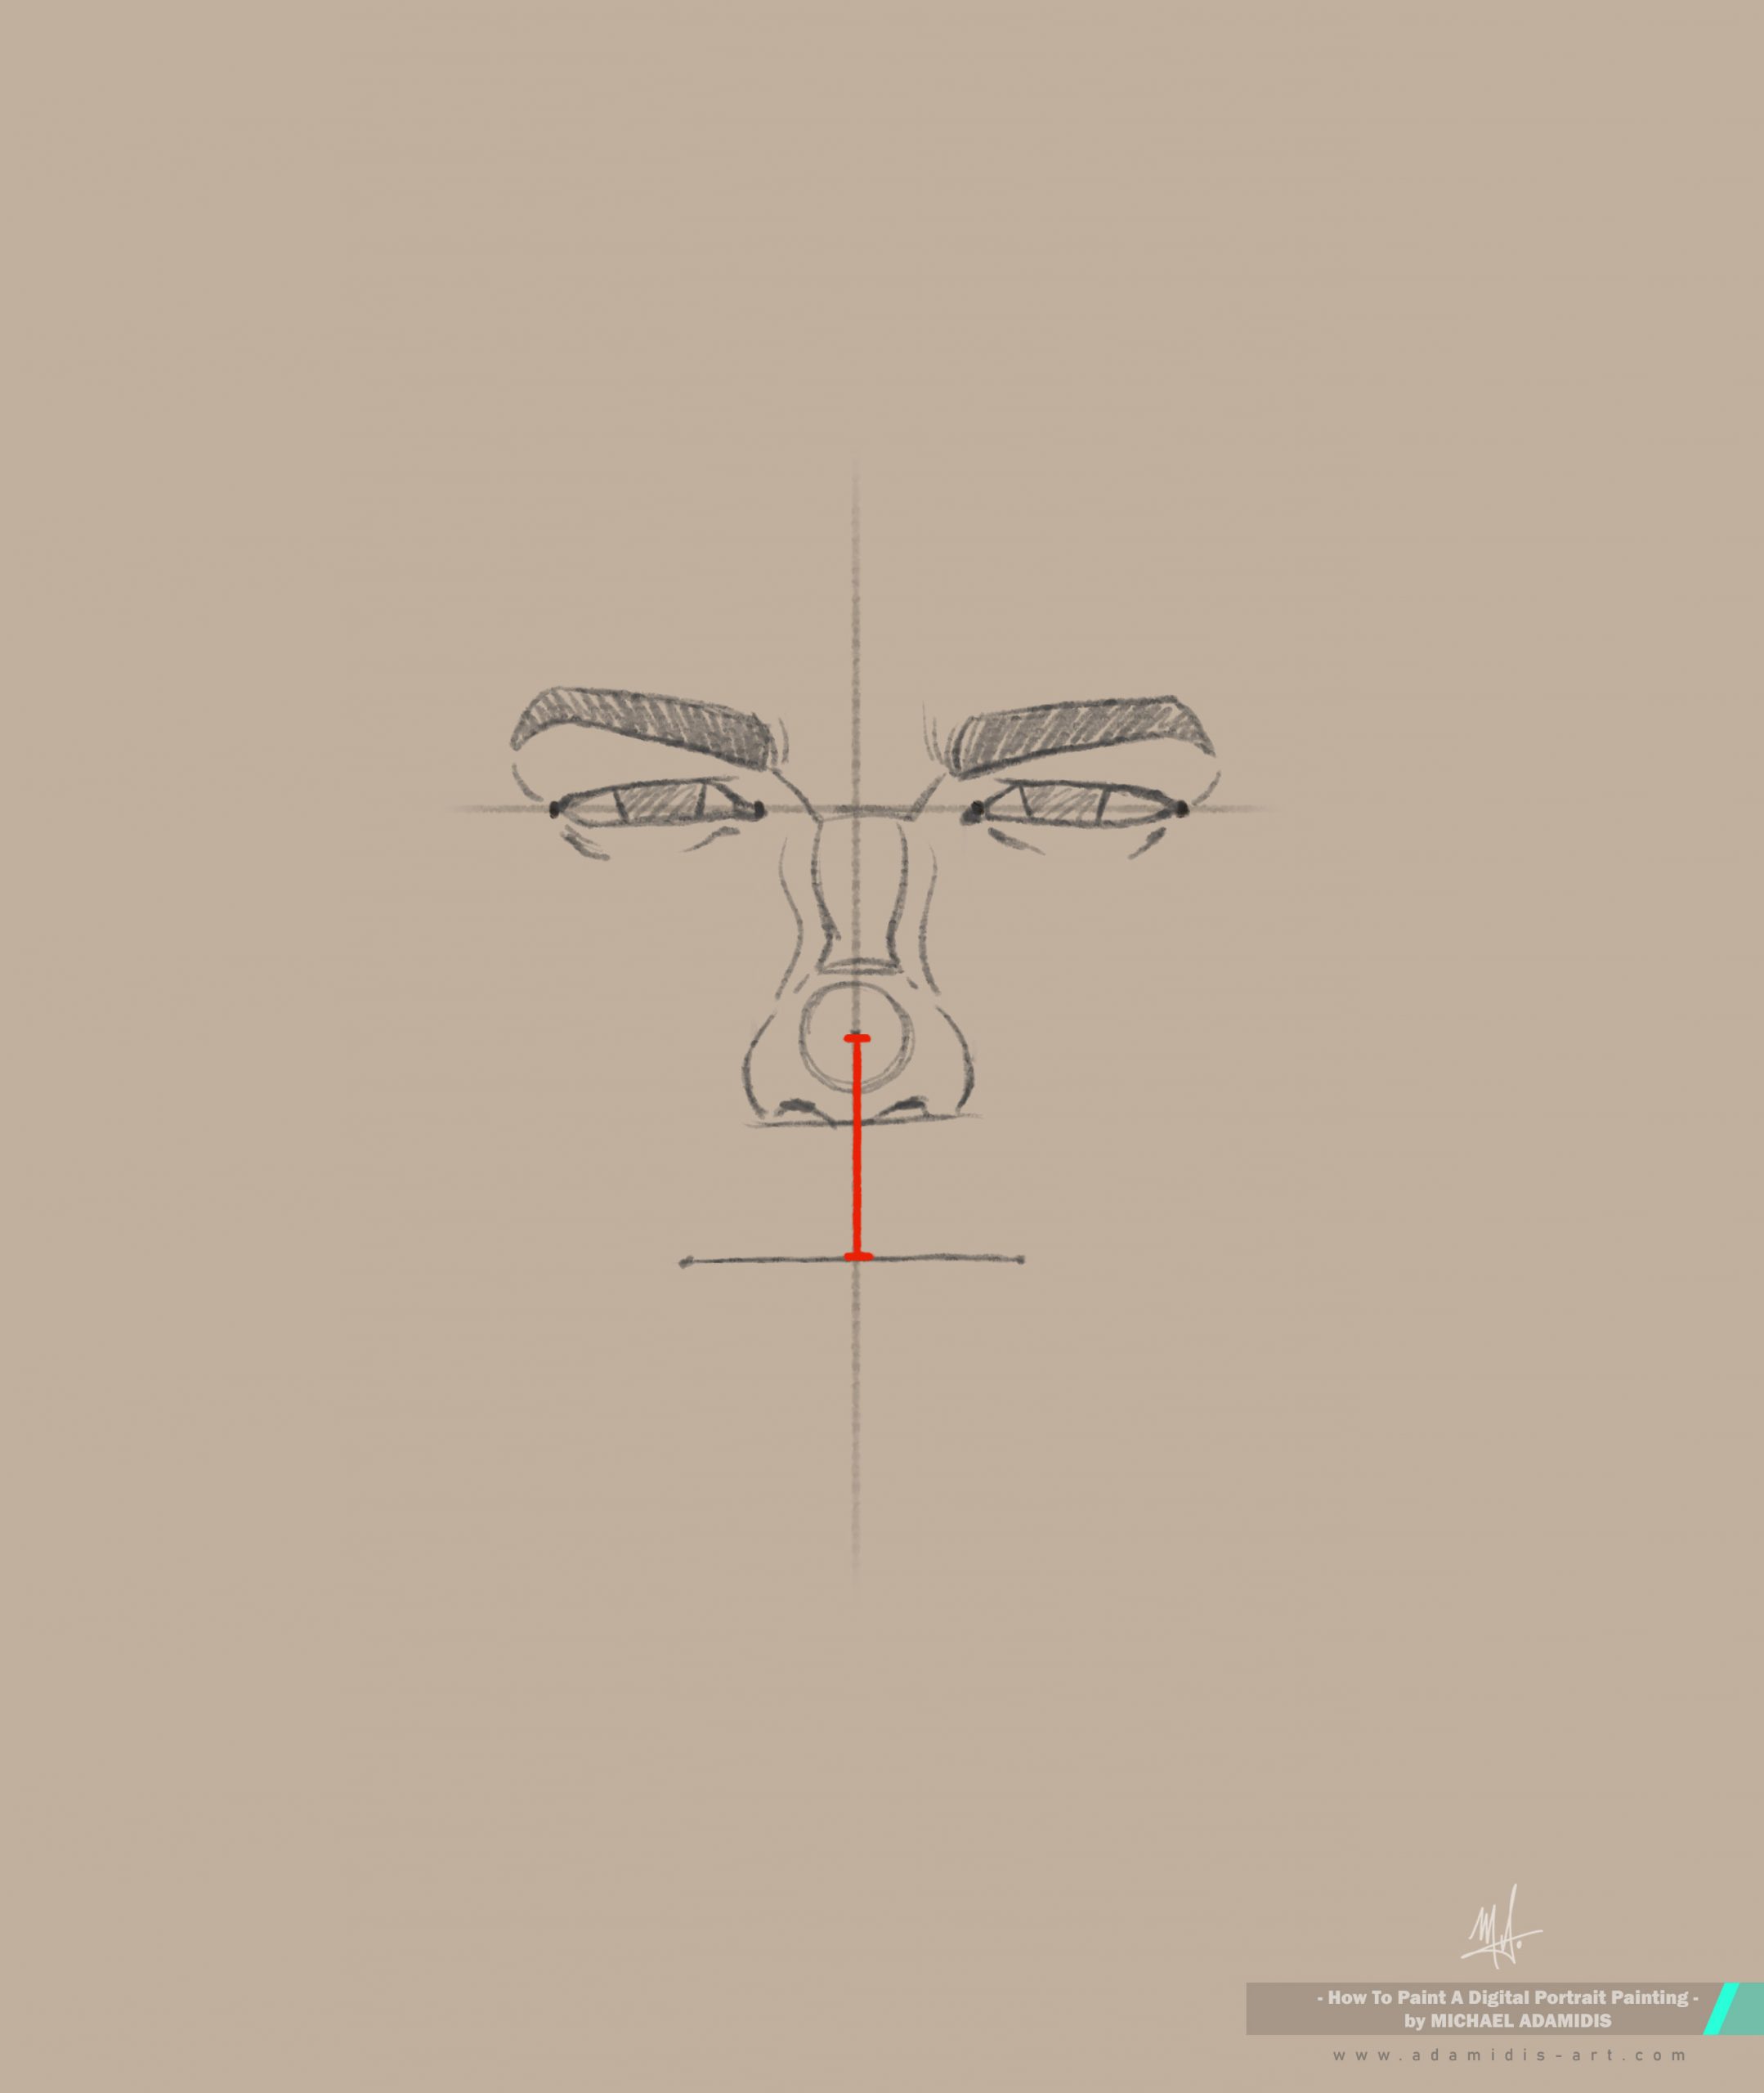
The end points of the sides of the mouth are very often on the vertical line down from the iris of the eyes. Find the right spot accordingly to your reference face.
> Now draw the mouth by defining the lips.
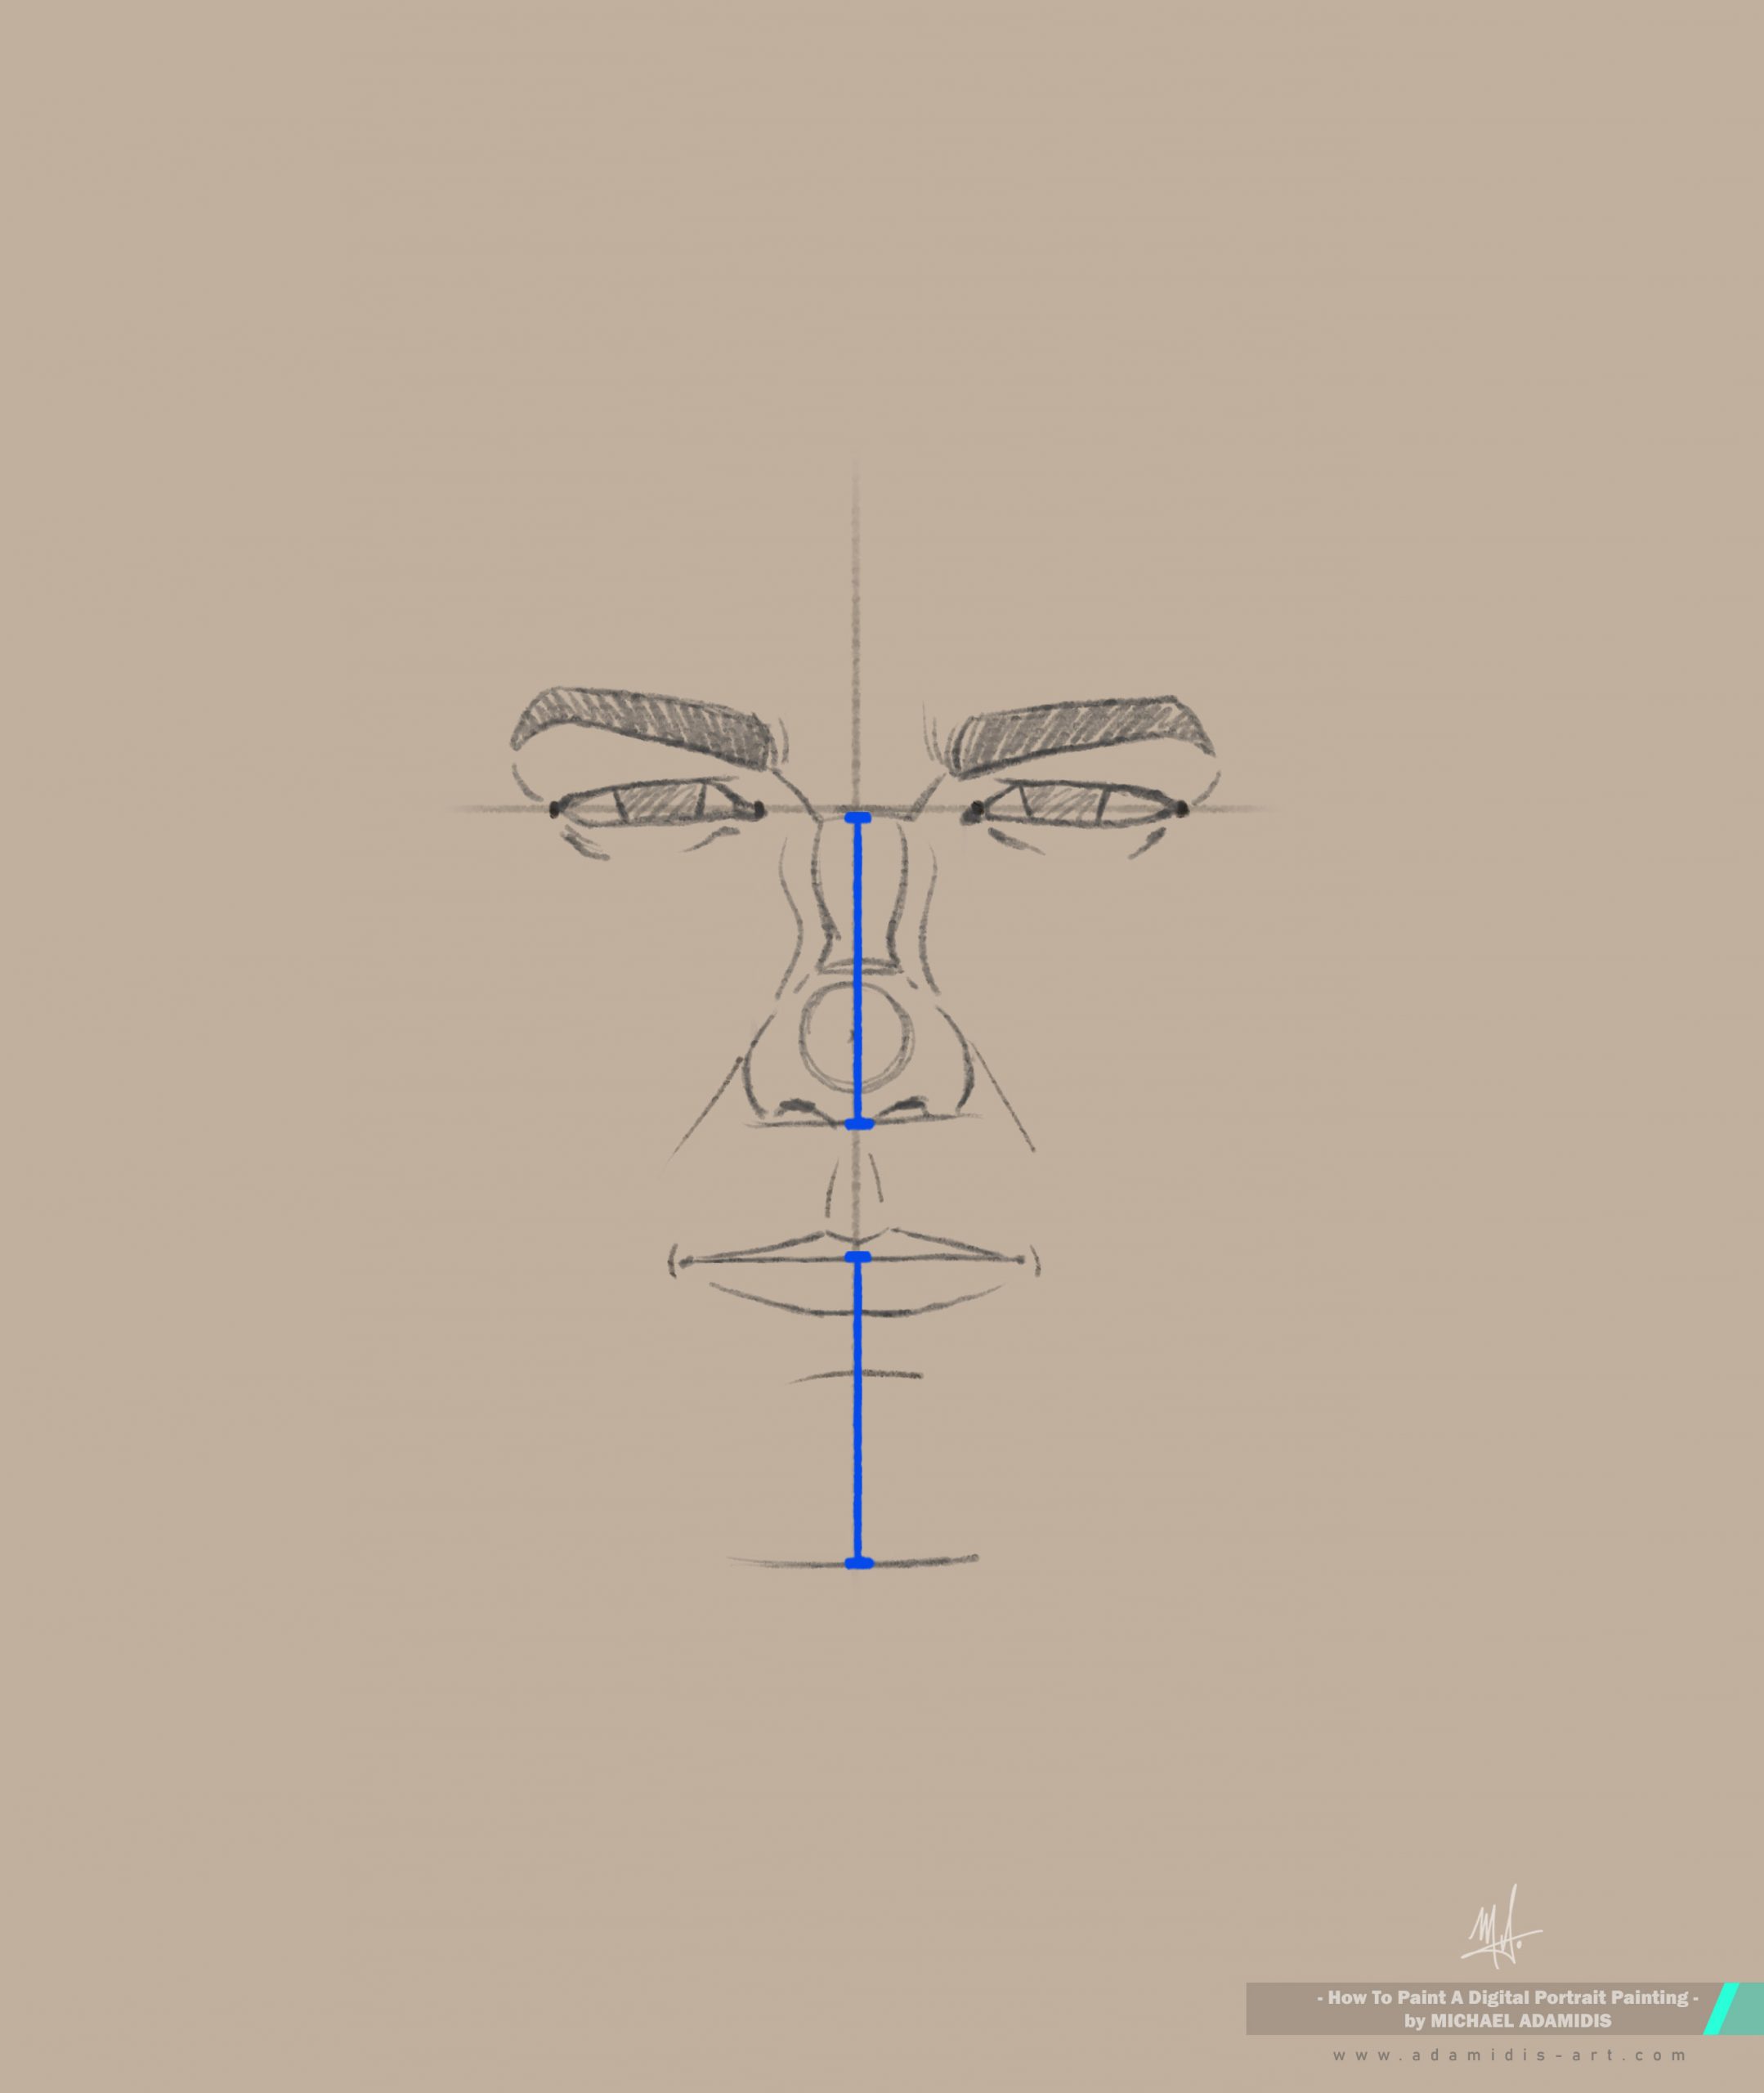
Spot the chin:
Take the eye length again, start from the end of the lower lip and go down, and you have the ending line of the front chin of the face.
Check also this alternative to find the chin line could be (better solution!):
Take the length from the eye line to the end of the nose (not the nose tip!) to define the distance from the mouth to the chin.
This again is just a rule of thumbs. Check always the real distances and proportions of the face twice and go with your scientific result.
Next, take the length of the mouth to the chin and use it to measure the distance from the eyebrows to the hairline.
The basic very helpful rule here is: chin to mouth, mouth to eyebrow, eyebrow to hairline = 1/3 + 1/3 + 1/3!
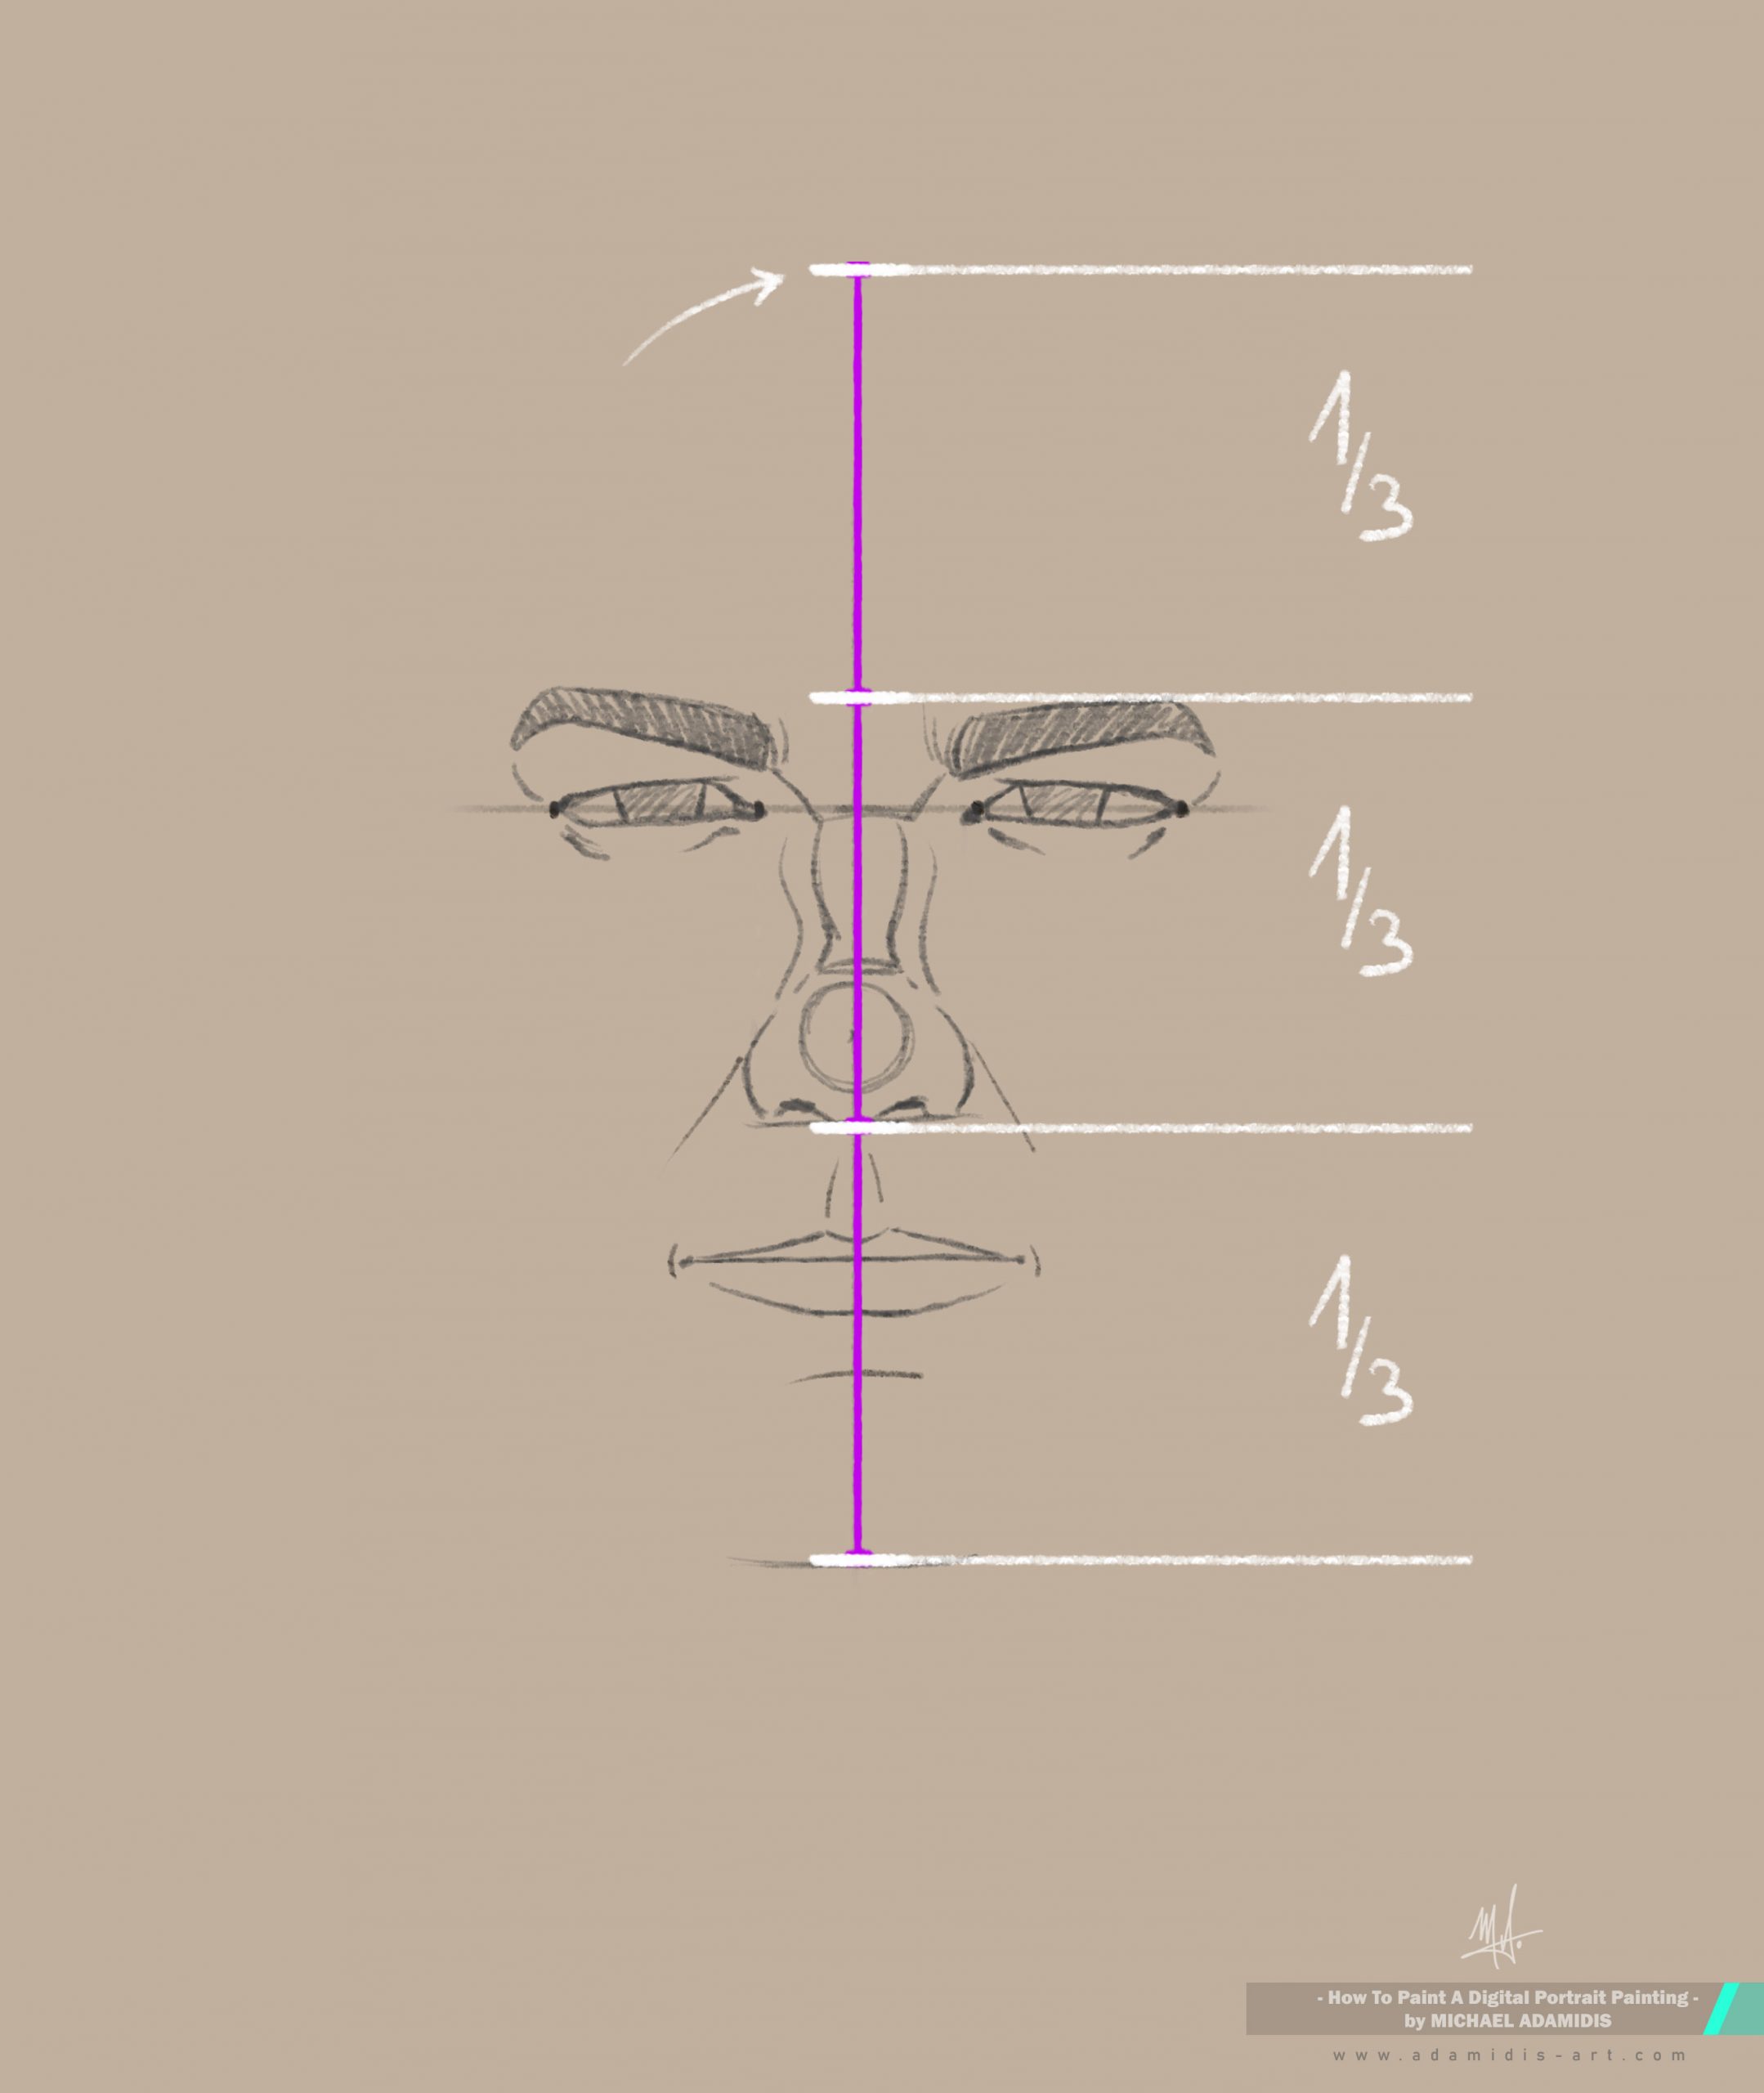
Now, if you take the distance from the chin line to the eyes, double it and find the upper end of the head.
Remember: The eyes are (often..) in the middle of the head.
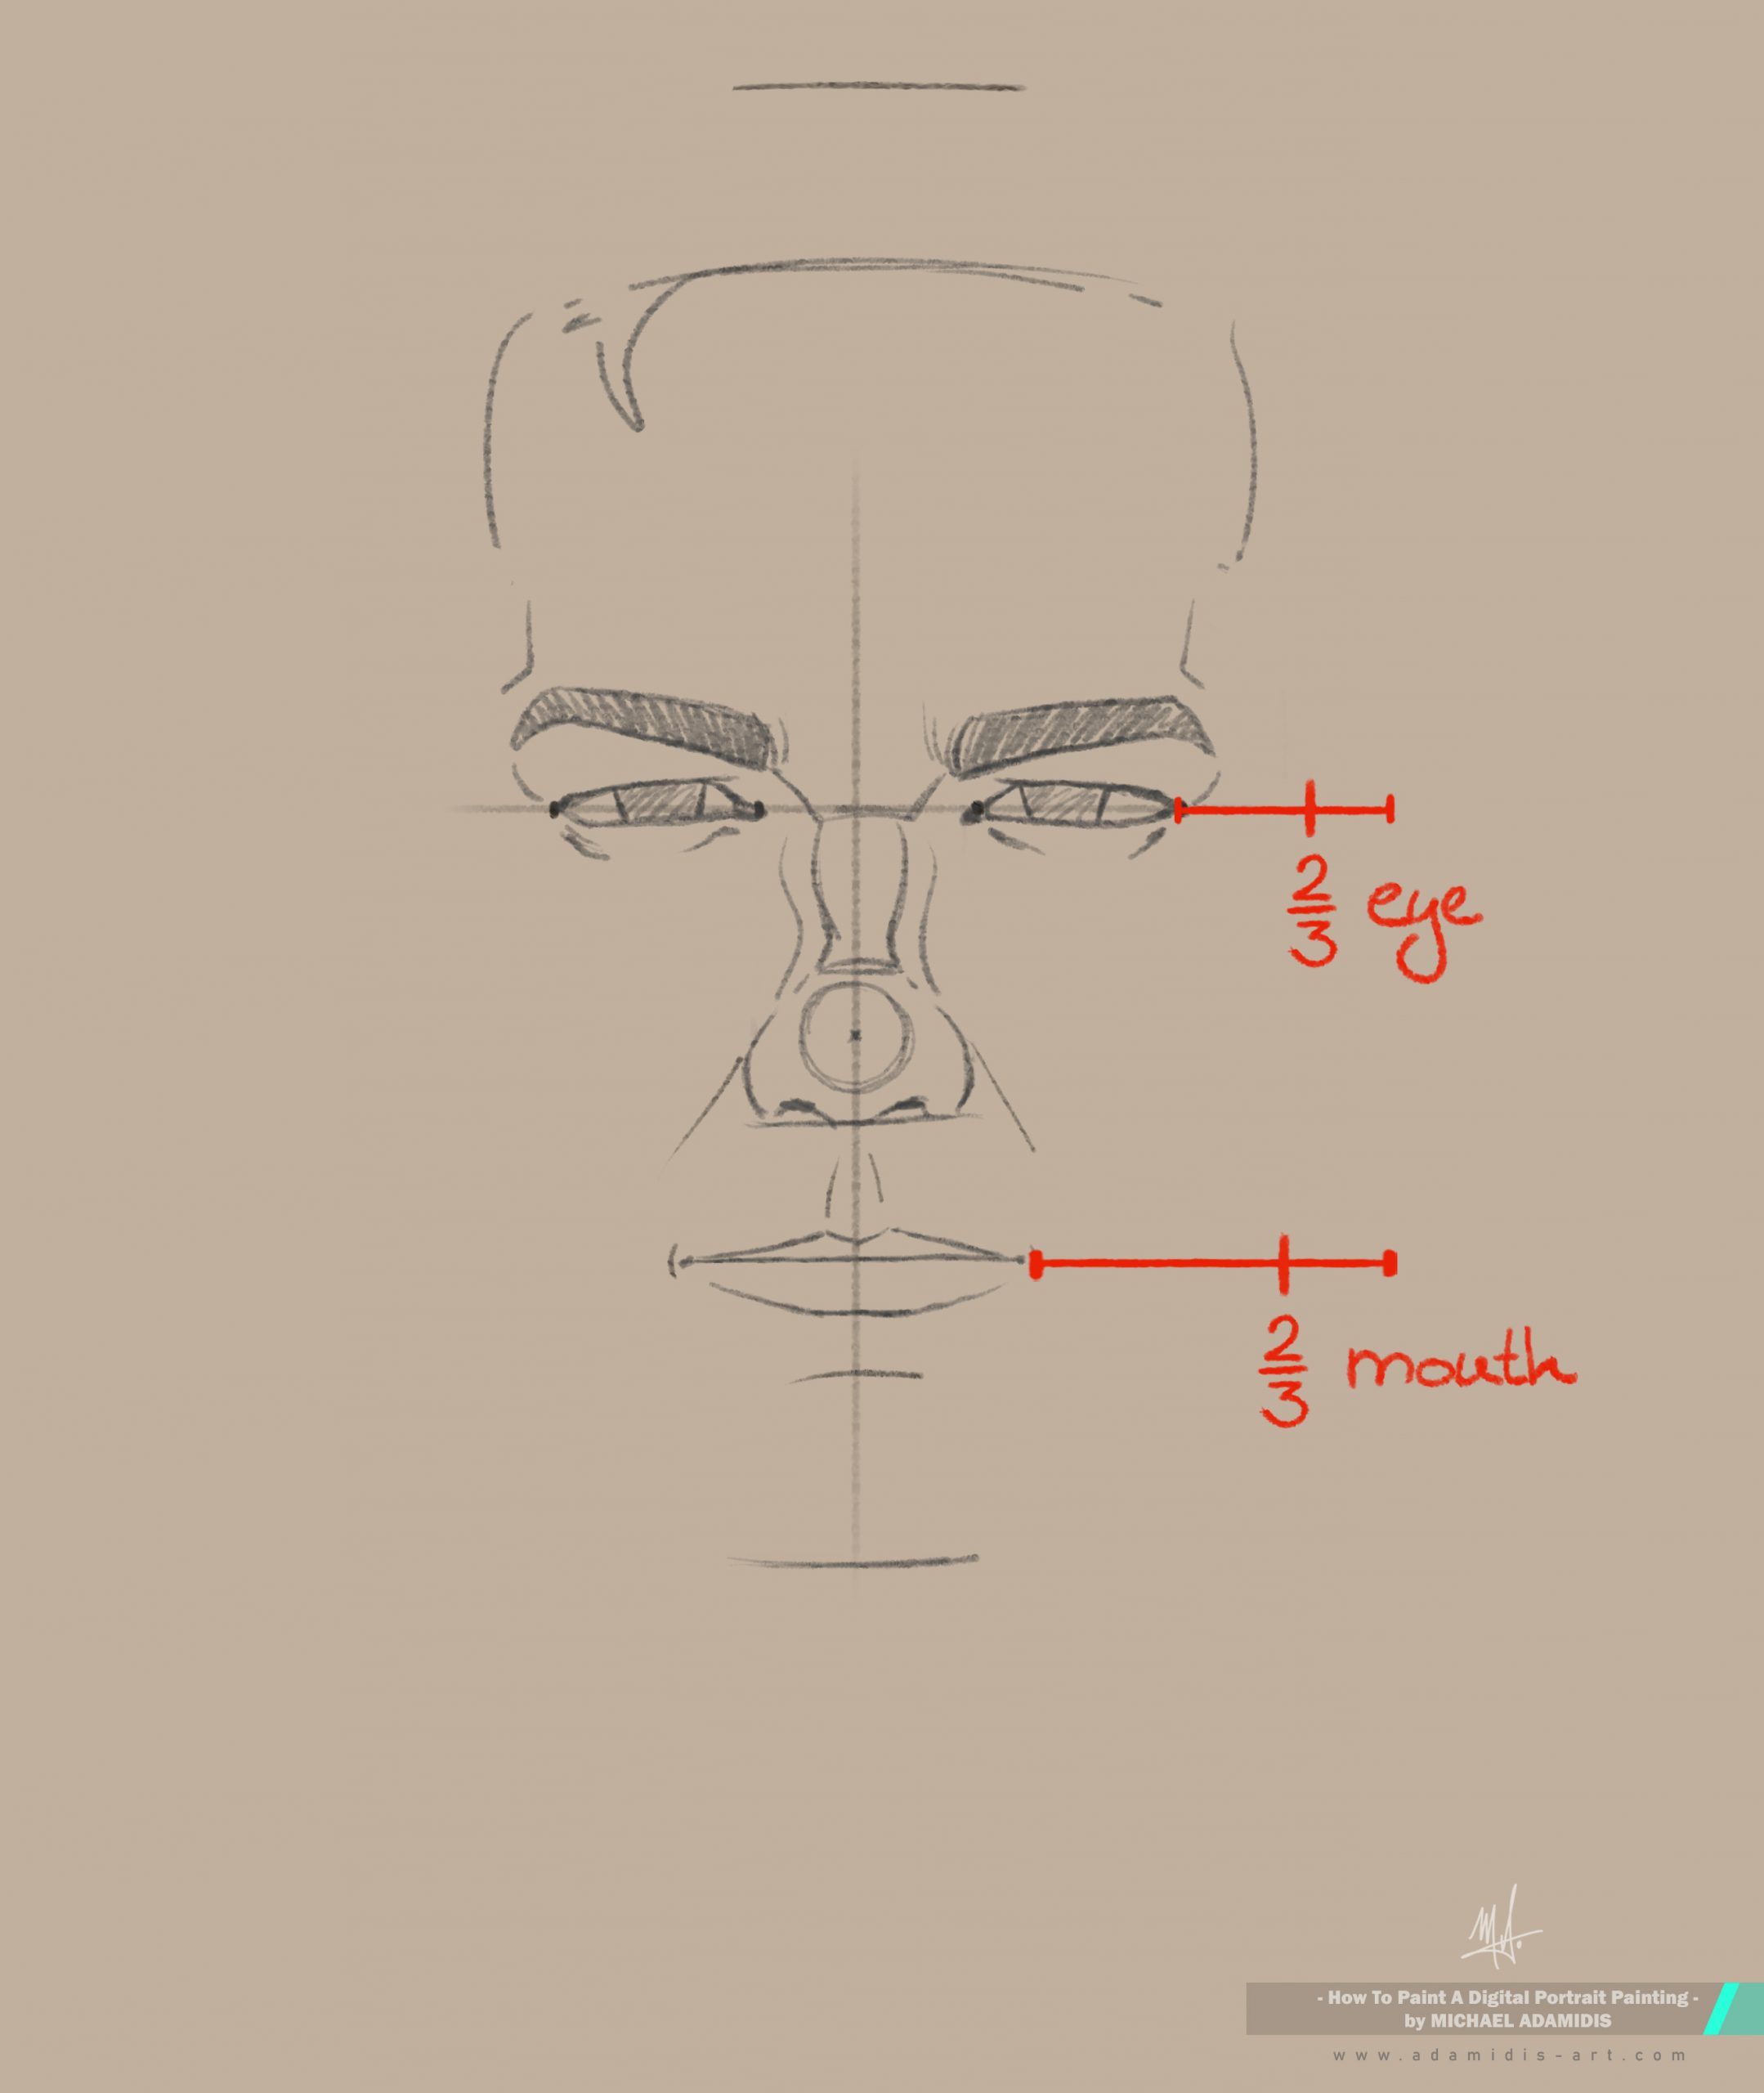
Here are two additional rules that can help you to find the outside lines.
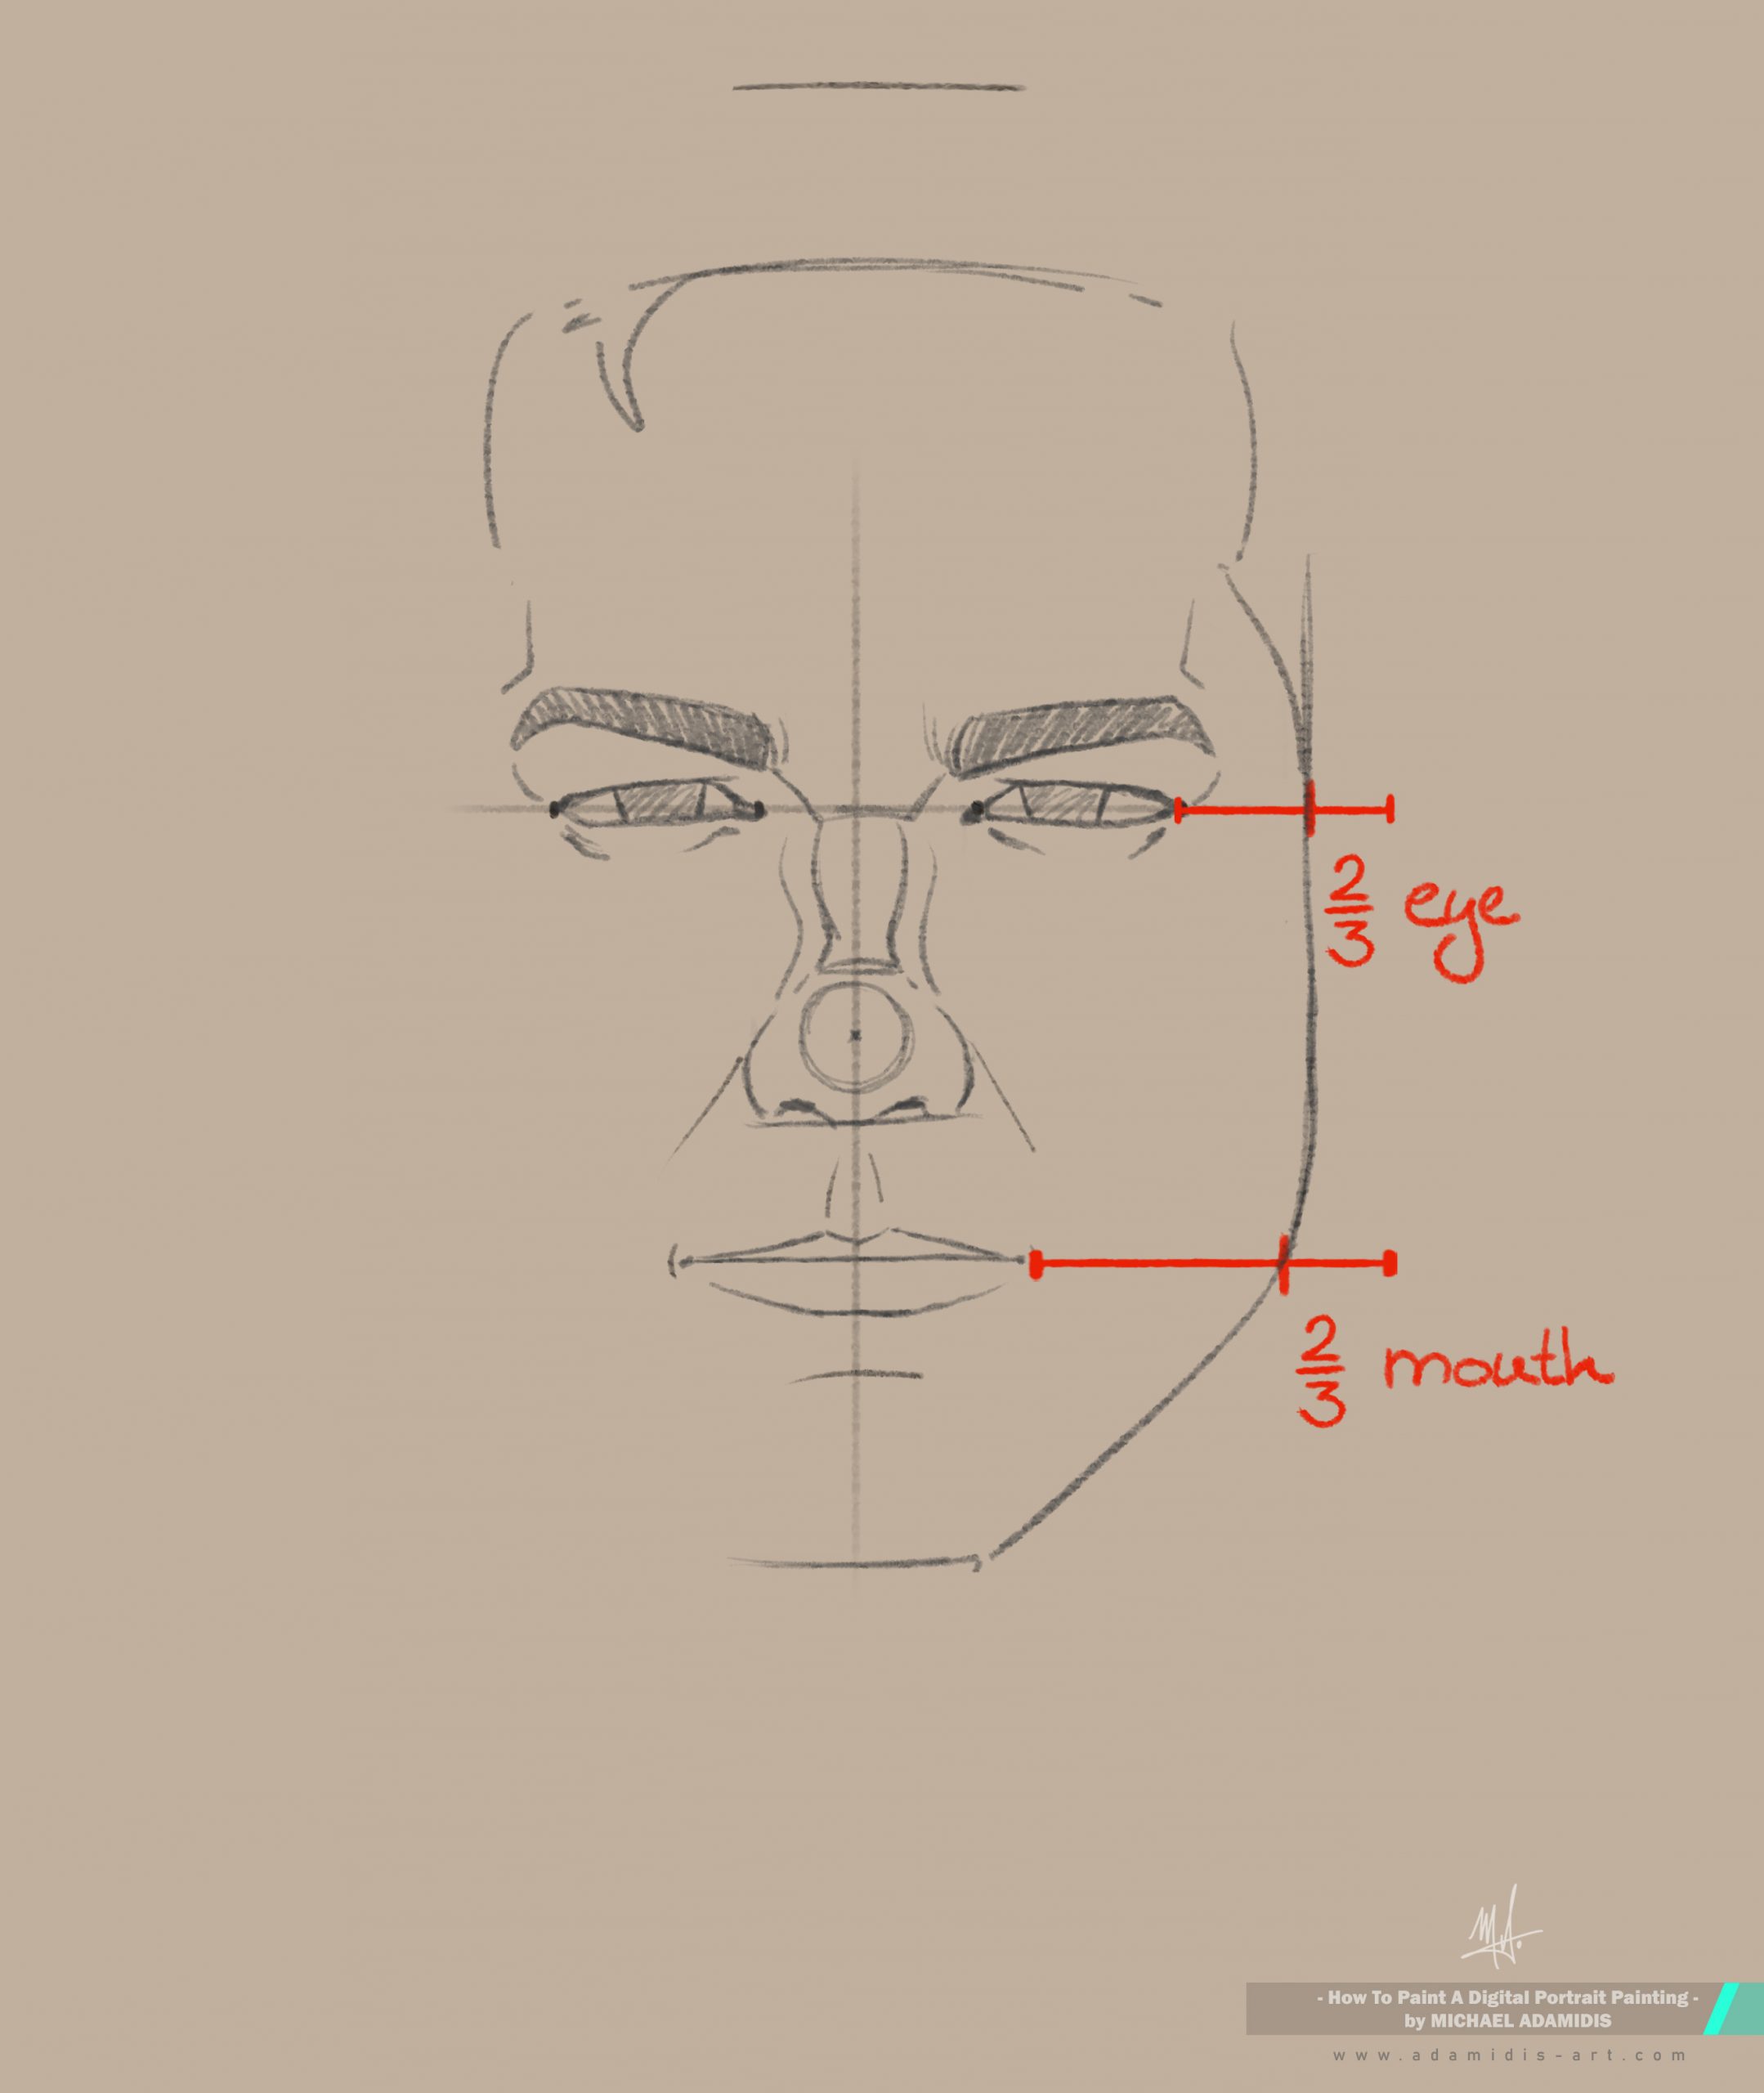
– Sometimes the end of the chin sides is exactly on that horizontal line from the mouth 2/3 mouth away from its corner (see the image).
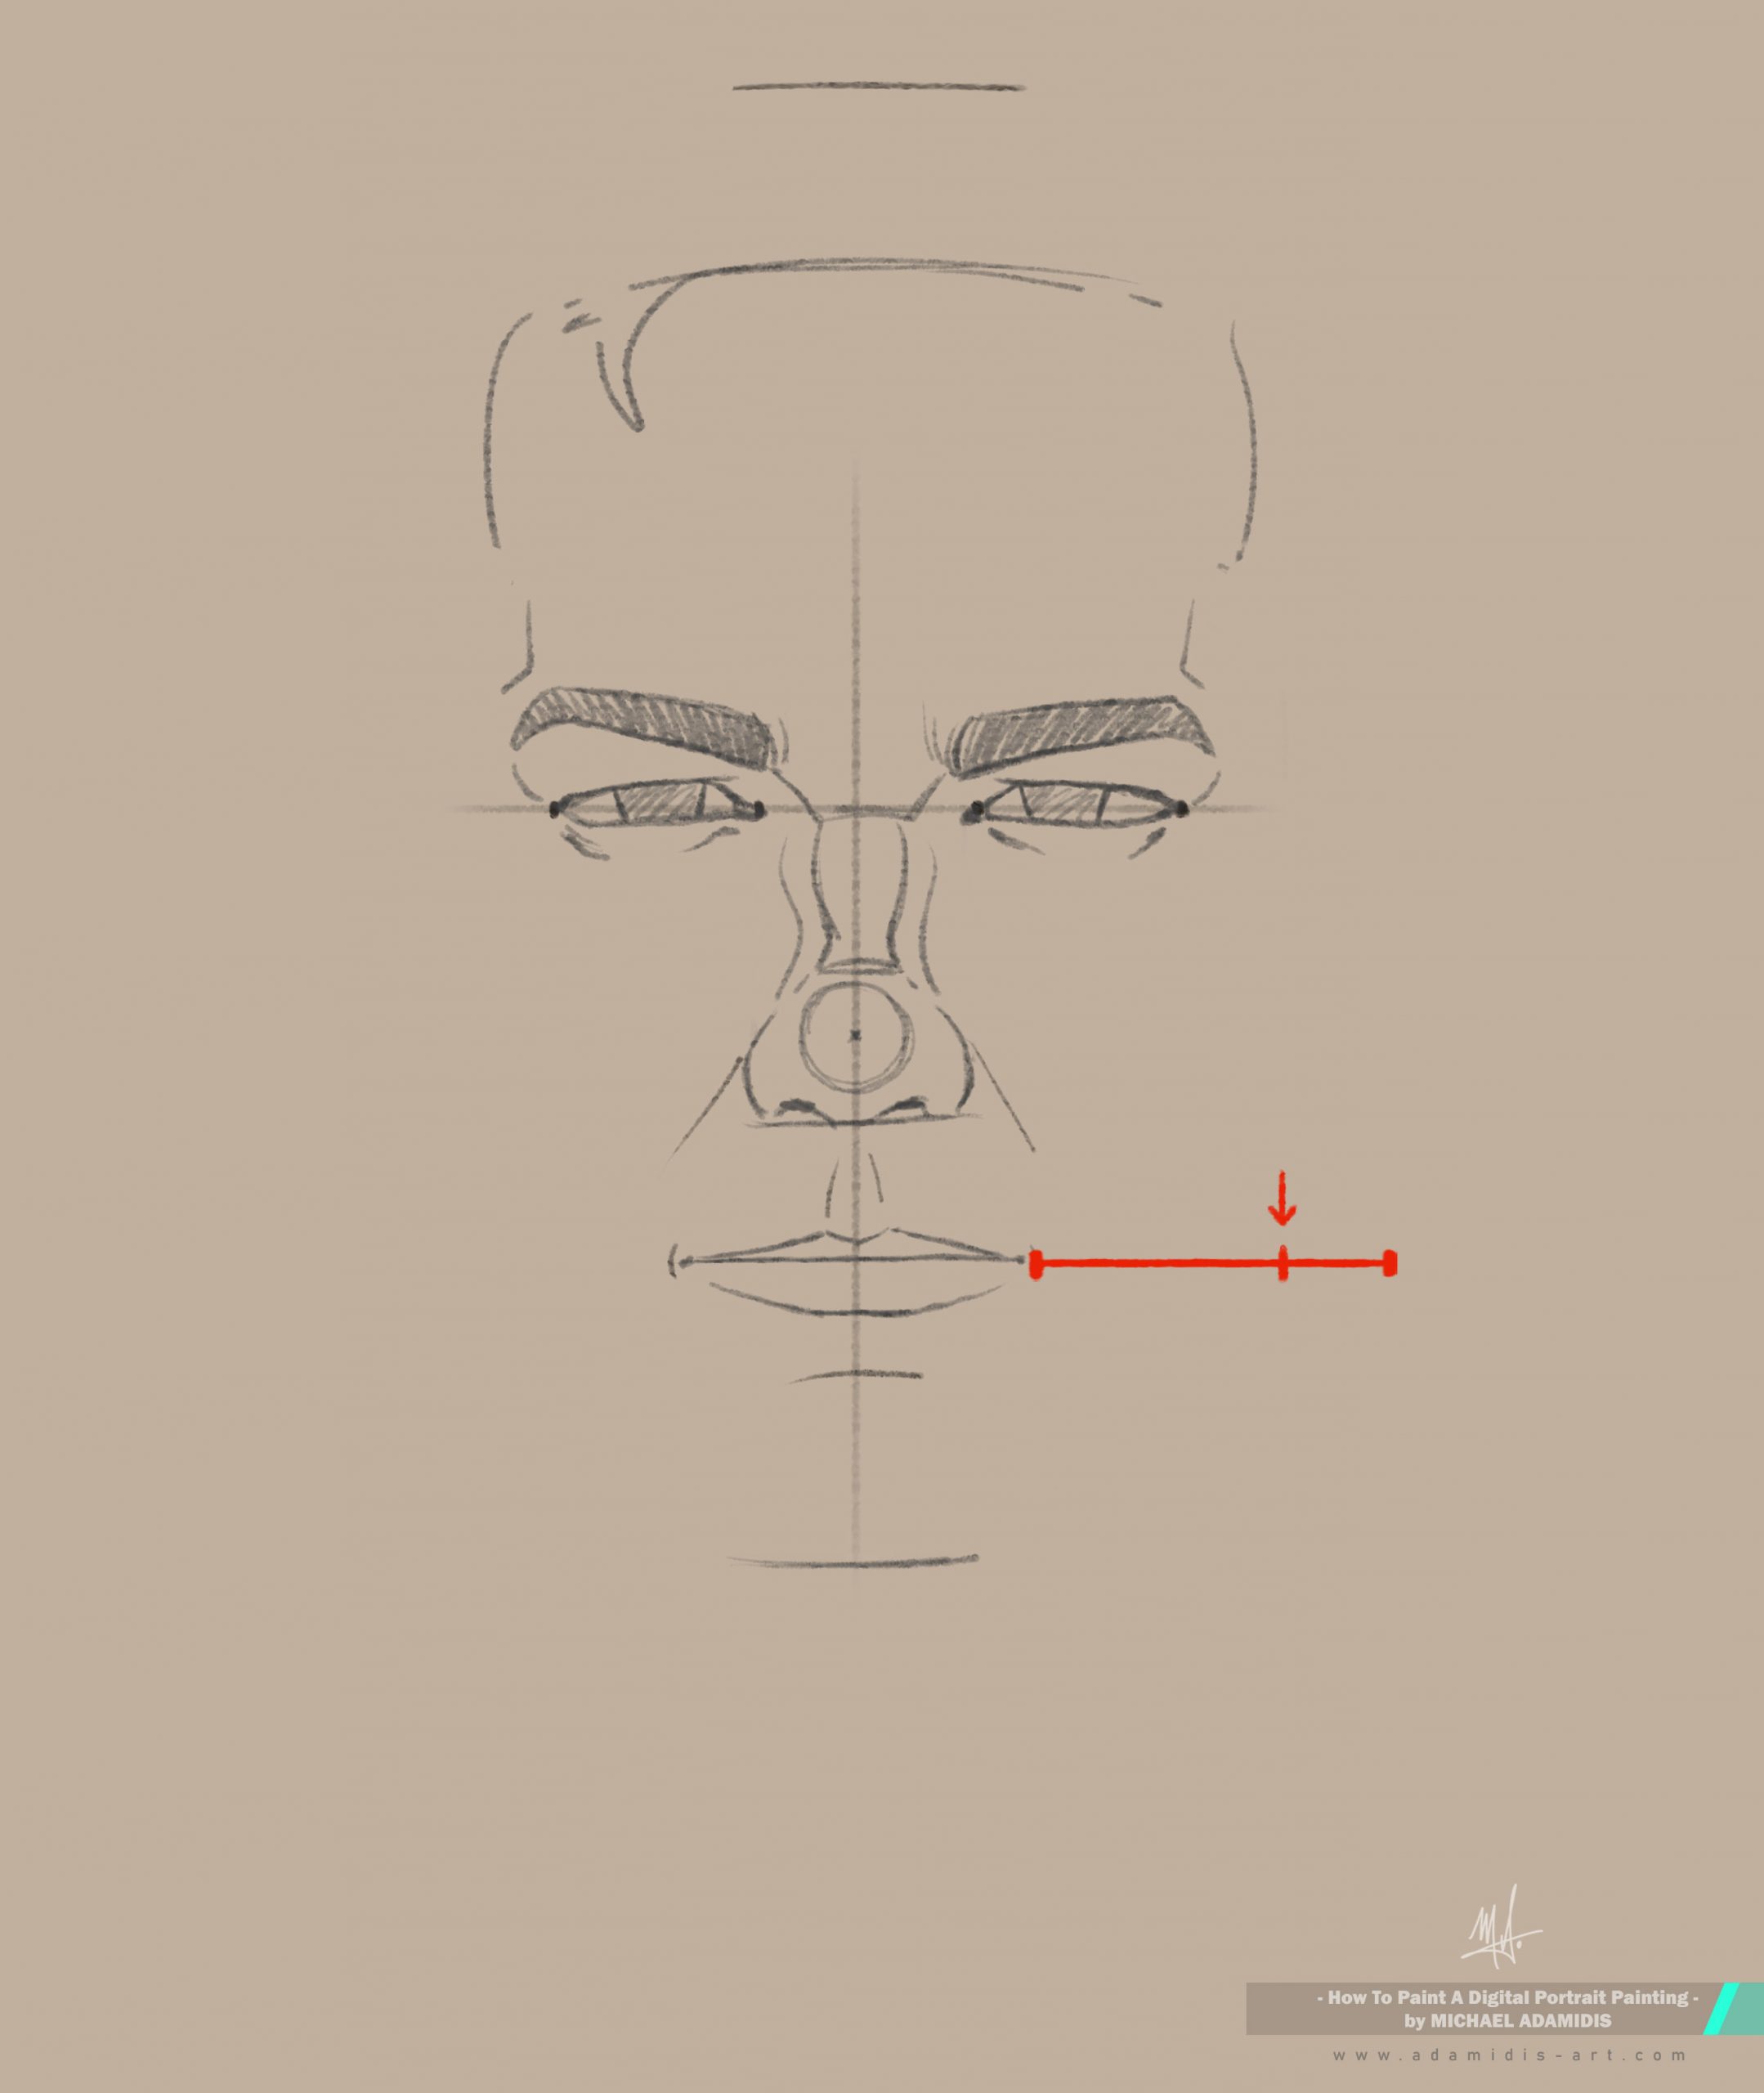
– The vertical side lines (left/right) of the face are ending at 2/3 eye length (of course this varies also) away to the sides from the eyes.
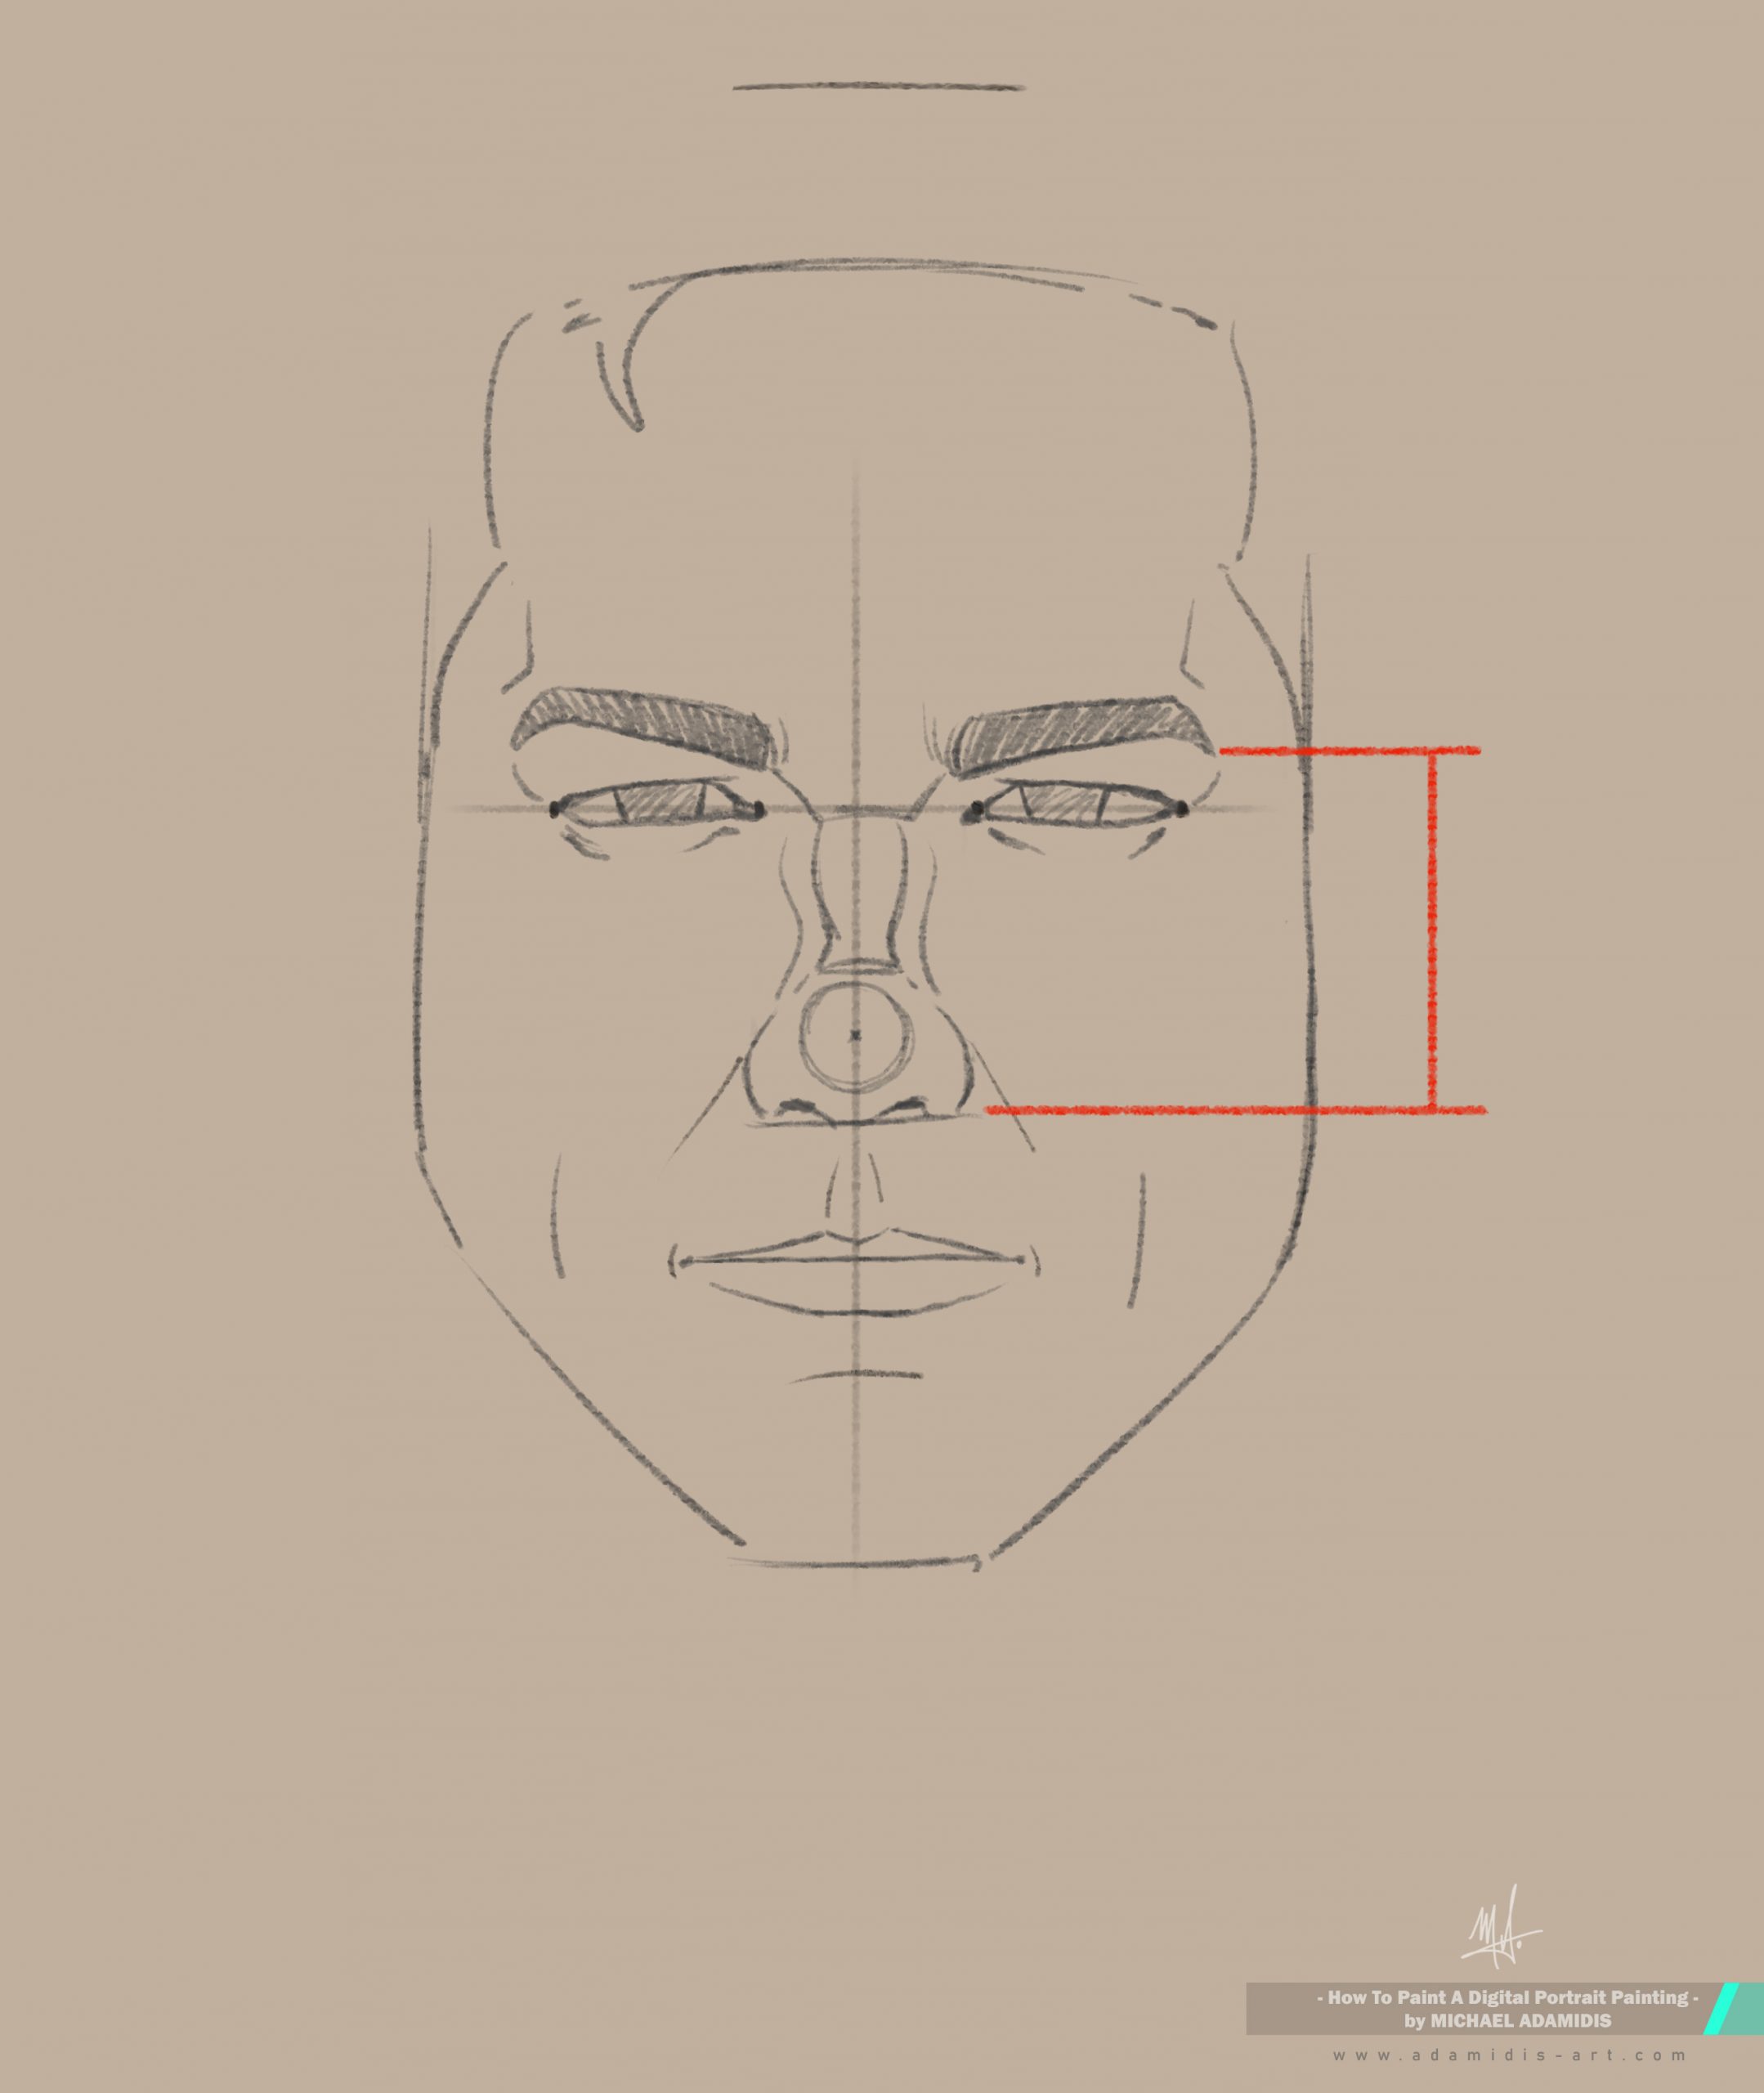
The ears –
Their position can differ very much, but it’s a help to know that they are often on an imaginary line to the sides from the eyebrown and a second line to the sides from the downside of the nose.
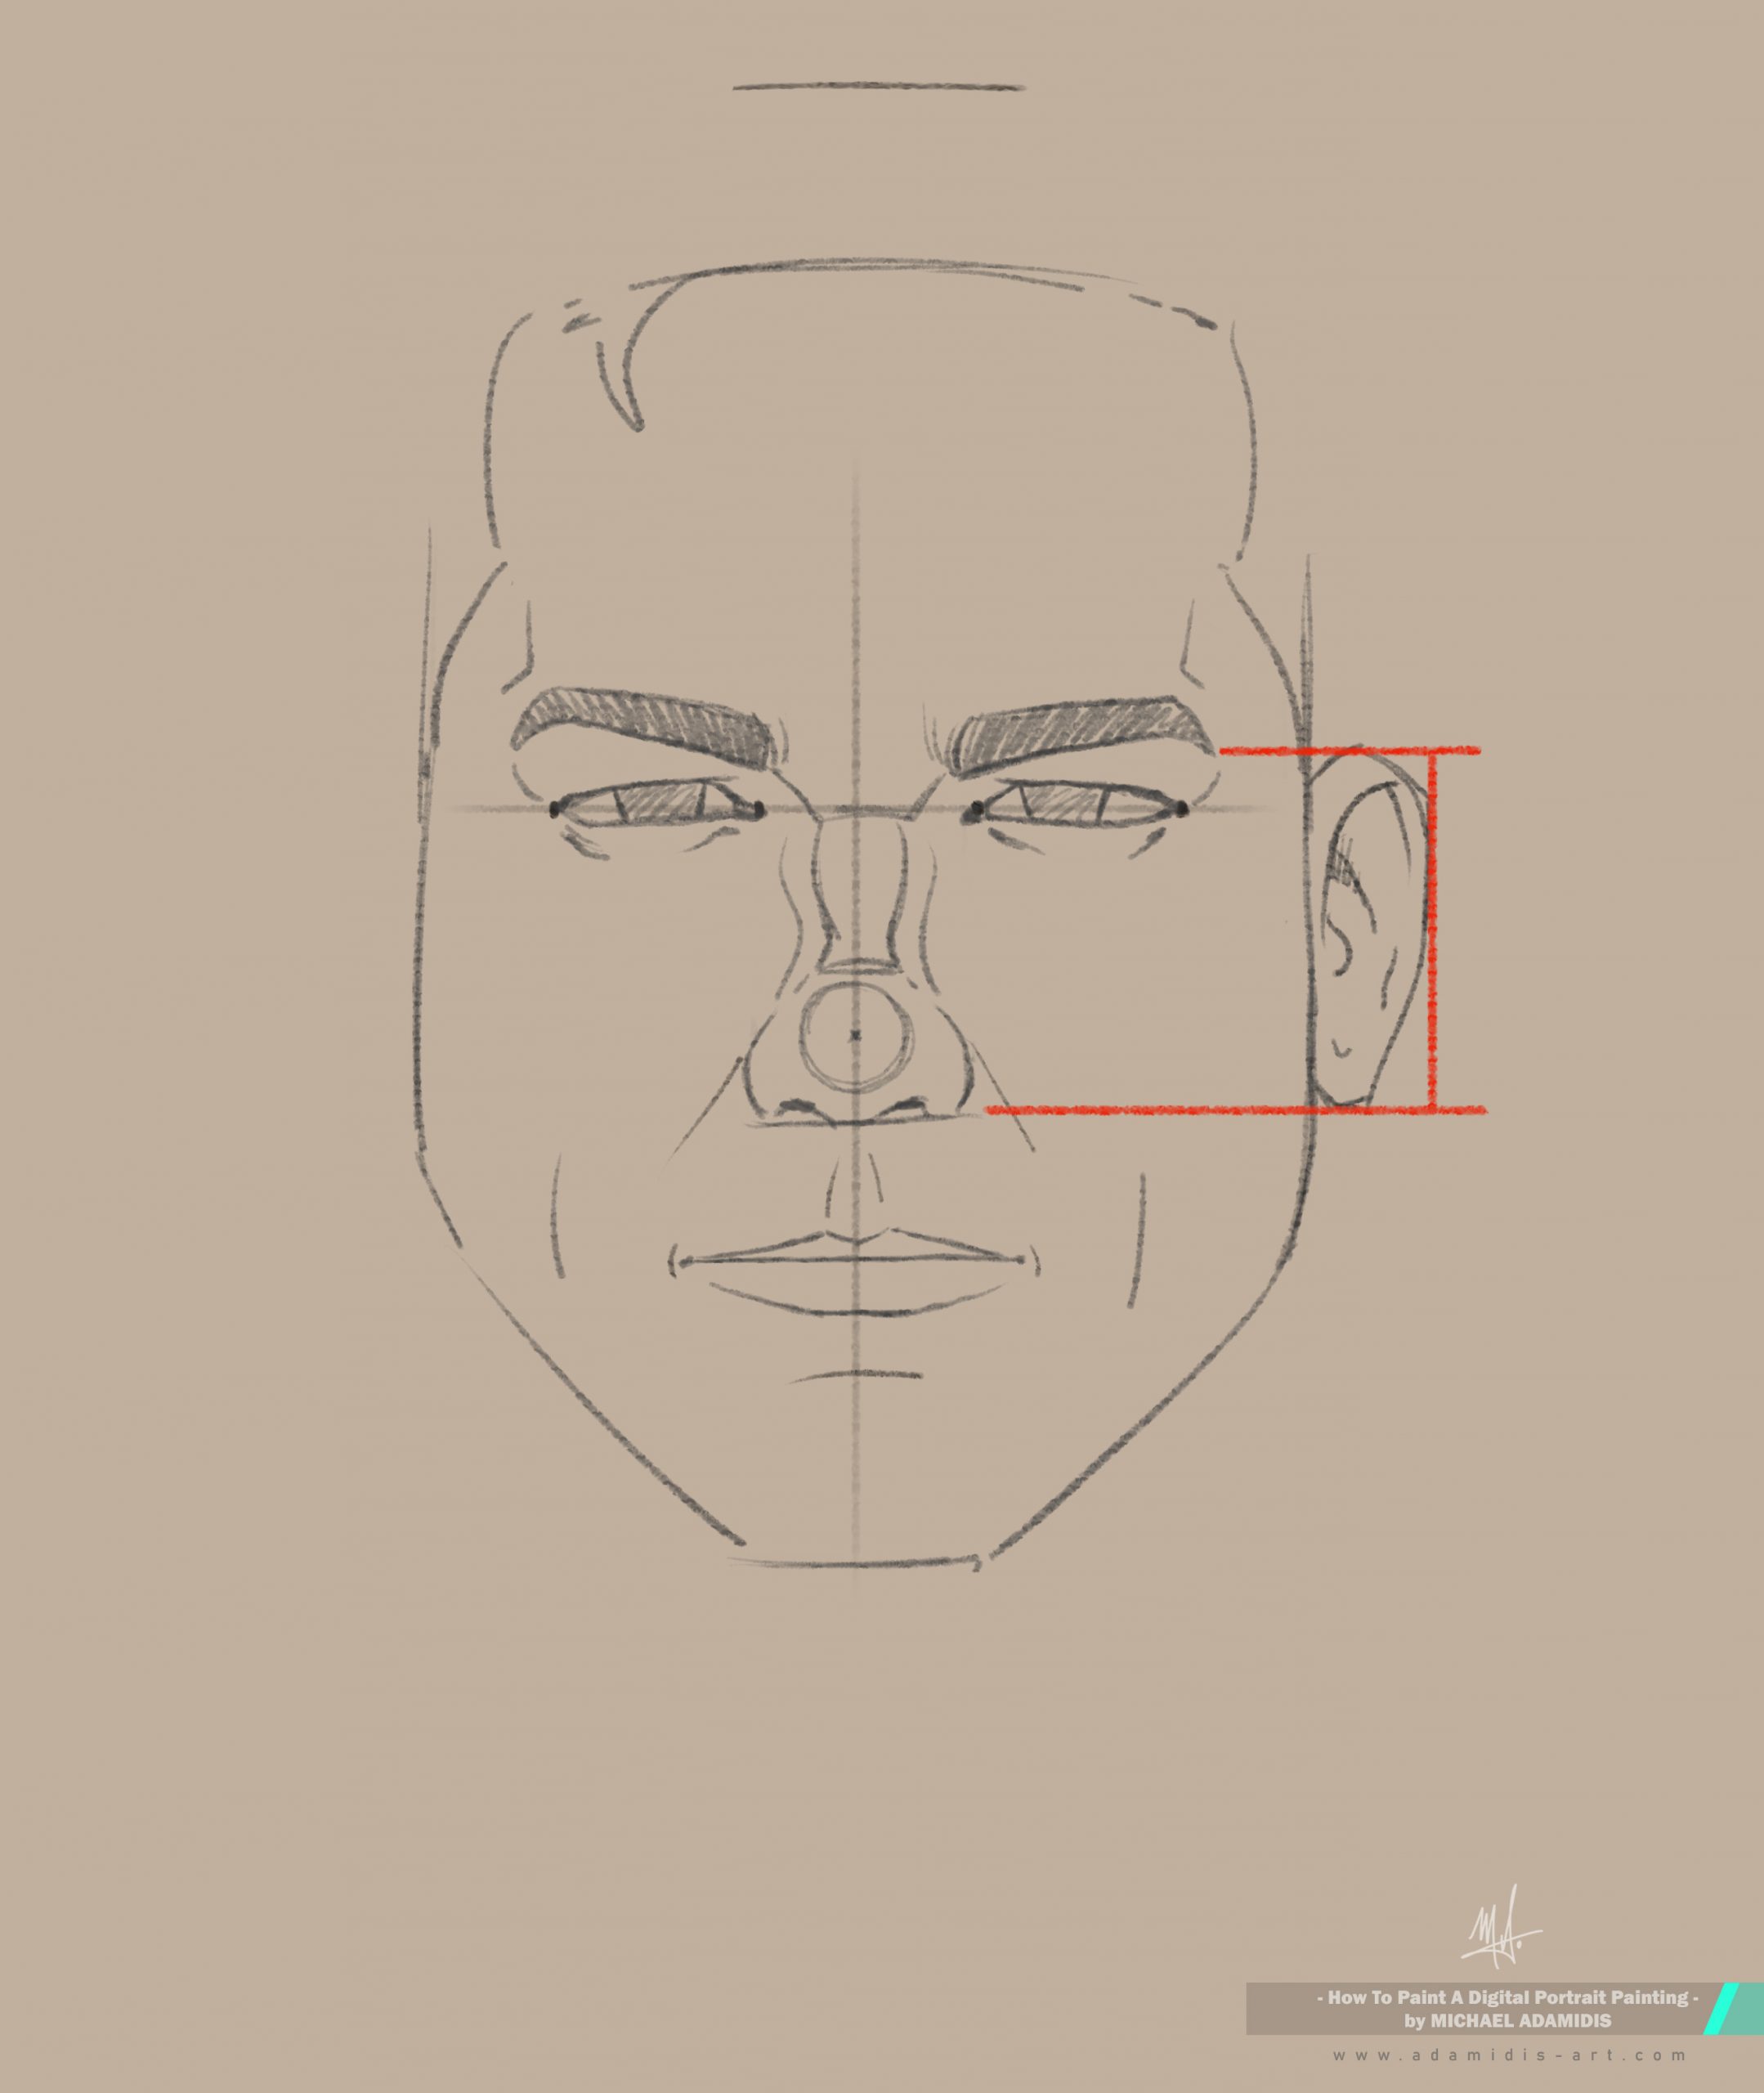
Draw both ears.
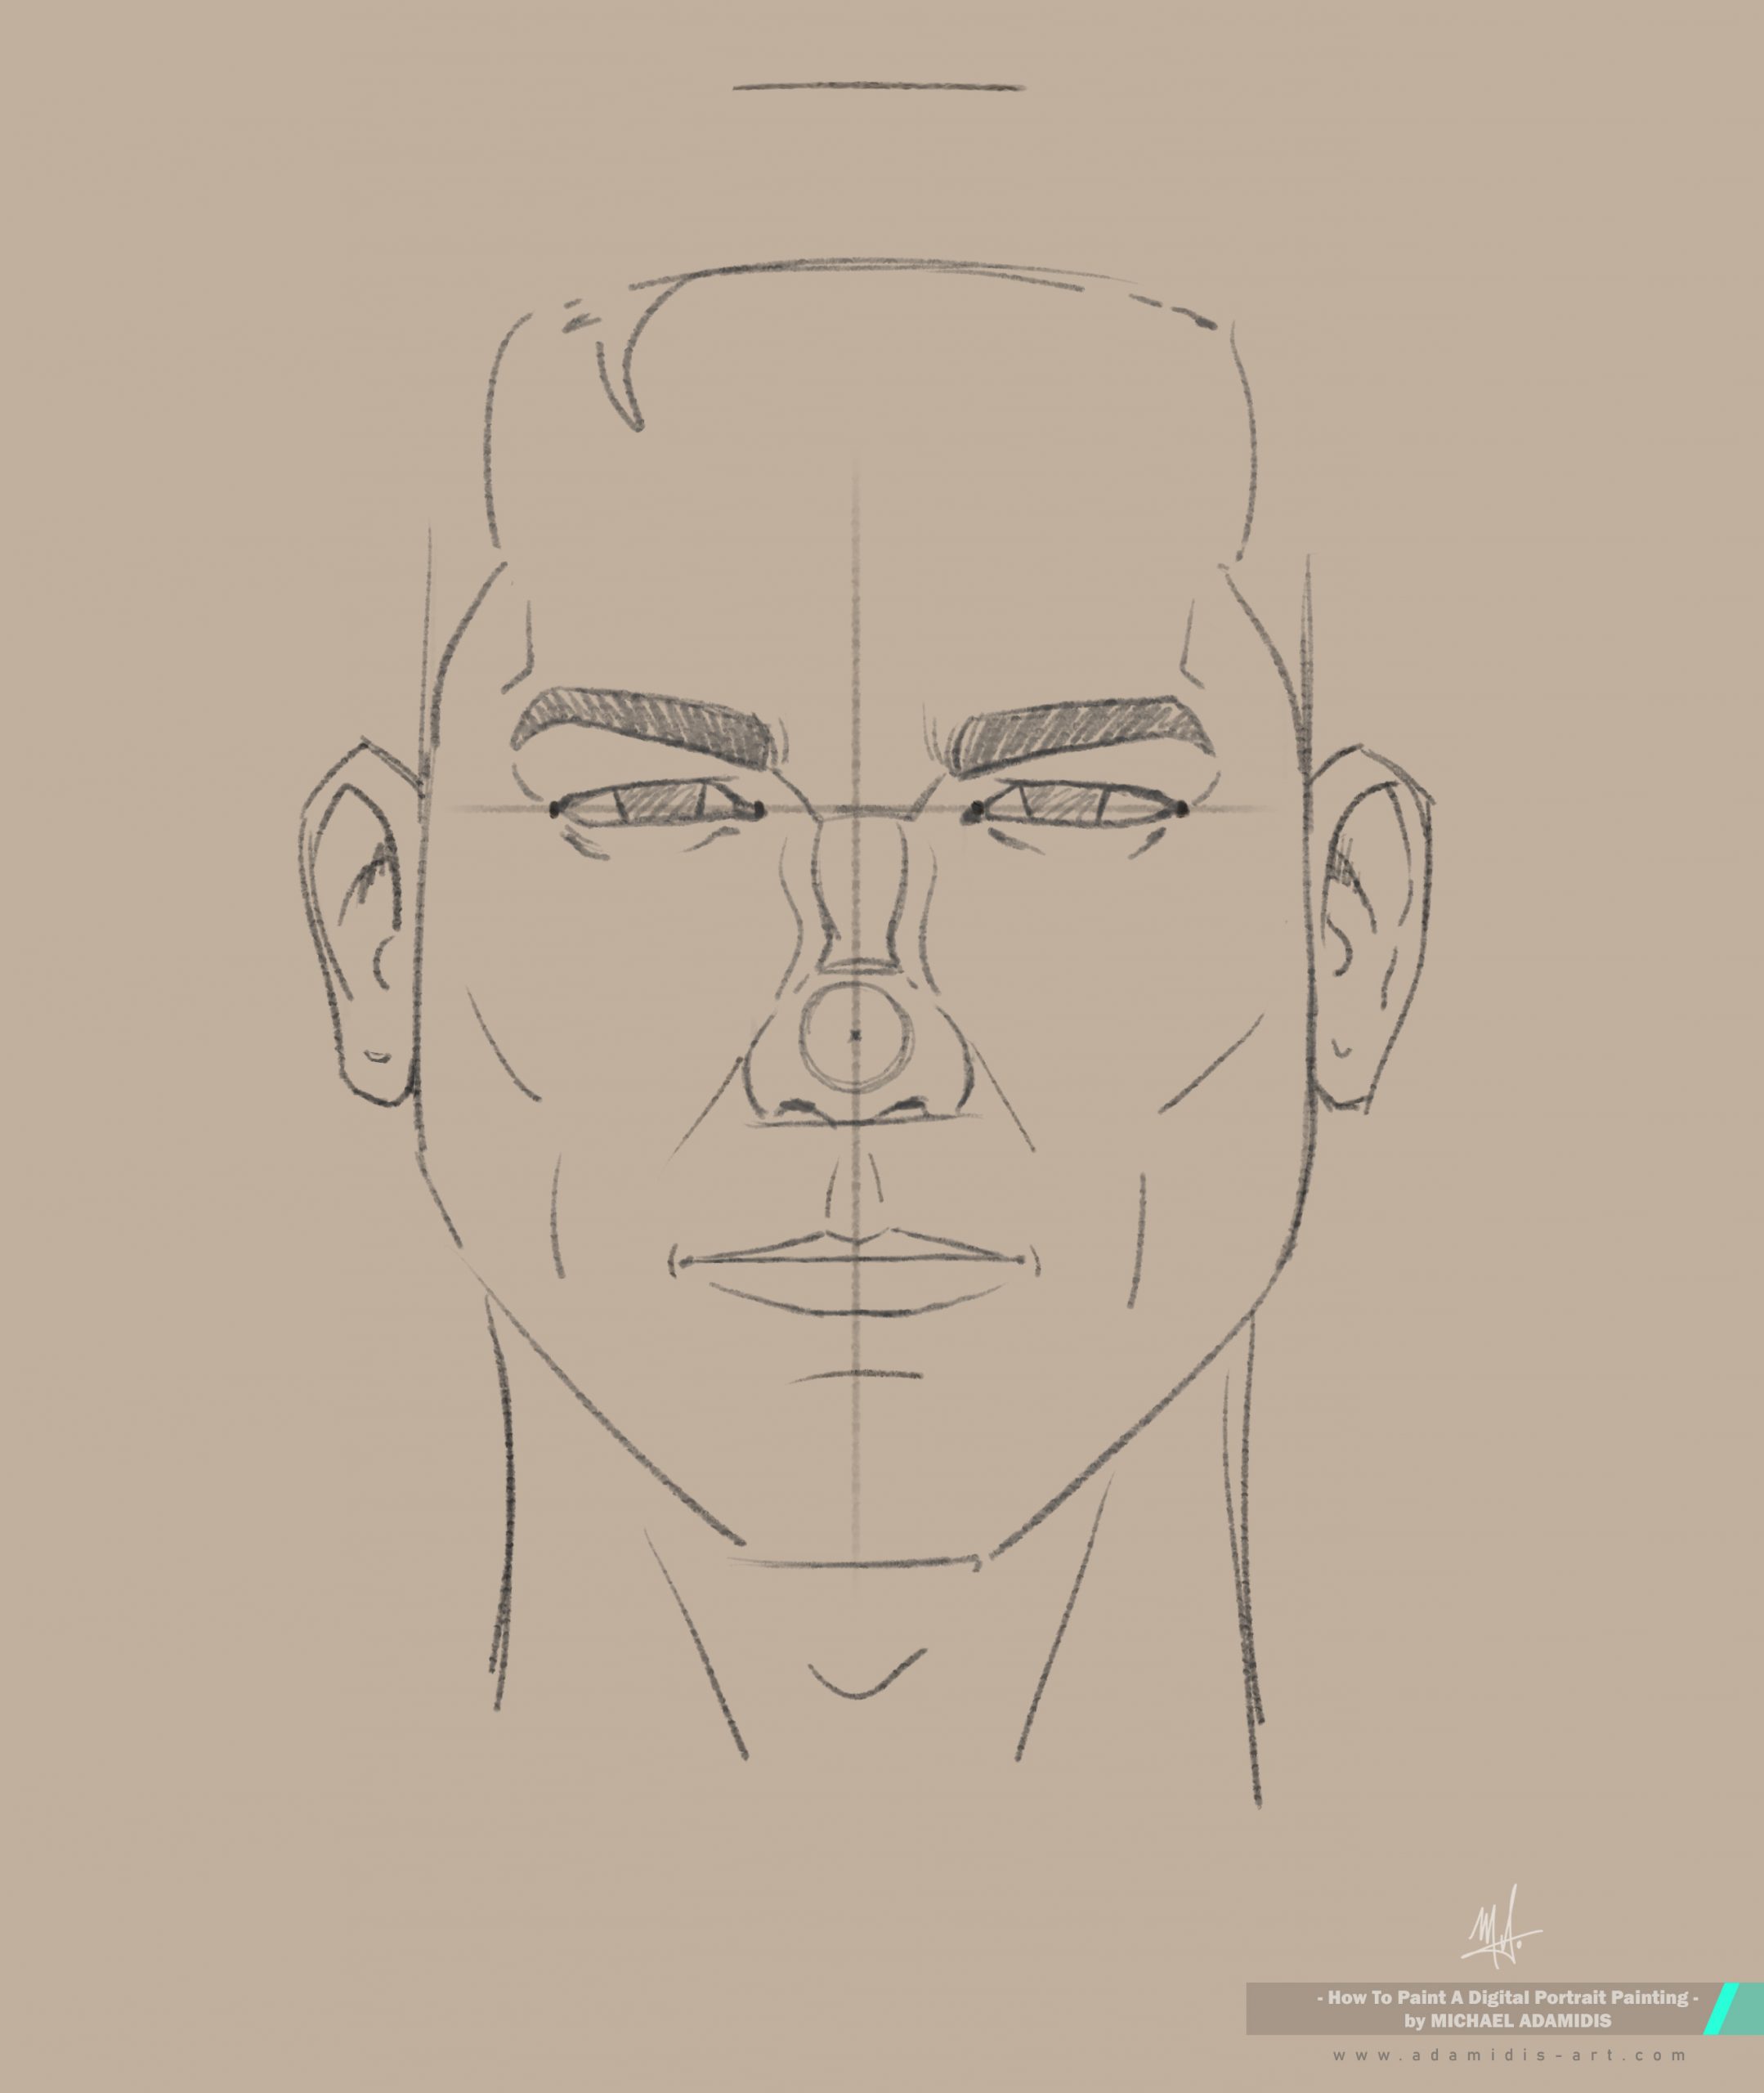
Draw the rest of the head with the shape of the hair.
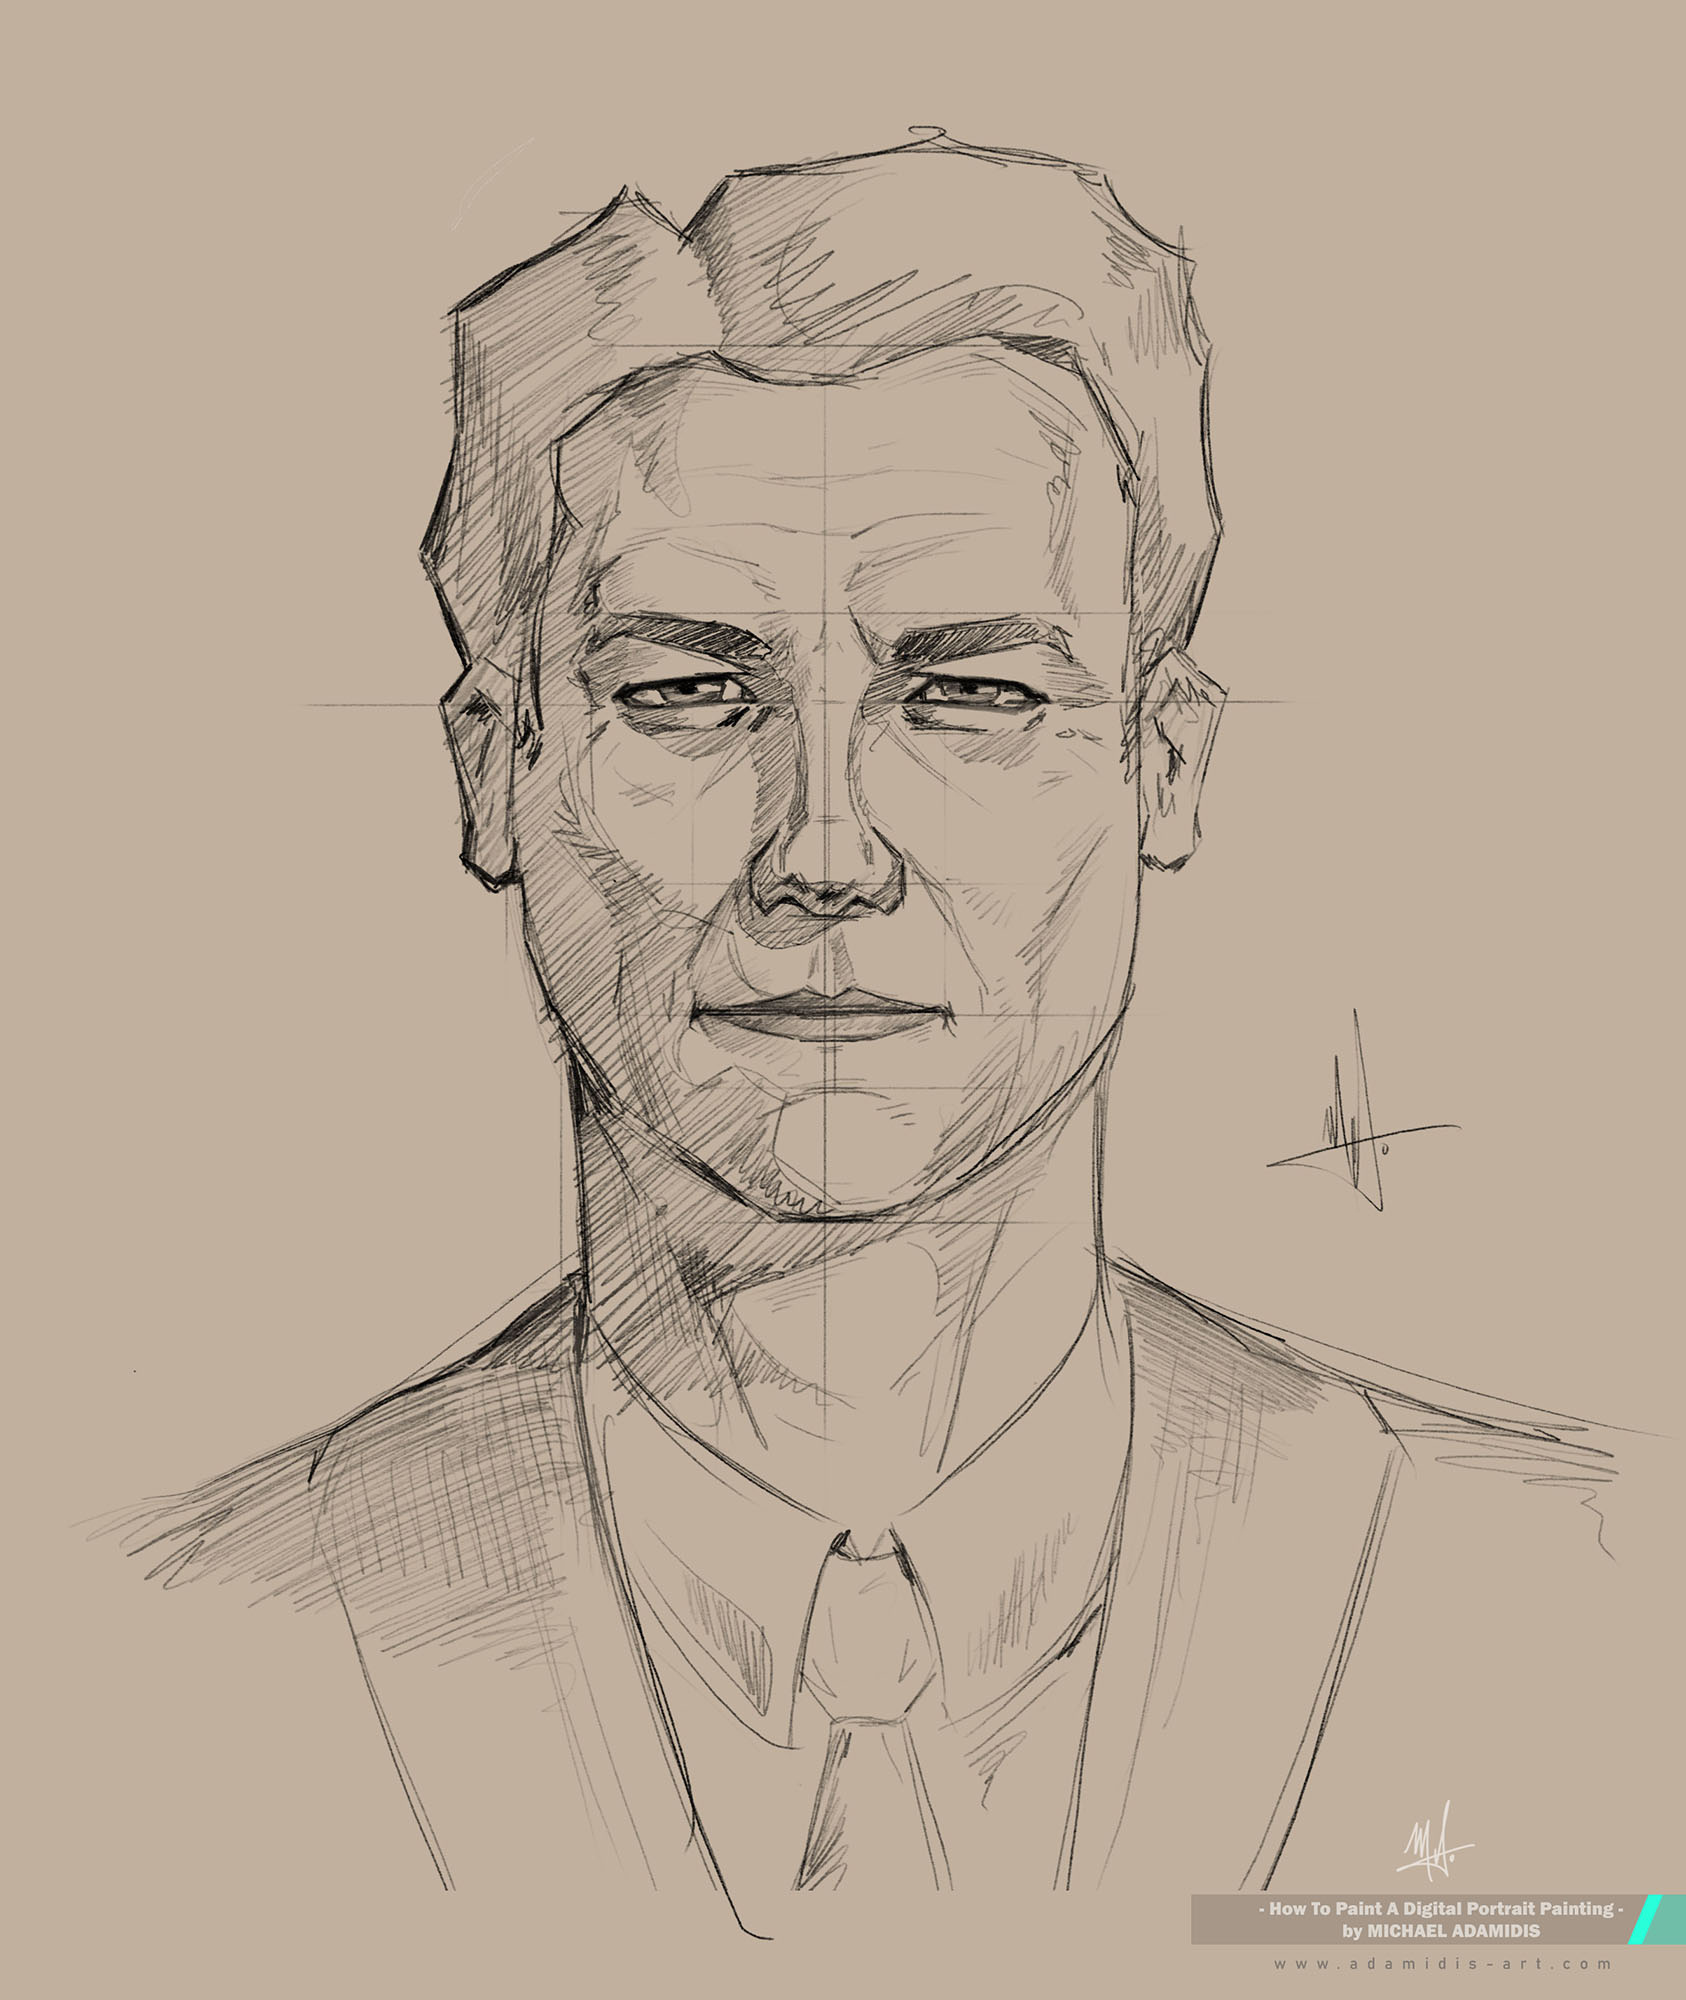
Hopefully you can now draw all the other needed lines for your digital portrait painting.
With practice you will get better and better. Be correct while drawing but never bad to yourself. Always be forgiving.
The winner is never the person who never falls, but the one who stands up, learns and proceeds.
I’ll mark this as a rule, too!
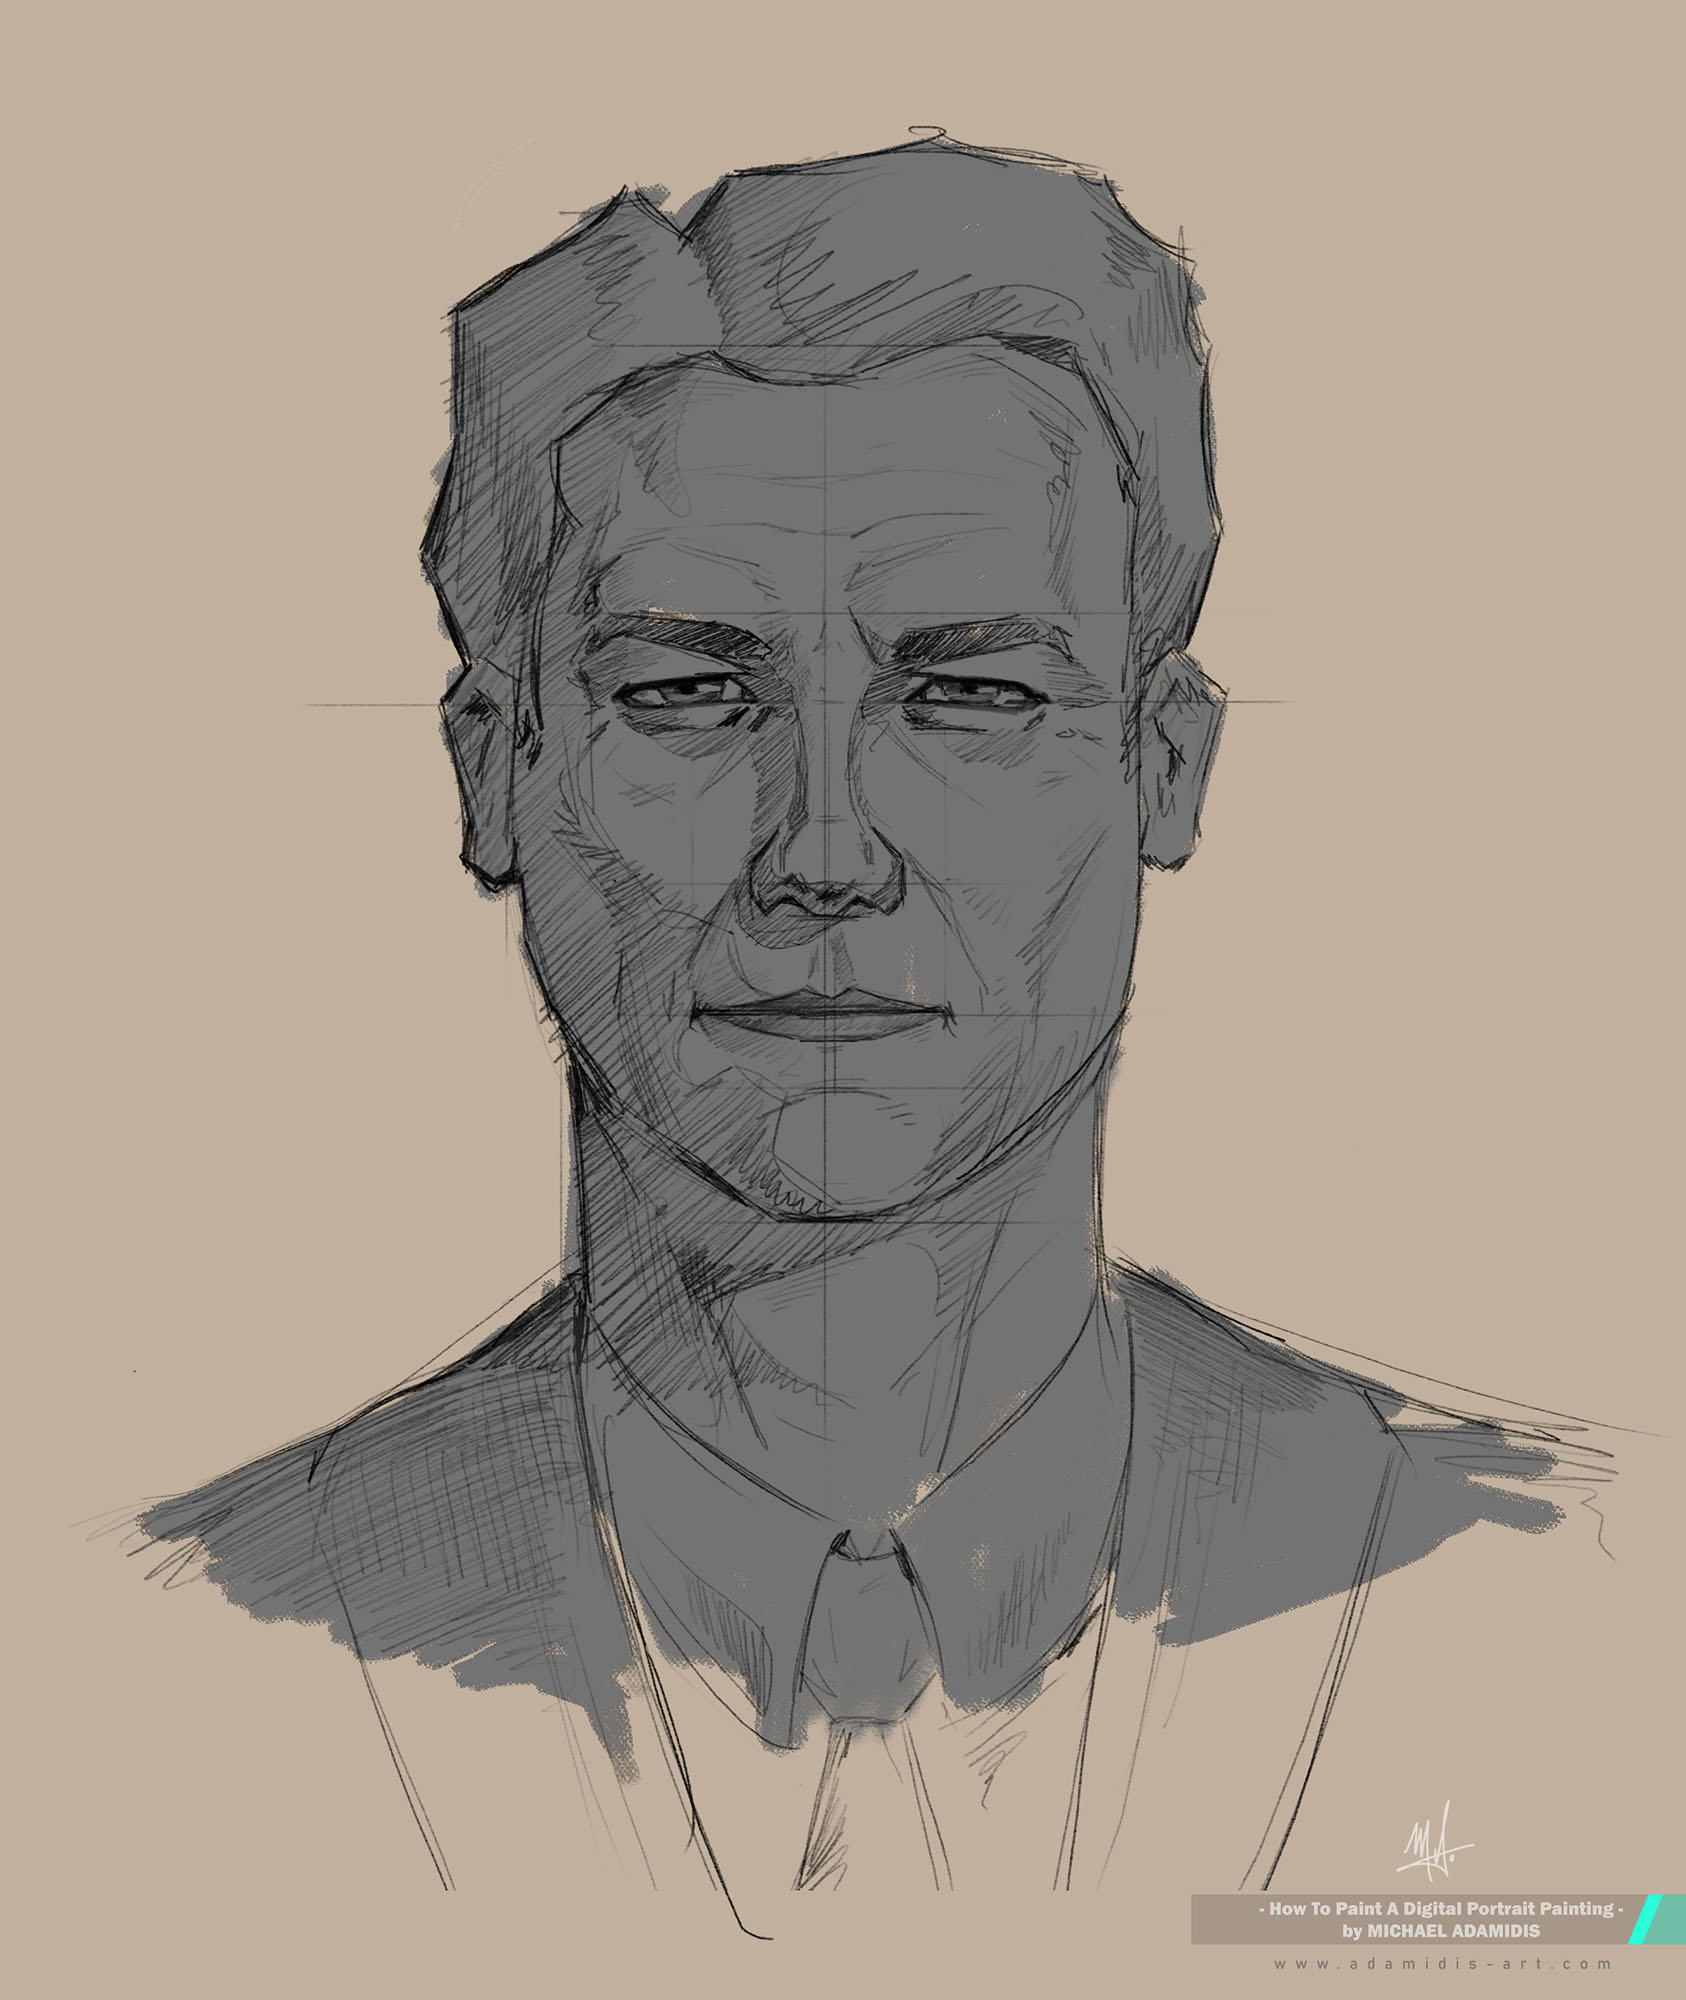
5. Find the Right Colors for Your Digital Portrait Painting
Gray is not a good choice…
but it’s funny, and quite satisfying to apply colors on it! 🙂
In digital painting it’s possible. But this here was just an experiment – not more.
I don’t recommend of course it to you.
Use the main color of the face to block it in.
For that you have two choices.
Either you go directly for the reference photo and use its colors or you take colors from other references, where you like the color scheme.
This is of course more risky, but sometimes it can’t even be avoided, for example, if you have received a reference with very washed out colors or even in black and white. Third case, which is quite often the case, is when the camera (often the mobile phone) has taken the photo with really bad colors. Often these are reddish, oversaturated faces. I feel really sorry for the whole world that the mobile device developers have this urgent aim to add this so ugly red to our faces. I don’t want to know how many young people have depression just because of that “lie” about their face.. I really hate this fact.
In those three cases you have to find reference photos and take from there the right colors. This is again so risky. Search for “face” or “portrait” in google and you will quickly know that it isn’t so clear, what is the right coloring.
Now, choose wisely and with an artistic eye.
If you want peace of mind for that important part, which can really ruin your painting quickly, take the amazing MA-Colors. If you want to have the best, most realistic and authentic colors not only for painting but also for printing, you have to check them. They were tested and developed over years and they do a job for you that is 10 times more the price they cost.
You will have forever the best colors for faces and landscapes at hand.
The Link will come when it’s available soon. Also see my Art Store (Menu) if it’s already available.
Now you are ready for the next part!
6. Start to Block in the Colors of the Background First
For that either check all the background colors of the MA-Colors and choose a palette or check once again google and see what you can find.
My suggestion is to search for “old portrait painting” on google.
One could argue that the background should be chosen well and really should match the person, but those backgrounds of old master paintings are often very neutral and desaturated and they will surely be very good for your portrait painting.
Those painters had already found the best colors for backgrounds that will accentuate the face.
I don’t think you can do anything wrong by going this direction.
But you could quickly ruin your painting with colors you have chosen by some artistic algorithms in your head which are trying to develop a great complementary color to the person’s dressing. In my eyes this can lead quickly to a catastrophe and some art teachers should be aware of it when they are advising that to their students.
Anyway, now take a great brush, which is mimicking a flat bristle brush, and with a good texture (like a canvas/linen texture) and block in those colors behind the layer of the portrait drawing, so that those can still be seen.
7. Shape the Facial Expression with Colors and Brushes
This part is important.
Have for it the best available colors and digital brushes for the digital portrait painting.
Most programs can handle the MA-Brushes but of course the very best result you will get with Photoshop for which they were developed. I always do recommend the MA-Brushes for digital portrait painting and I do recommend them also for digital landscape painting.
They are the very best for this task.
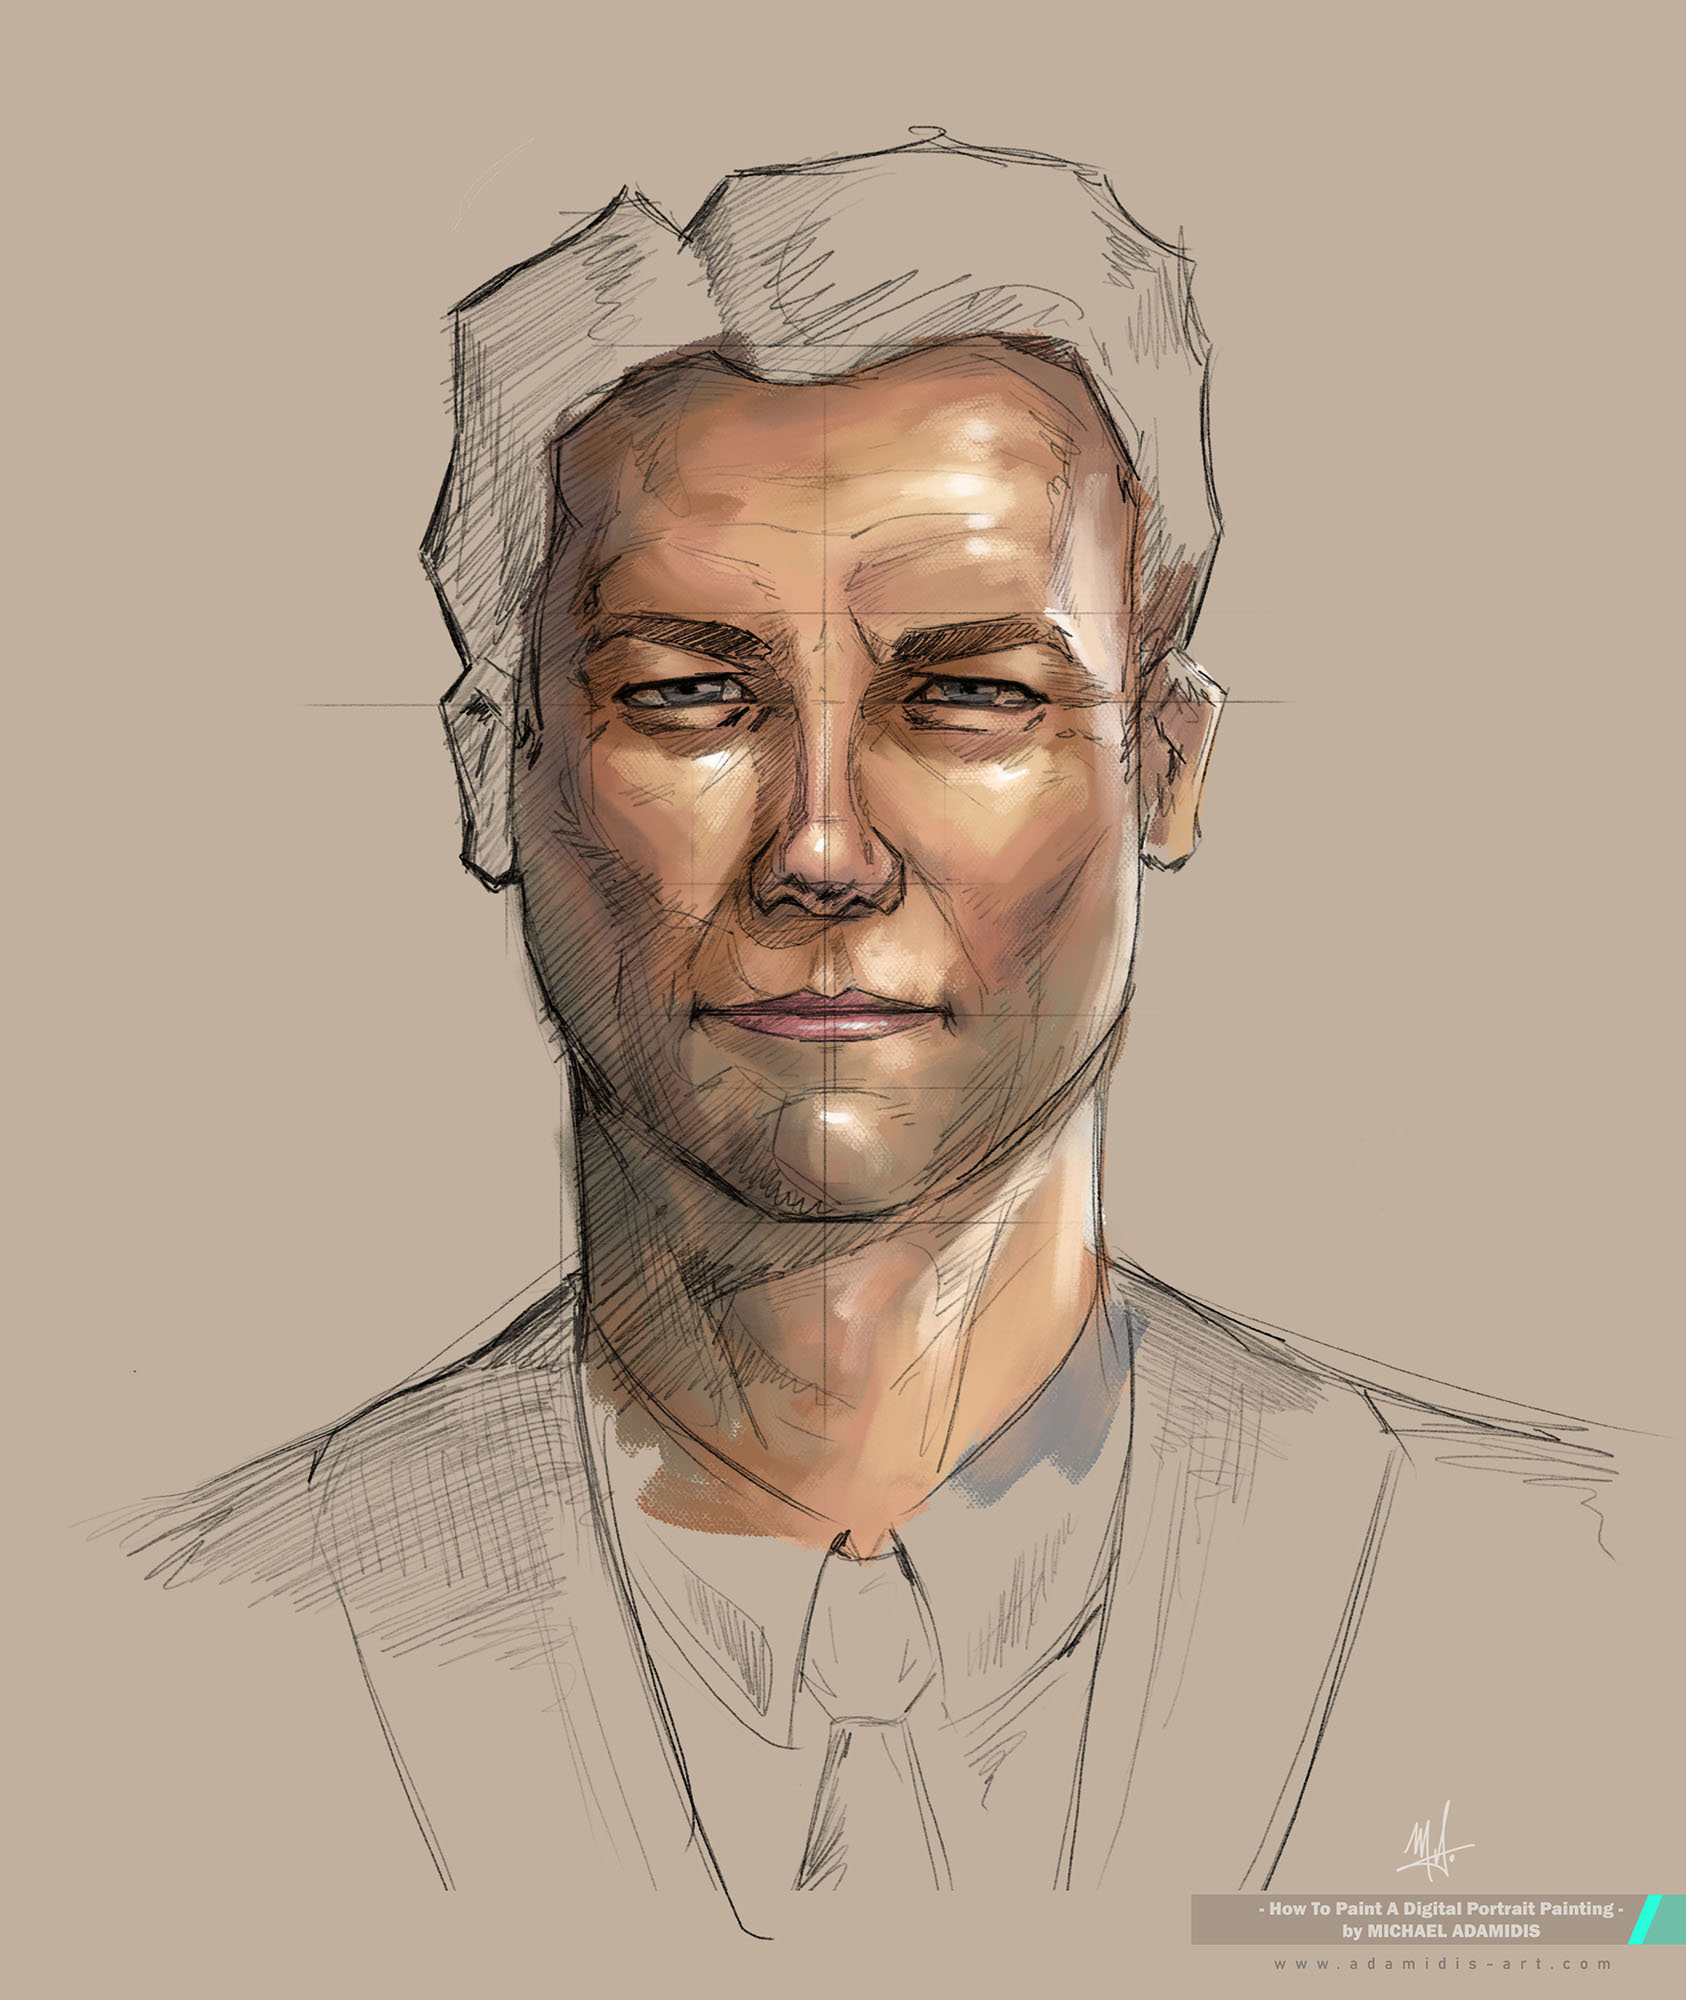
Now start to block in the main color of your face, the hair and the clothing with a mid tonal value of the main colors of those three.
Think about it like that: Later you will darken places and you will lighten places up. Here you are laying out the foundation.
Next, try to bring first shadows to the face. Often those shadows will go slightly to the low saturated reddish/orange tones. But be careful, take the right colors for every step here. Take care that you are not painting what you “think”, but what you “see”.
This is a common mistake you should avoid. Be very primitive when painting a digital portrait. There are enough other things you can do wrong, so at least take advantage of the right color picking and don’t be too lazy to not do it often enough.
Same with the brushes. If you feel like you should change it, go for it, don’t wait.
Go first smoothly with softer brushes and then shape edges or do first the rough work with a characteristic brush and then soften it?
These are things you really have to find out for yourself. It will also depend on what brush exactly you are using and how it is behaving.
I think for the start it is good to start smoothly with a softer brush or a mixer brush and then start to use brushes with more character to create all the edges of the face.
If you are using the MA-Brushes, I recommend you to use one of the Frost brushes or a flat one like the Oil Brush No. 1 v6 – both of the mixer brushes – to start blocking in the colors of the face and shaping the rest.
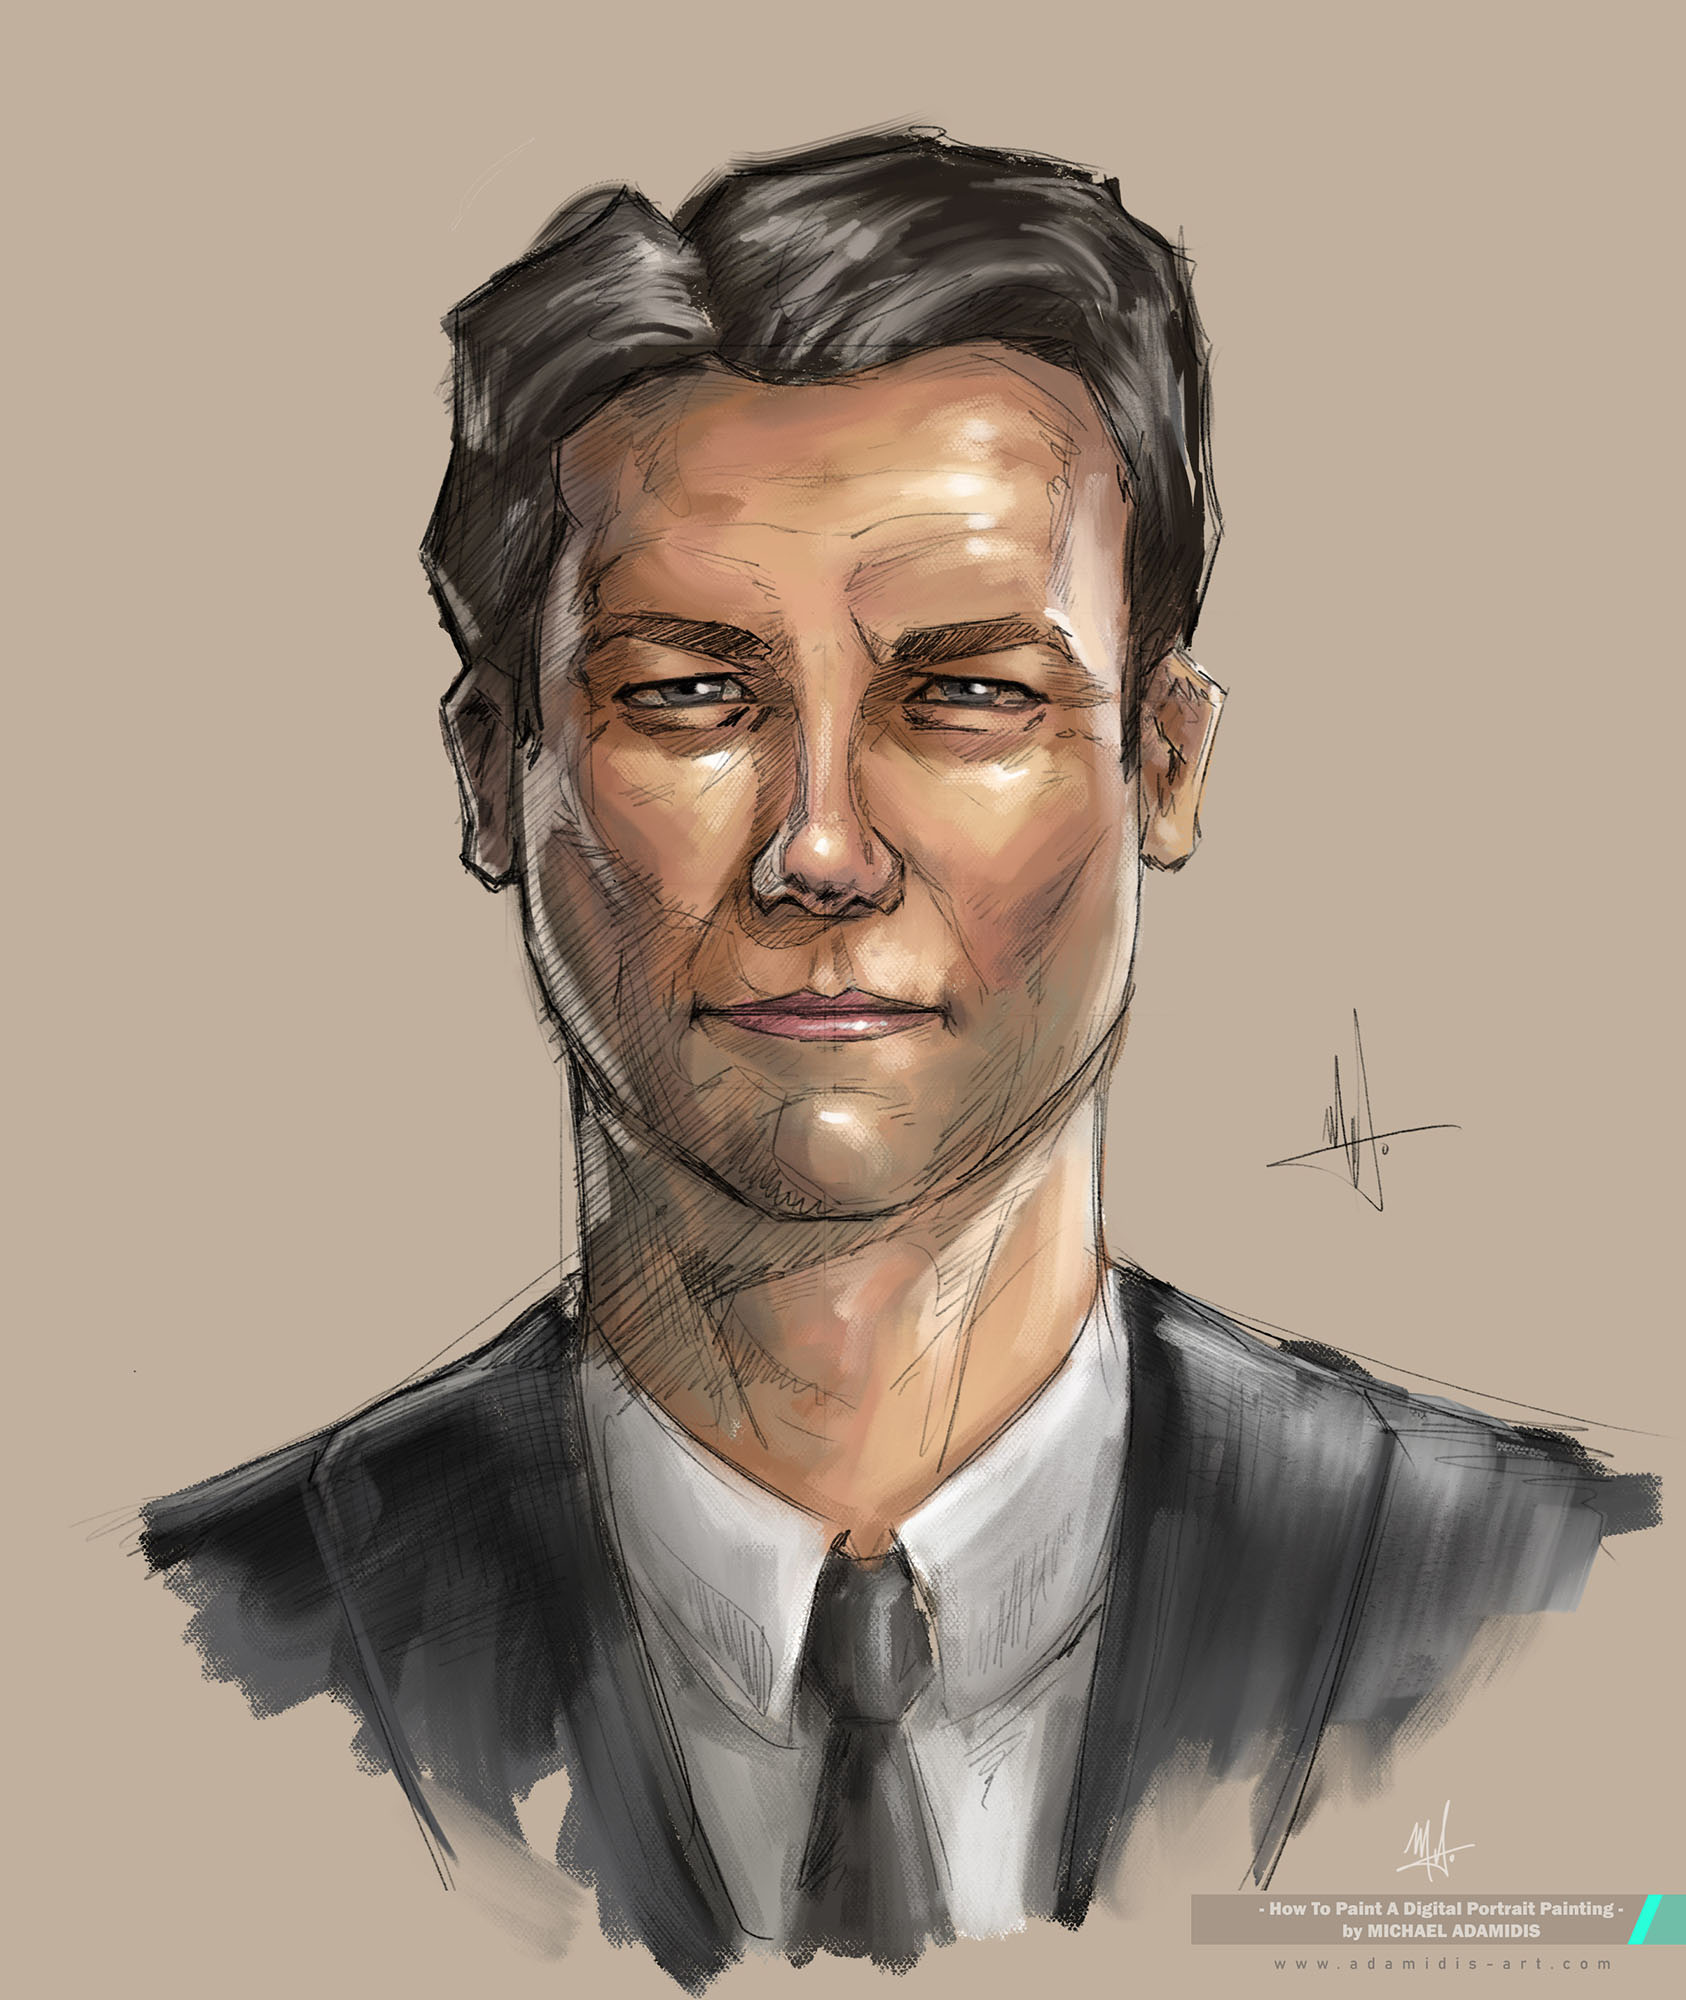
As said, create shadows and then also create highlights.
My suggestion is to go with one color (like a real painter would do) to all the places of the face. This is slowly building up the face.
So I, for example, do jump from here to there to shape all the forms through putting the colors with the right values to the right places.
I do enjoy this part, the same way as the drawing part. The background work for example costs me often some extra motivation.
Do you know those unfinished looking portrait paintings, where the background is painted just to the half..? Maybe those artists had the same issues. ?
The outcome of this part here will give a lot of character to your painting. So choose wisely how you want to express colors and forms.
If you have blocked in all the different colors and your shadows and bright areas are already defining the facial expression, you are ready to go to the next stage of painting the details.
Btw, I do recommend that you wait with the details till it’s their turn. Don’t start with details in the coloring time. It will irritate you and your painting will look so uneven and surely also somehow scary.
So better have everything ready and quite far till the details part. This will give you a better overall control of them and your digital portrait painting will have a more balanced look.
8. Paint the Details of the Face
Paint much of them?
Paint less of them?
This depends now on you.
With a Sargent like style you really have not to do too much of those details.
But for a high definition painting it takes some more time and extra passion.
Again: take care that you are not going to make an exact copy of the reference photo.
Be a master in deciding how to paint details and where to put them. This takes a lot of practice and experience, but for the start of course: just go for it.
The digital brush for portrait painting you are using now will once again make a huge difference.
Plan details especially here:
- The eyes
- The nose
- The mouth + teeth
- The facial hair
- Some of the hair
By the way, if you like very loose painting, still consider having details on those places – especially the eyes.
Have also brushes that mimic a real brush stroke for the highlights (perfect for that are the brushes filbert brushes category of the MA-Brushes for example).
Imagine being a traditional portrait artist putting some very thick, artistic and characteristic last brush strokes to the painting.
What a pleasure!
9. Work on the Texture of the Portrait Painting
Enjoy now giving some texture to your almost finished painting.
Have brushes with textures for the details on the skin if you like.
Put also texture to the clothing and the background and maybe the hair.
Use for this mainly a brighter tonal value.
Also be careful to not overdo it. Just here and there to give a small impression of a texture where the reflection of the light will hit. You are an artist with a good feeling for the right amount for it, so let your painting shine, but not glow.
10. Finish Your Digital Portrait Painting in Different Ways
First way: throw it out of the window.
2nd way: think of letting it be like it is. Its finished! Don’t ruin it.
3rd way: use artistic ideas, like big smudges at the edges of the head, or soften/mix the edges of the head with the background.
You could also use artistic lines over the whole painting to bring a special character into it.
Maybe you want to use smudge the clothes or you could add artistic textures of other images. Maybe some letters, words, sentences?
You could use the knives out of the MA-Brushes as I often do to create a real painterly looking portrait painting. Very wet and full of paint.
I mean, really there are no limits for this part here.
Just please: don’t ruin your painting.
And if you are doing a commission portrait this part is not that important.
FINISHED! – Now, take a warm, nice bath..
You have mastered the part of the digital portrait. Go ahead now and draw and paint as much as possible. Enjoy!
– Michael
-> If you want also to learn about the best brushes for digital painting (my view after around 15 years of experience as an concept artist in the entertainment industry), then go read also my new article about which are the best digital brushes for painting. (new tab)
You may also like:
- Which Are The Best Brushes For Digital Painting?
 Now which are the best brushes for digital painting? We are talking about digital art brushes, that will bring you the maximum benefit… Read more: Which Are The Best Brushes For Digital Painting?
 - 10 Easy Steps – How to Paint a Digital Portrait Painting
 Welcome, dear digital artist!If you want to learn how to paint a digital portrait painting, this is a great place for you to… Read more: 10 Easy Steps – How to Paint a Digital Portrait Painting
 - 10 Easy Steps – How to Paint a Digital Landscape (Digital Painting)
 You want to paint a beautiful landscape painting, but you don’t know where to start? I will lead you through the process of… Read more: 10 Easy Steps – How to Paint a Digital Landscape (Digital Painting)